


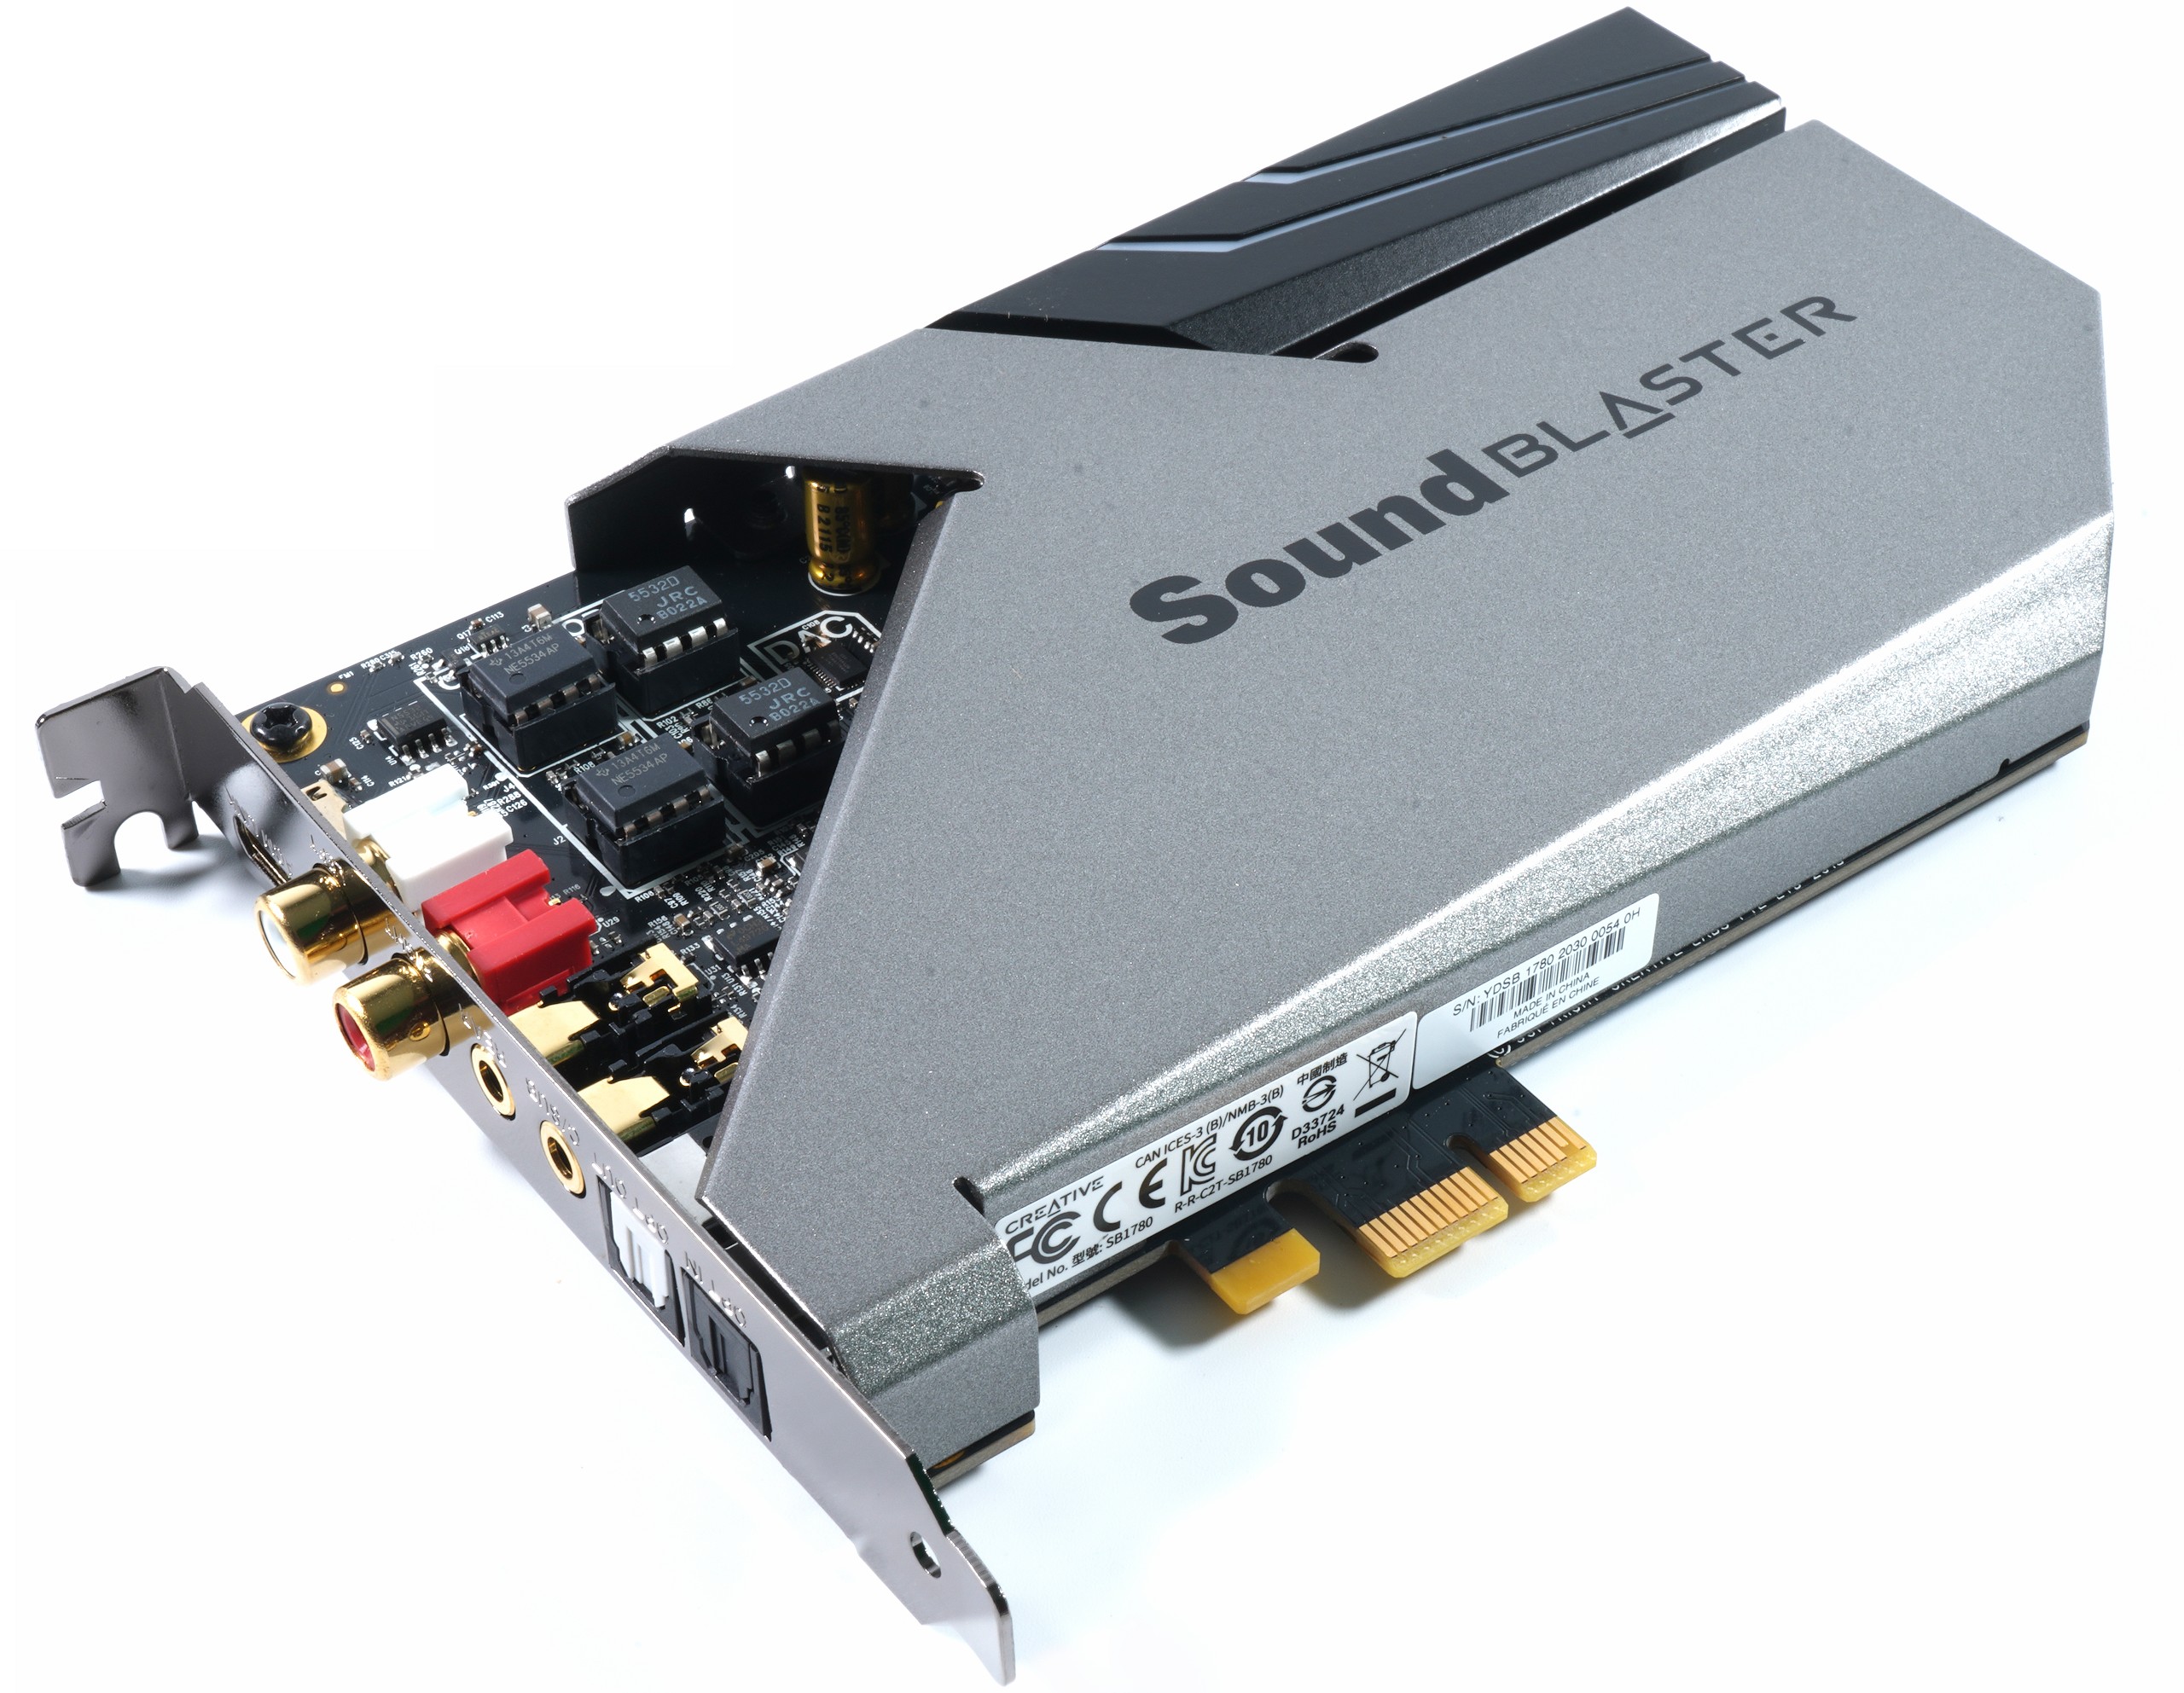
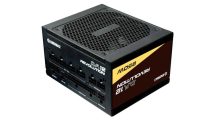
The Creative Sound Blaster AE-9 as a girl for everything
For about 300 euros, you can get the Sound Blaster AE-9 with XLR connector and 48V phantom power in the panel, which was important to me because I also have suitable measuring microphones for sound level measurements and can thus use them without any other accessories. I did not write girl for everything for nothing. Yes, it’s a bit harder to price, but in the end, at least the requirement and the features offered fit well together. We’ll see in a moment that the Sound Blaster AE-9 also produces more pressure than will be necessary from 32 to 600 ohms. That fits already.

If we take a look at the I/O panel, we find the following connections: one TOSLINK input and one TOSLINK output (S/PDIF) each, a 3.5 mm jack as output for the rear speakers, a 3.5 mm jack as output for the center speaker/subwoofer, as well as 2x RCA (output, L/R front speakers) and the ACM connection (connection to the Audio Control Module). Compared to many other sound cards, the Sound Blaster AE-9 analog is a pure 5.1 sound card and was deliberately not designed as a 7.1 sound card. However, users of headsets can fall back on the virtual 7.1 sound from the DSP.
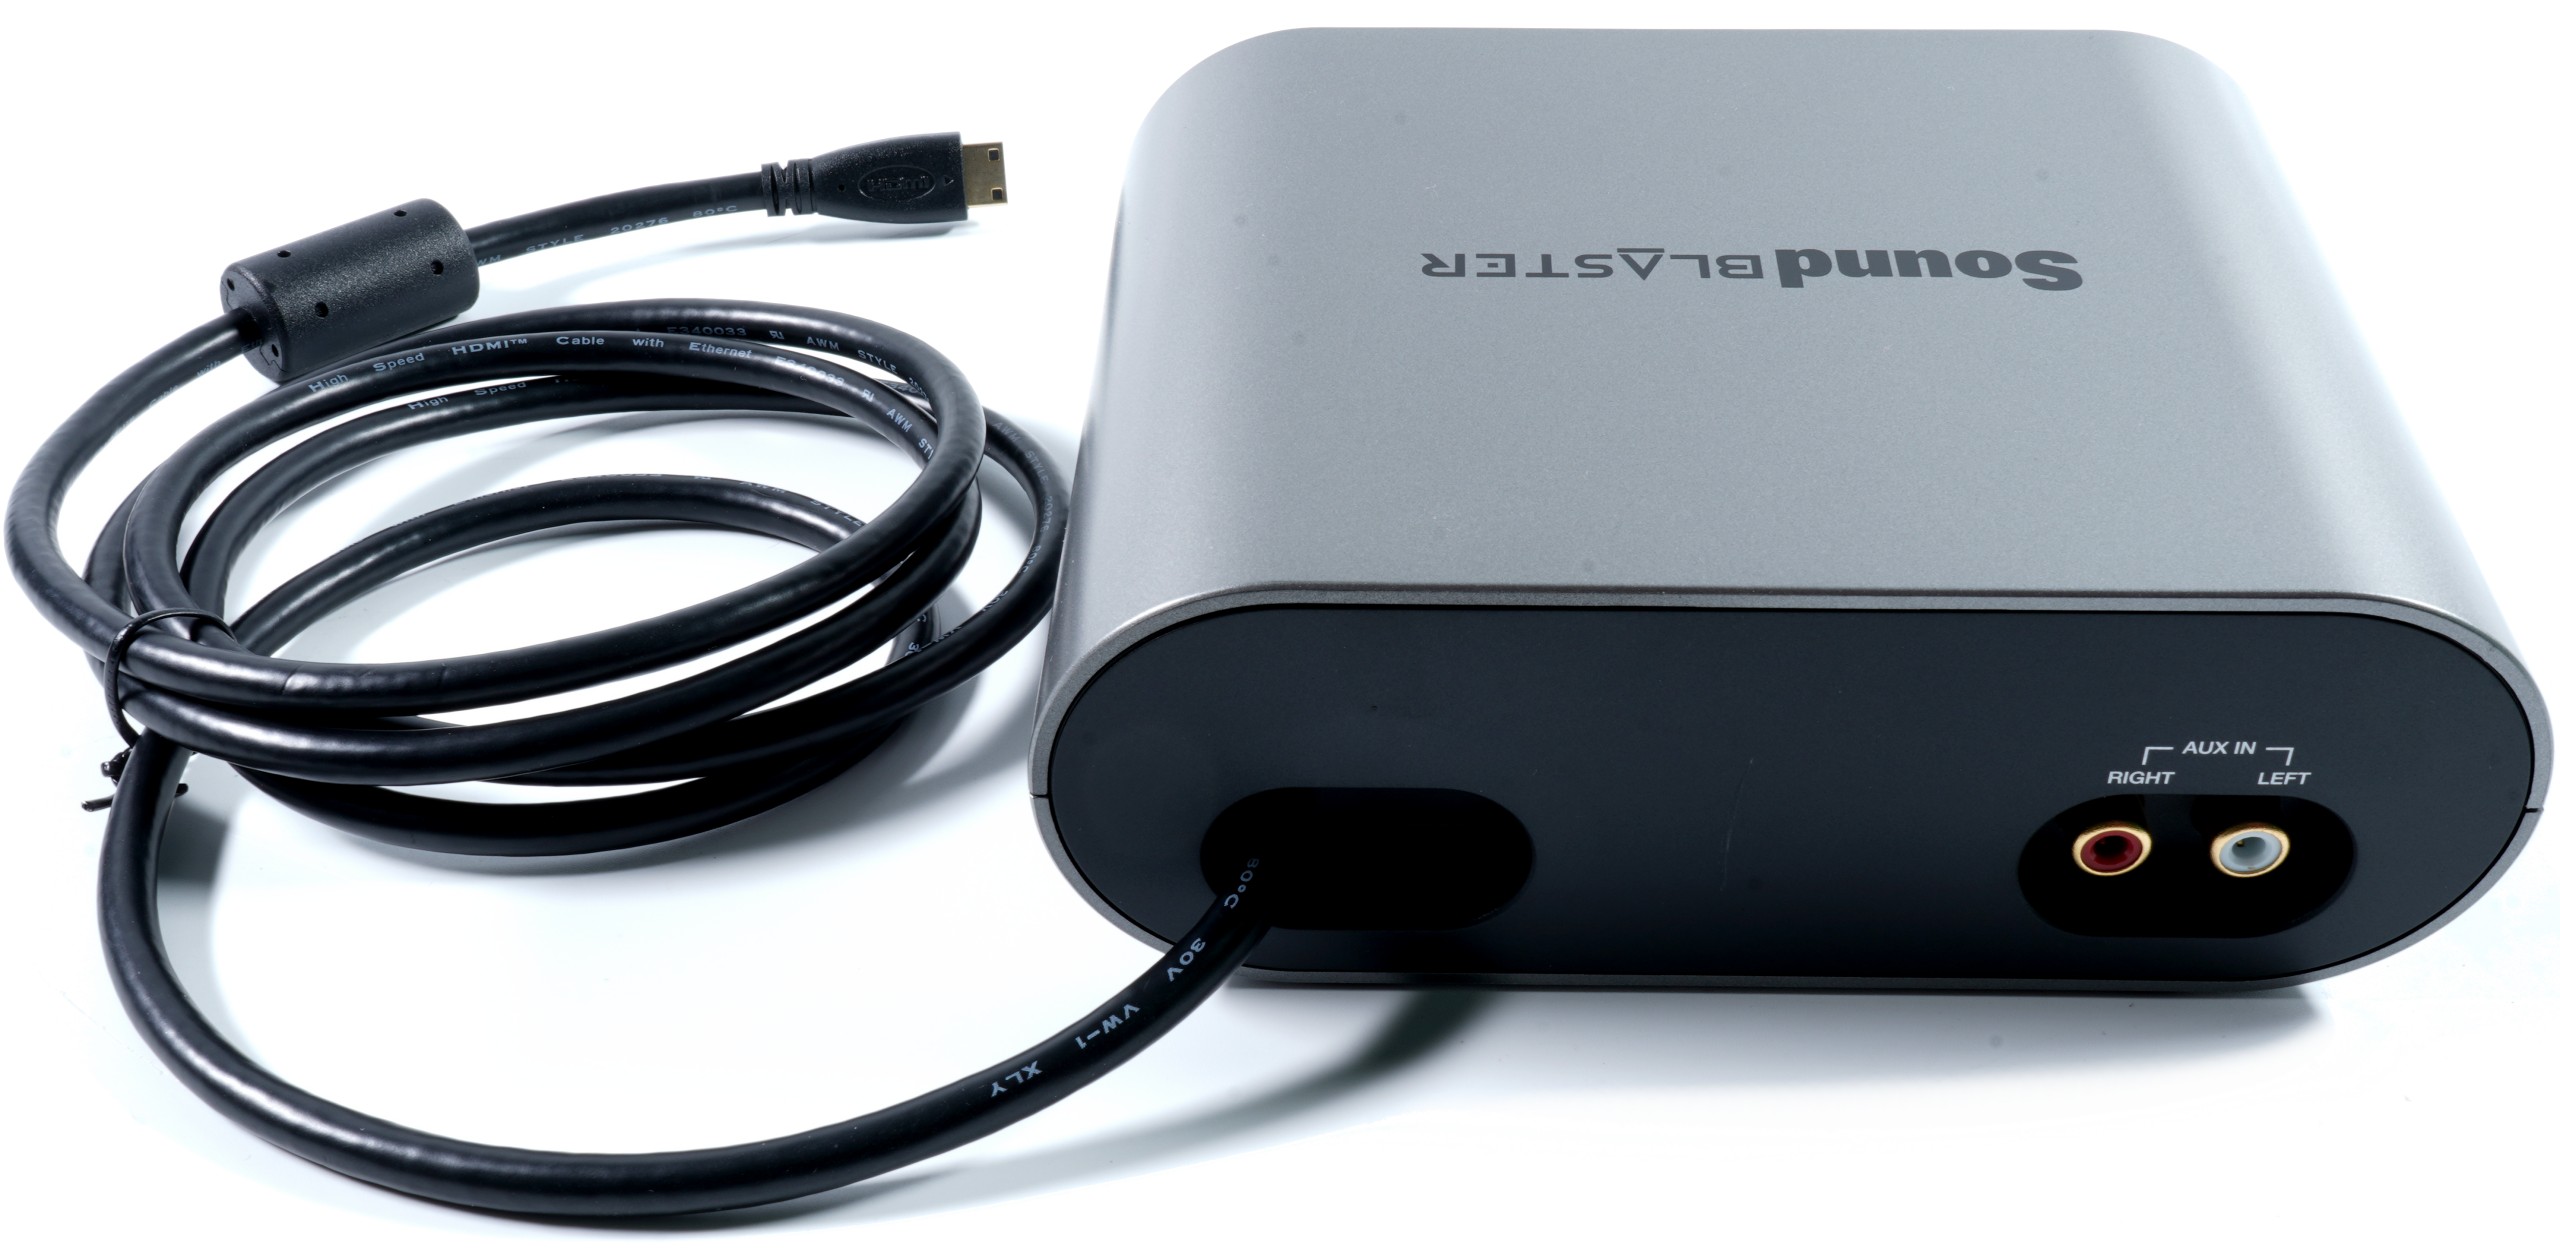
The AE-9’s separate panel (ACM) is the only way to connect a headset or microphone in close proximity to the keyboard or mouse. The panel has a 3.5 mm and a 6.3 mm jack (for connecting headsets and headphones) as well as a 3.5 mm jack for a microphone. There is also an XLR connector with 48V phantom power, which can be switched on and off at the touch of a button.
However, you can not only connect normal stereo headphones to the 3.5 mm headphone jack, but since it is actually a TRSS jack (four-pin connector for headsets with microphone), connecting a corresponding headset incl. microphone via a 4-pin plug is also possible without any problems. The large rotary control (and a digital display for the level) can be used to control the volume of the connected headphones or headset. If you press the button for two seconds, you can switch between the connected headphones or speakers. Furthermore we find the 3-stage gain switch (important for me) and the SBX switch (unimportant for me).

The AE-9 uses a headphone dual amplifier has been equipped. The discrete headphone amplifier consists of a voltage amplifier stage, where the differential signal from the DAC passes through a low-pass filter with WIMA film capacitors to the preamplifier stage. Their task is to increase the current and power amplification to drive the discrete push-pull output stage with matching transistors, which in turn transmits its power to the headphones with low loss. The negative feedback is enormous, which helps to effectively suppress ugly harmonics. We already discussed this topic in depth and breadth with the Beyerdynamik A20. On the back of the ACM, you’ll also find an RCA AUX input in addition to the permanently connected connection cable. But that’s it with the connections.
You have to install SB Command here of course and then there in the appropriate drivers if you want the full functionality of the panel. At the heart of the AE-9 is an ESS SABRE-Reference 9038 DAC, which offers a nominal 129 dB signal-to-noise ratio and 384 kilohertz reproduction at 32 bits. The 4-core sound processor is 96 KHz/24 bit model. Even though the DAC offers 8 channels, unfortunately only a native 5.1 signal is output. The interchangeable OpAmps are more of a gimmick in my view, because for the measurements such a thing makes no difference. If you use the sound card without the included ACM, then the 6-pin PCIe connector on the card does not need to be connected to the power supply. With the ACM connected, you have to supply the Sound Blaster AE-9 with additional power via this port, even if you can’t fully utilize the 66 watts of the motherboard slot anyway. .
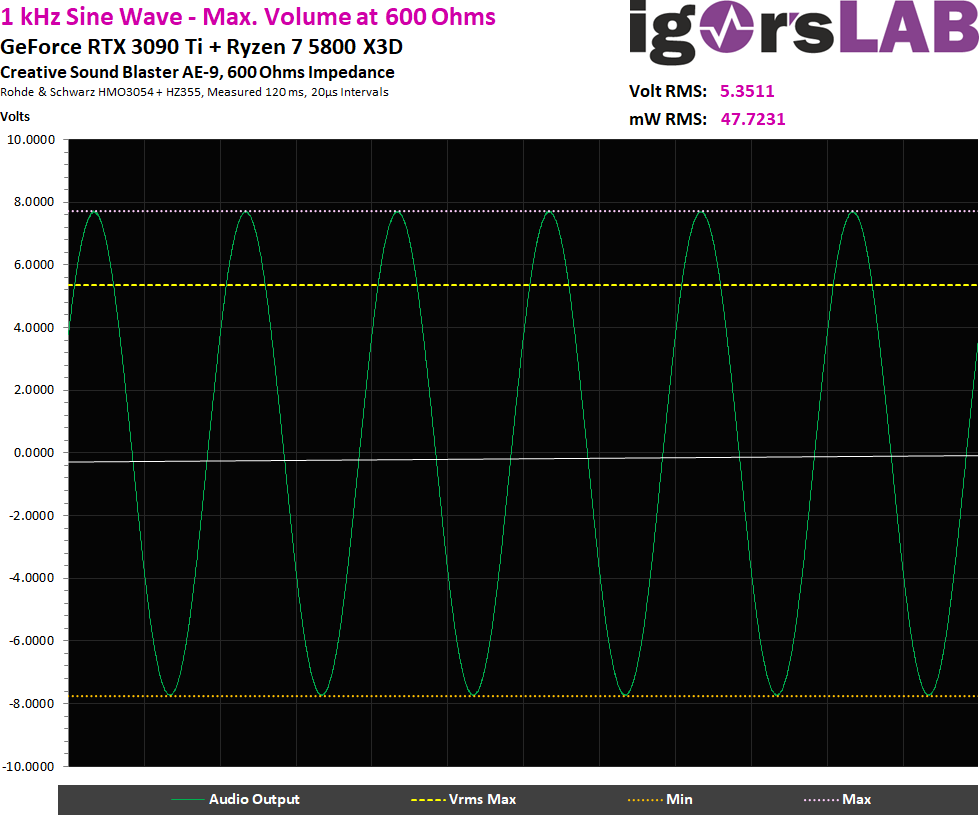
Maximum output level at 32 and 600 ohms
Does the discrete transistorized push-pull output stage bring us a real benefit here? Yes, this works just fine, so let’s start with the widely used 32 ohms first. With a brute 410.69 mW RMS per channel instead of the 7.3 mW of the Godlike’s onboard sound, you get 56 times the output power here! These are extreme improvements, because you can easily get all headphones to the maximum level. With a full 3.6252 Vrms at 32 ohms, acoustic emergencies of my measurements can be mastered here with a casual gesture.

But what happens when you want to measure a 600-ohm headphone? With a real 5.3511 Vrms and almost 47.7231 mW RMS, you still get more than 15 times the onboard sound, which is very modest with 3.1 mW RMS and just under 1.37 Vrms. This is already real ear cinema, but it is of course also a clear and above all audible improvement for all higher impedance headphones from 80 ohms.
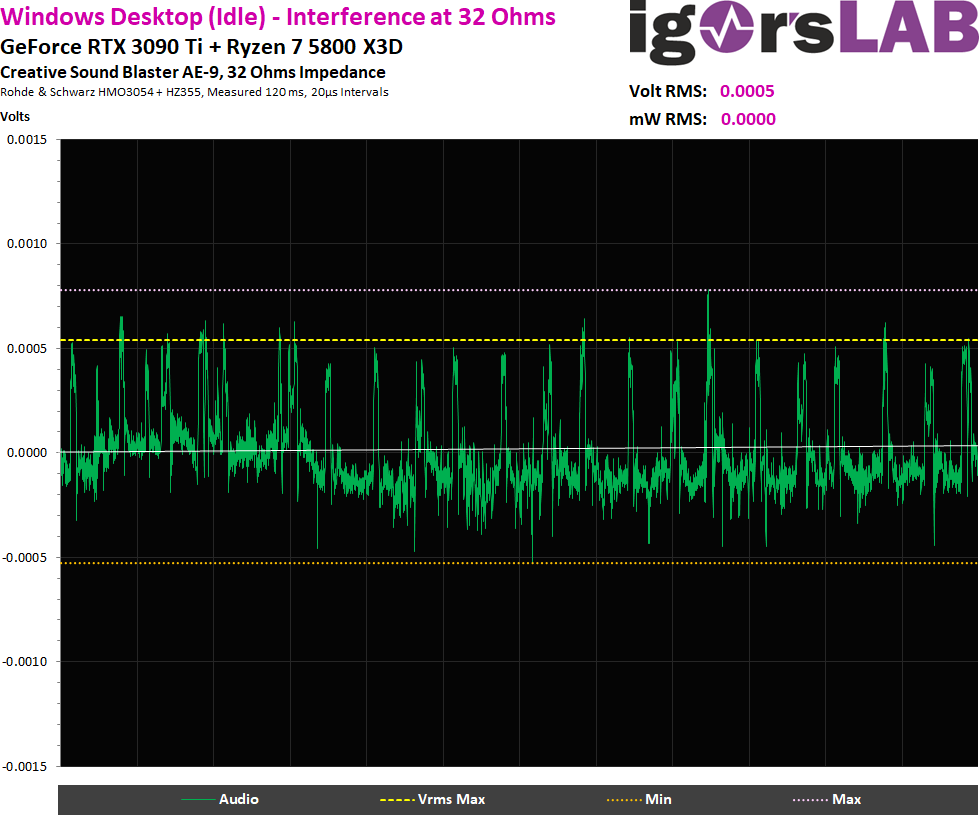
External voltage distance
Again, the measurement during operation is of course the slave of the motherboard, graphics card and power supply. The theoretical values from the specs of the components can of course never be achieved (I already wrote something on the first page), but you can compare the products and sound solutions quite well among themselves! Let’s first take a look at the idle state on the desktop with the maximum, still distortion-free volume setting for the possible full level of just now. With 0.0005 volts, one is far below the onboard solution despite the significantly higher overall gain, but this is still better in relation. The 0.483 Vrms of the onboard chip are compared with 3.6252 Vrms. And so the distance to the interfering signal increases from 1:537 to 1:7250 compared to the onboard sound, which is really outstanding.
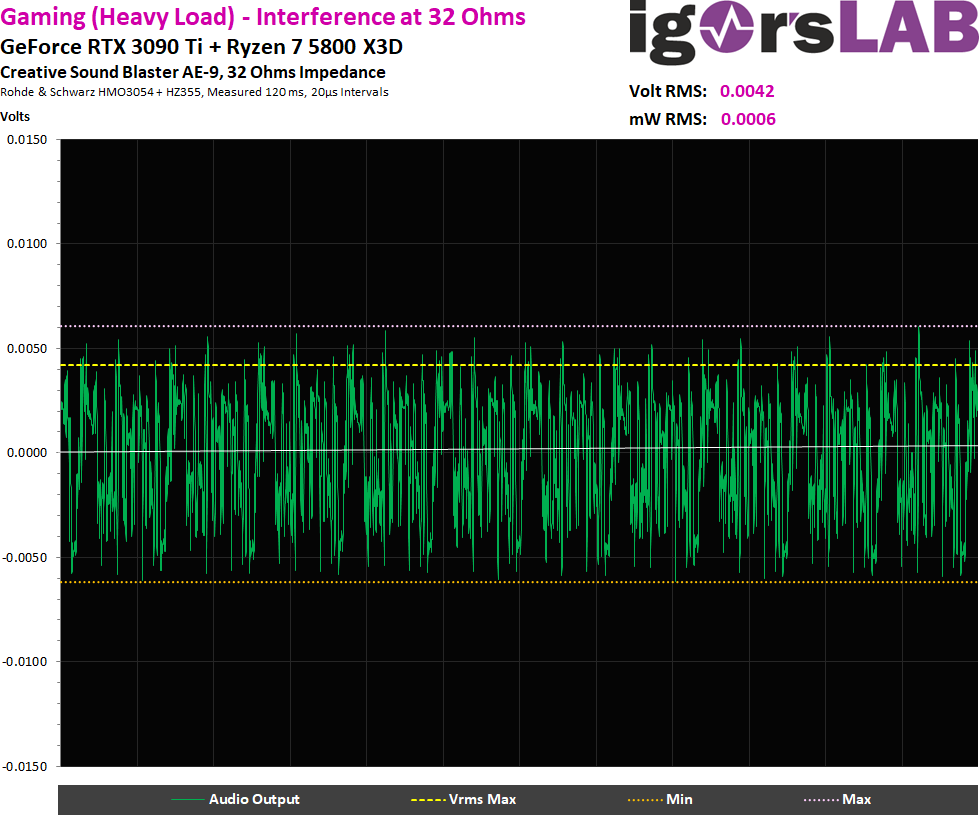
It is not relevant for the headphone measurements, but the influence of the graphics card also excites me here. Therefore, let’s start the game and load the savegame. In Ultra-HD and maximum settings, the graphics card really has to choke as usual and over 500 watts flow through the thick pixel heater. I now measure 0.0042 Vrms which still results in a ratio of 1:863 to the maximum measured 3.6252 Vrms. For the onboard sound, it was 0.0074 Vrms versus 0.4831 Vrms, resulting in a ratio of only 1:65. Graphics card 0, sound card 1.
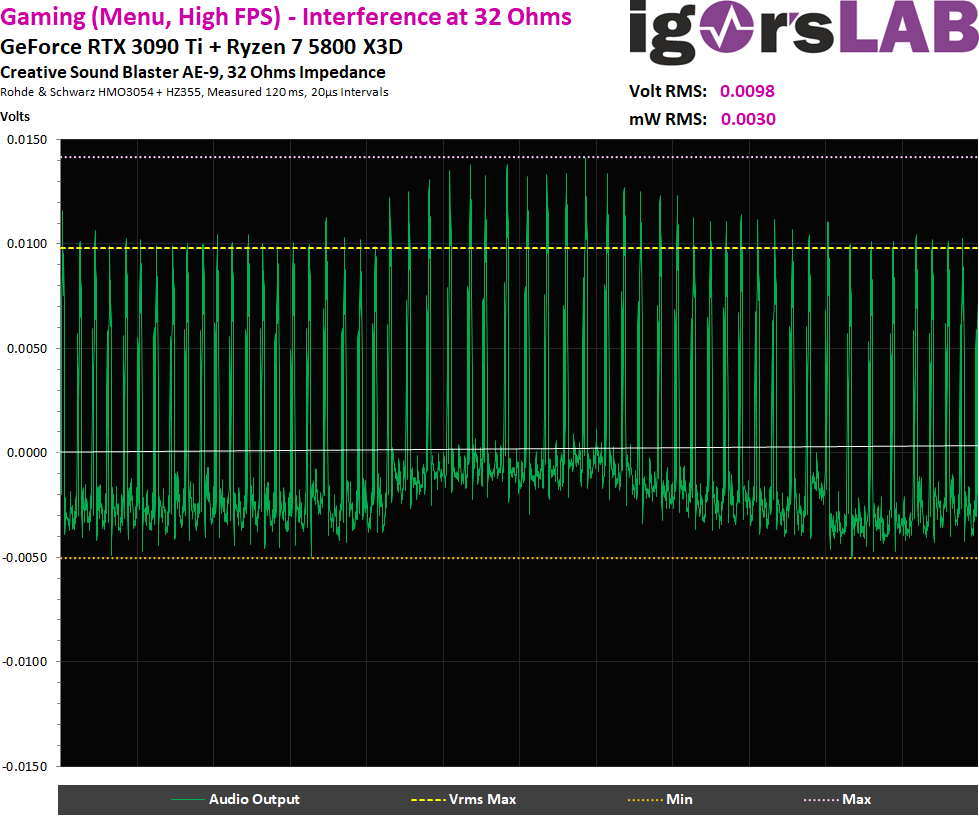
But what happens again in the in-game menu when the high FPS rates send the voltage converters into the stress test? This is also interesting, because it results in a ratio of 1:370 for the sound card compared to the 1:115 for the Audigy FX V2 and the really bad ratio of 1:48 of the onboard solution, where the chirping in the menu really got on your nerves.
Interim summary
For my measurements, the Sound Blaster AE-9 is completely sufficient, you don’t even need to put more there. From this point of view, I have only just reached the end of the rather rocky road, but I now have a really good feeling about the measurements. And that is still underpaid even with the 300 euros. After all, you don’t just have to measure yourself, you have to be measured against others. And there is nothing worse than unsubstantiated and fuzzy measurements.


65 Antworten
Kommentar
Lade neue Kommentare
Mitglied
1
Urgestein
1
Neuling
Urgestein
1
Veteran
1
Mitglied
Veteran
1
Mitglied
Veteran
Mitglied
1
Urgestein
Mitglied
1
Alle Kommentare lesen unter igor´sLAB Community →