


Our forum user casi30 has created an optimization guide for us, which should make the impossible possible, especially since the combination as CPU and GPU is already quite sporty. He cools an AMD Ryzen R7 3800X with the included Wraith Prism, runs a reference model of the Radeon RX 5700 for this purpose and finally optimized the whole thing manually to such an extent that neither the components glow nor the ears fall off. You can’t? yes, you can! and that is exactly what you are reading today in his guide, which was written in the ego-form (logical, it is his) and which I do not want to withhold from you.
Cooler optimization (optional)
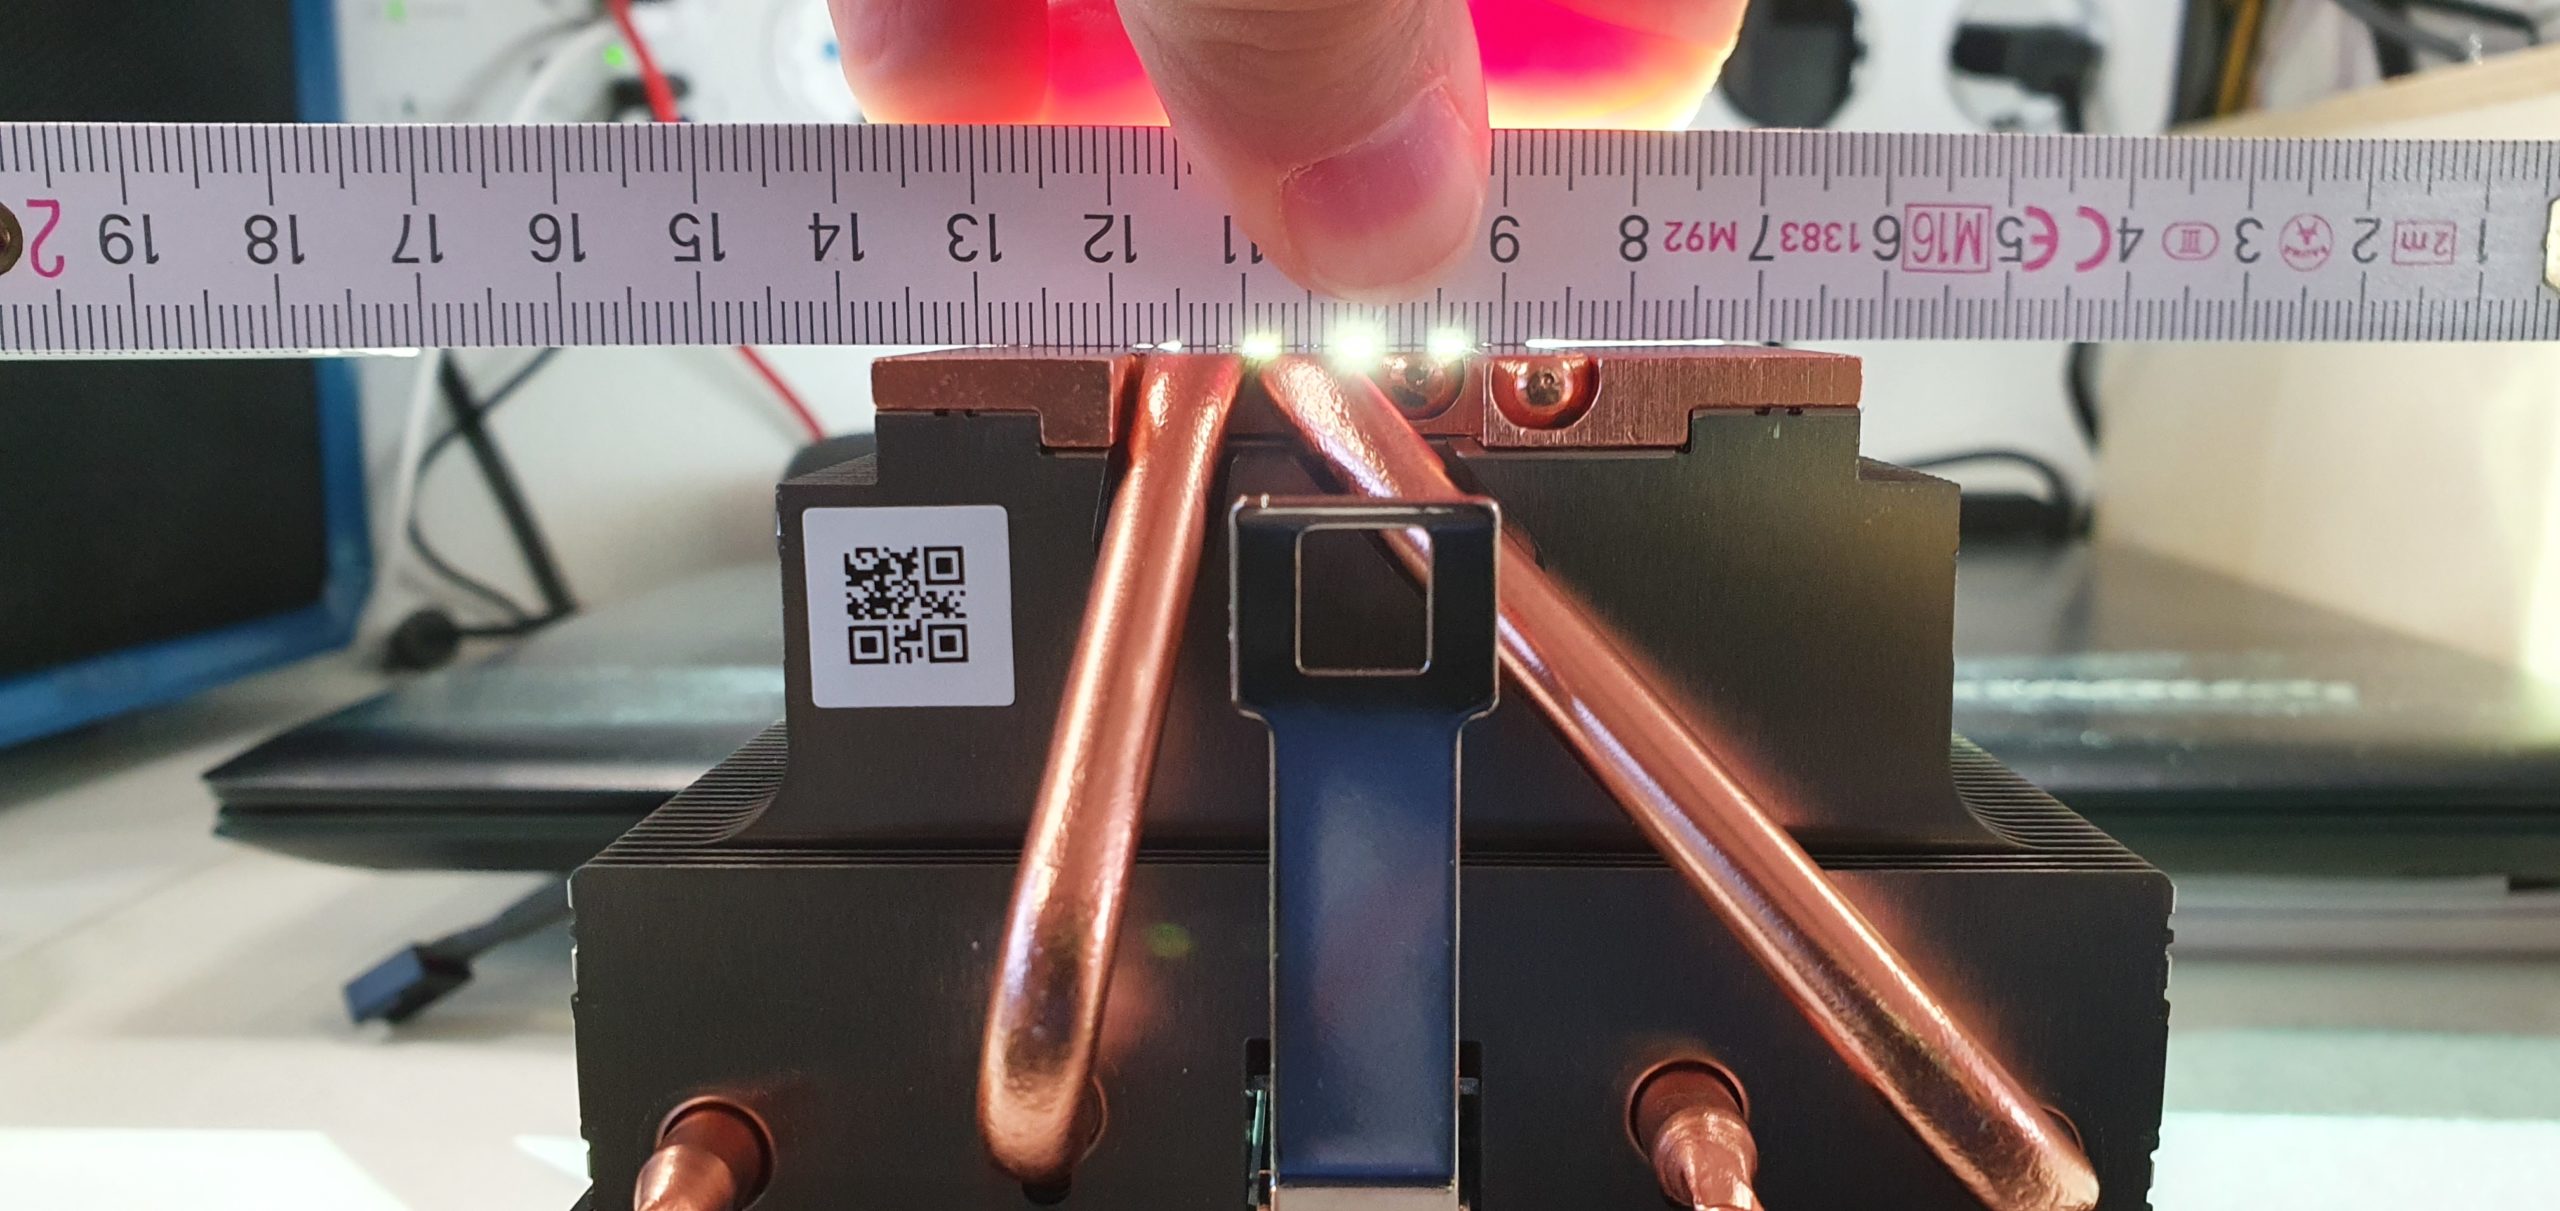
Thanks for the intro, I’ll take over and start right away. The AMD Wraith Prism was a little bit processed by me, because it had quite big grooves and bumps after a light check as you can see here. The only important thing is that the contact surface becomes larger and the heat-conducting paste does not have to compensate as much, because it transfers the heat much worse than e.g. Copper. A small instruction on how to do this can be found in my last picture gallery.
Adapting the BIOS
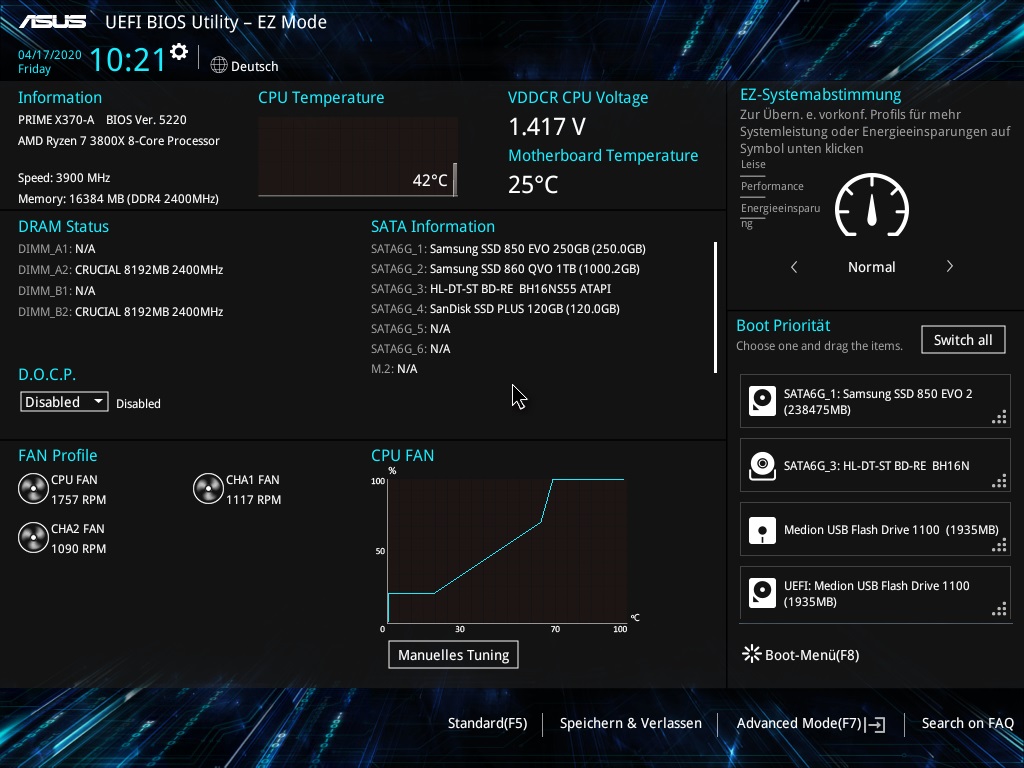
The first start at ASUS looks like the picture below. Via Del when starting the computer we get into the BIOS. With F10 the settings are saved and the computer restarts.
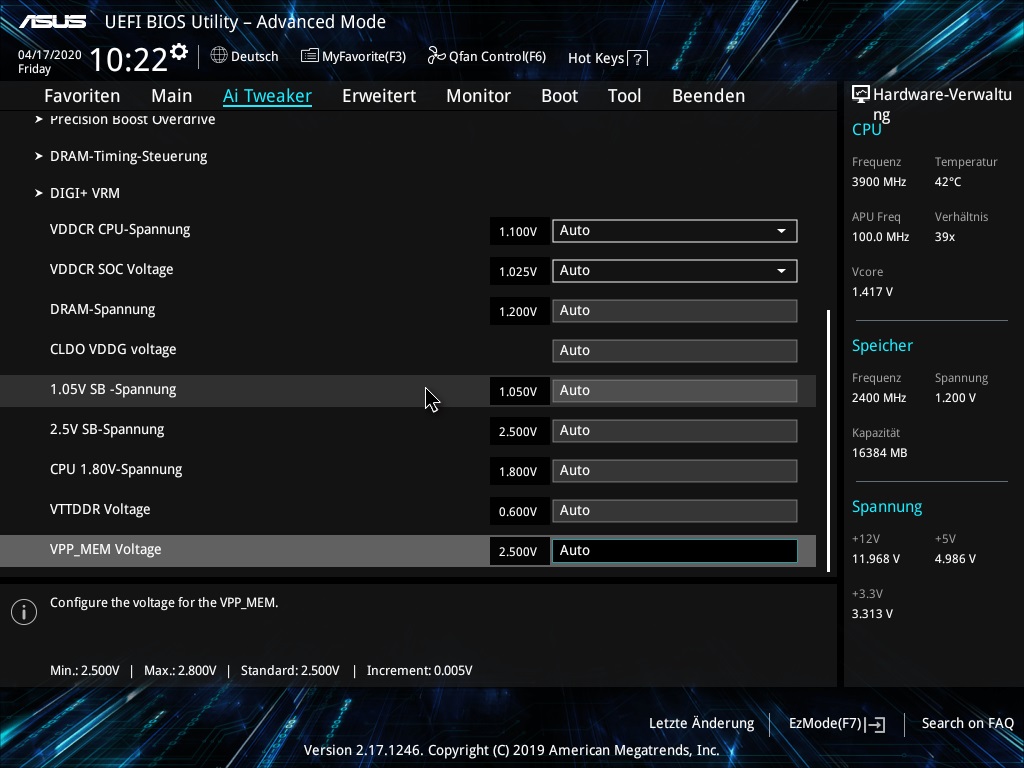
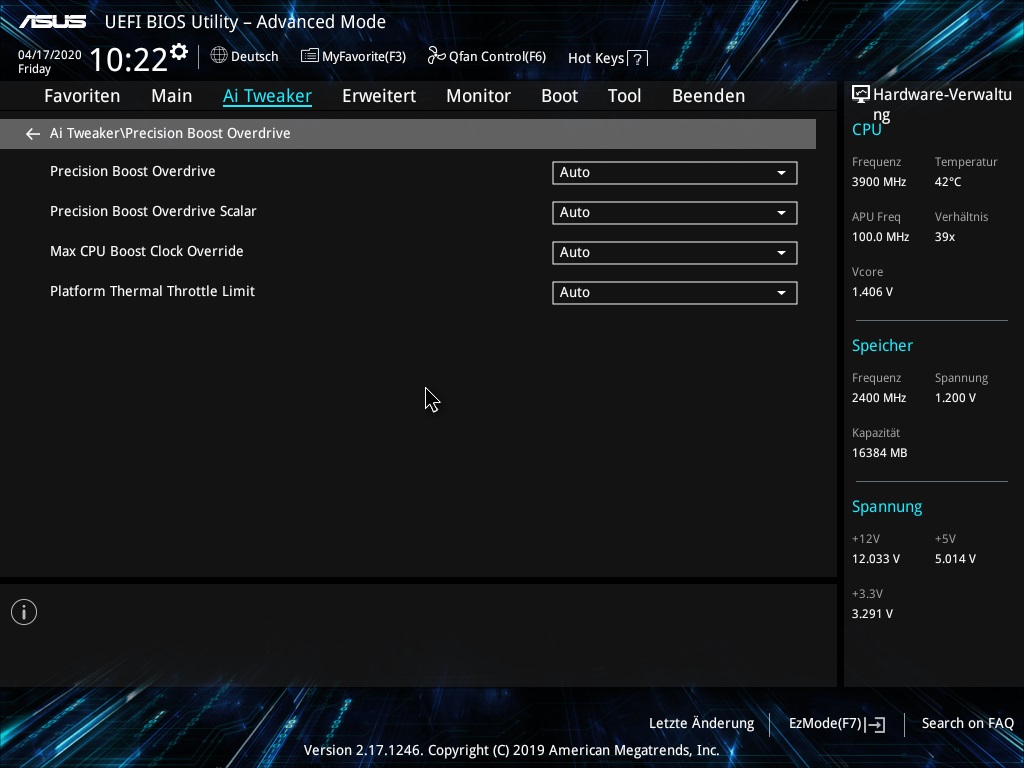
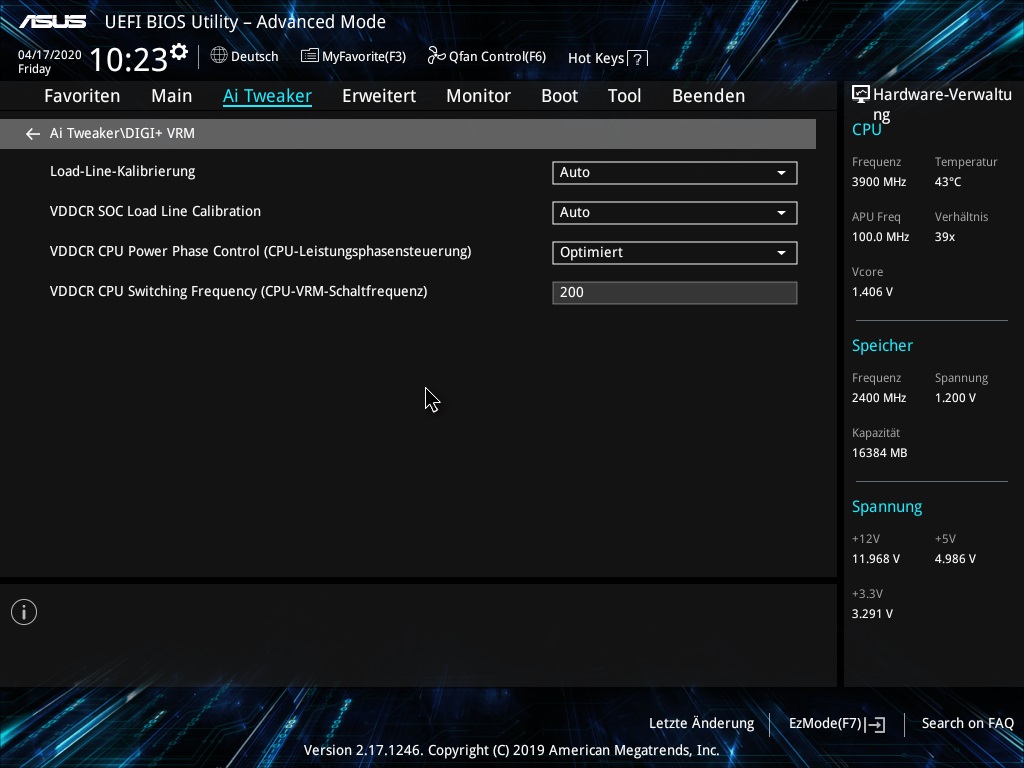
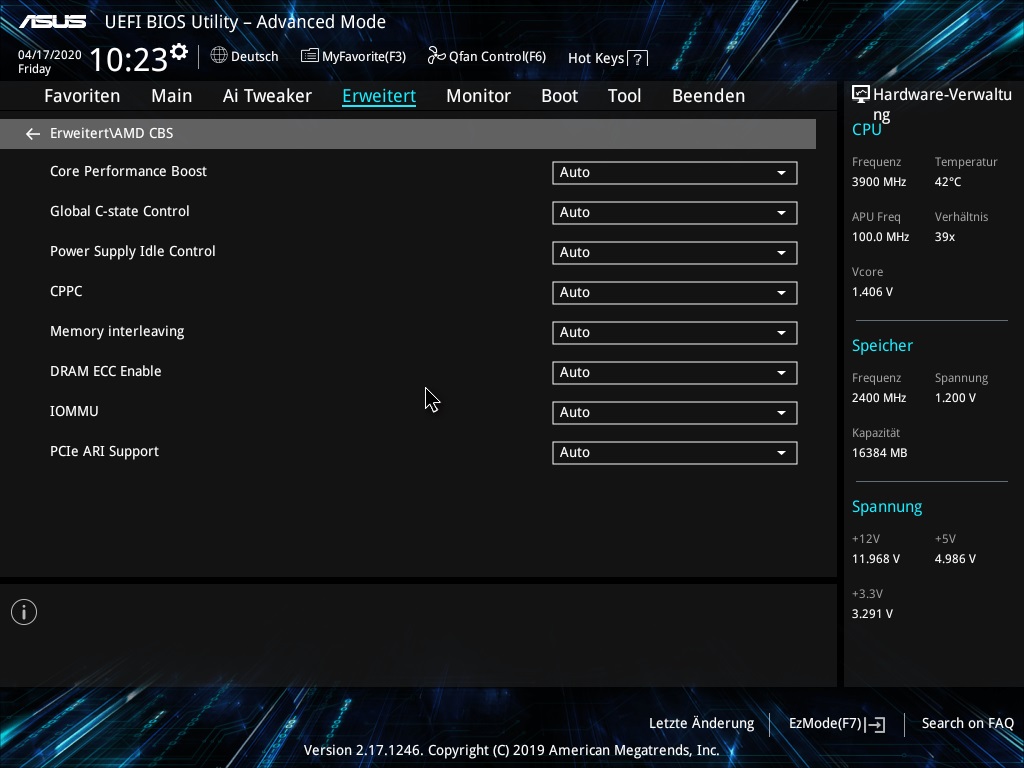
Depending on the manufacturer and BIOS, the names and keys may of course differ, but the principle is the same. With F7 you get into the extended bios in Asus where you can make the main settings for optimization. I have summarized these steps chronologically in a gallery, so please browse through:


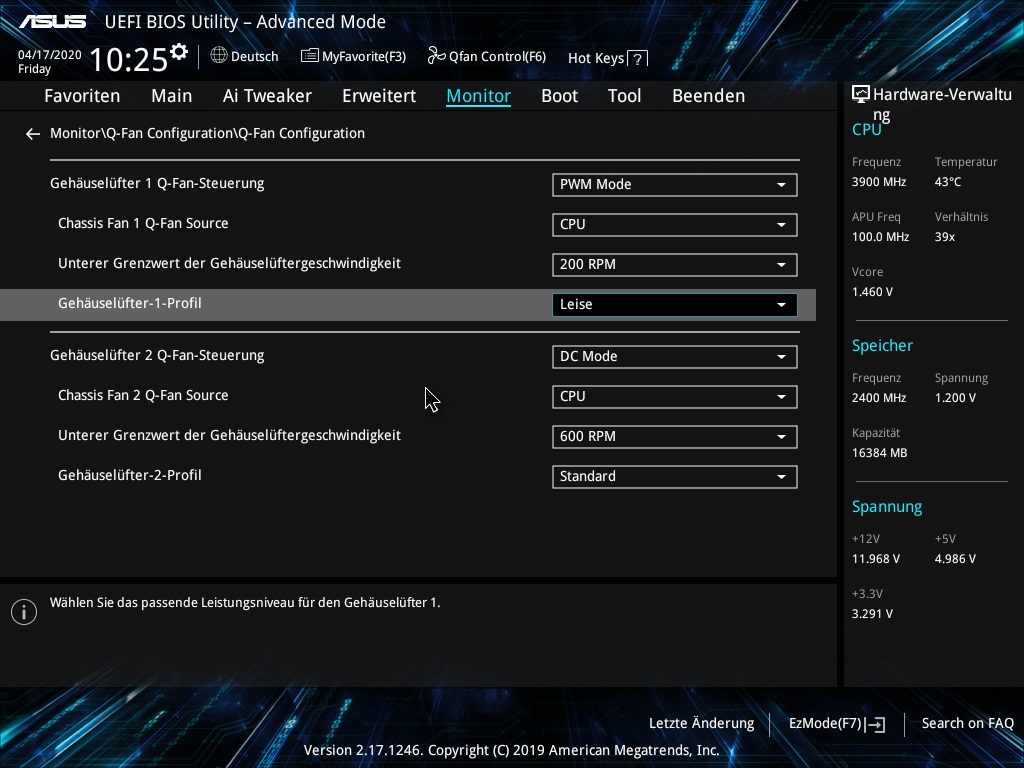
In the next picture I will now roughly adjust the fans, depending on the version with PWM 4 pin or DC mode 3 pin connection, default setting “Silent”. Here the fan speed must simply be minimized a little:
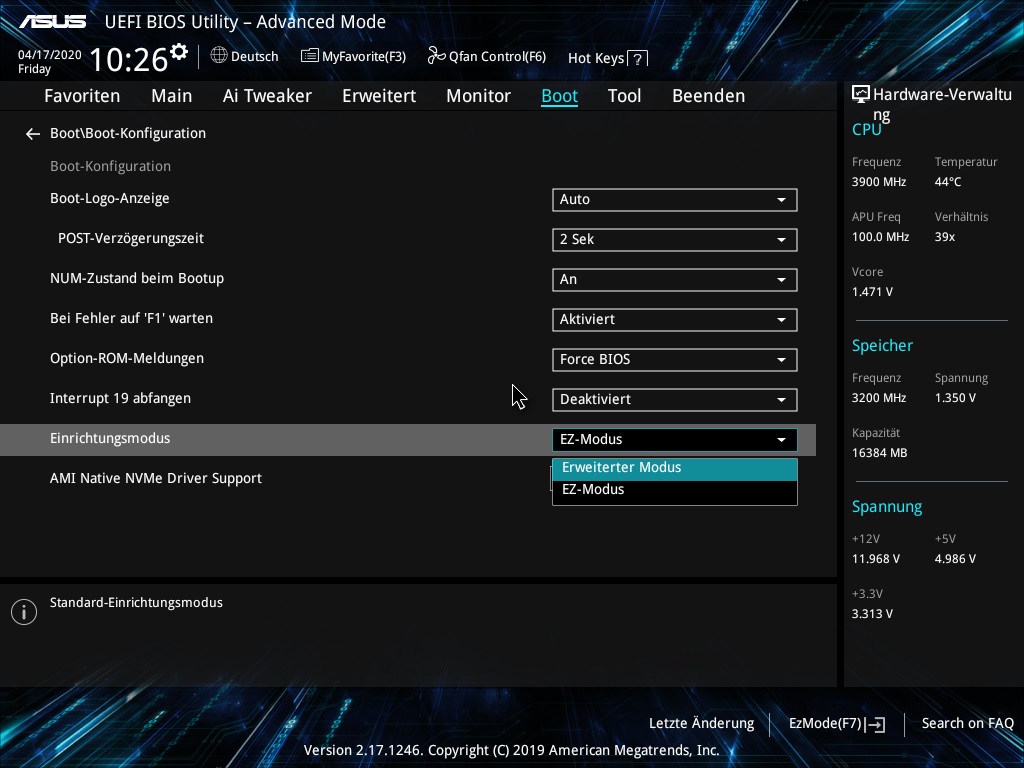
If the BIOS does not remember this switch to extended mode itself, such as on Ausus boards, then you can change the start mode of the UEFI BIOS here, so that you don’t have to switch anything each time:
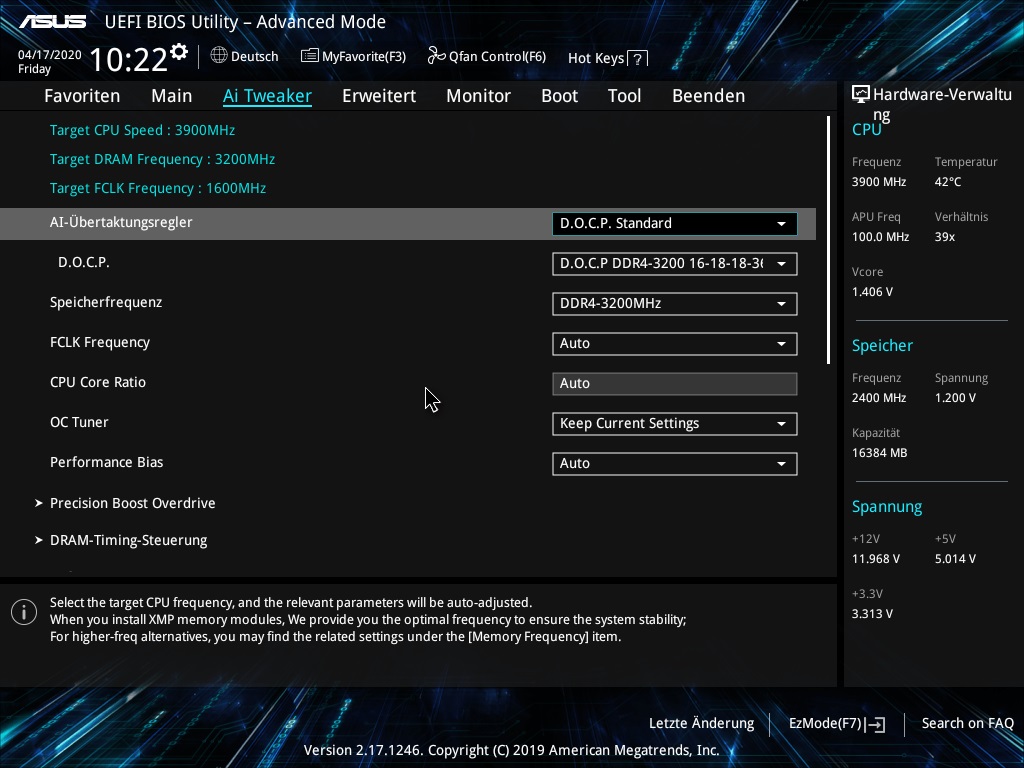
In these two pictures I first loaded the setting with the 3200MHz via D.O.C.P (on other boards e.g. Select XMP Profile). If you don’t have RAM with at least 3200MHz, then look for the highest XMP profile that is stored in RAM and that you can load.
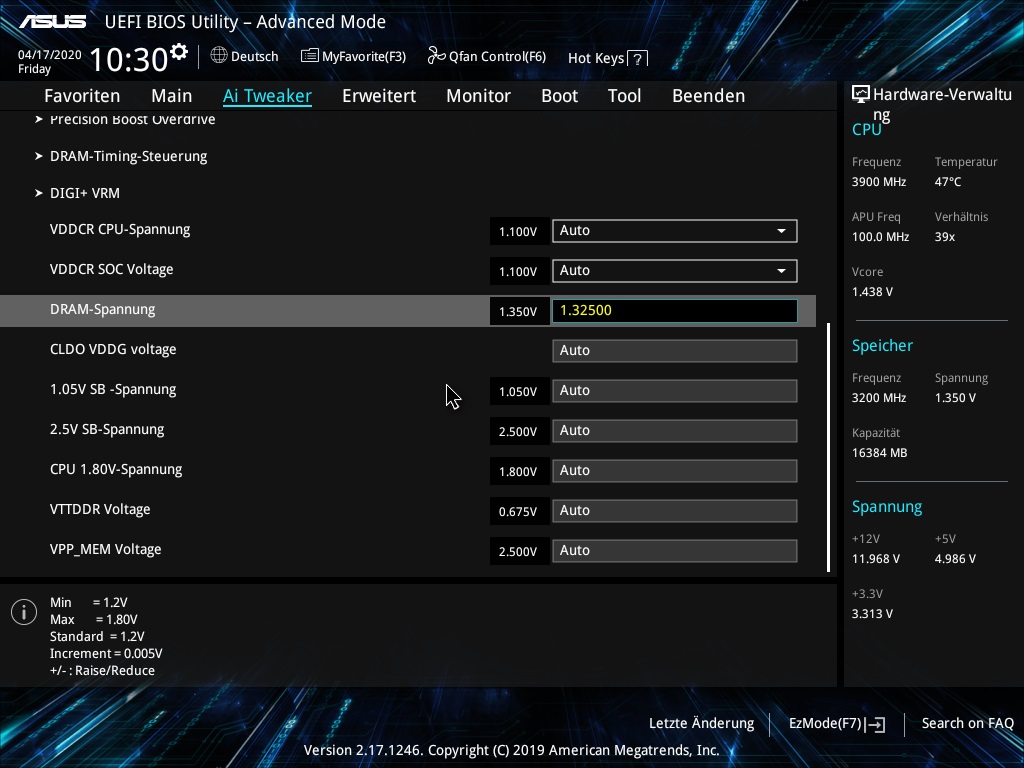
I lowered the voltage from 1.35V to 1.325V. Also make sure that the RAM is enabled for 1.35V. If not, then for example at 1.2V and tries to get down to 1.175V. Something always works. Depending on the RAM.
Stability test and first warm-up
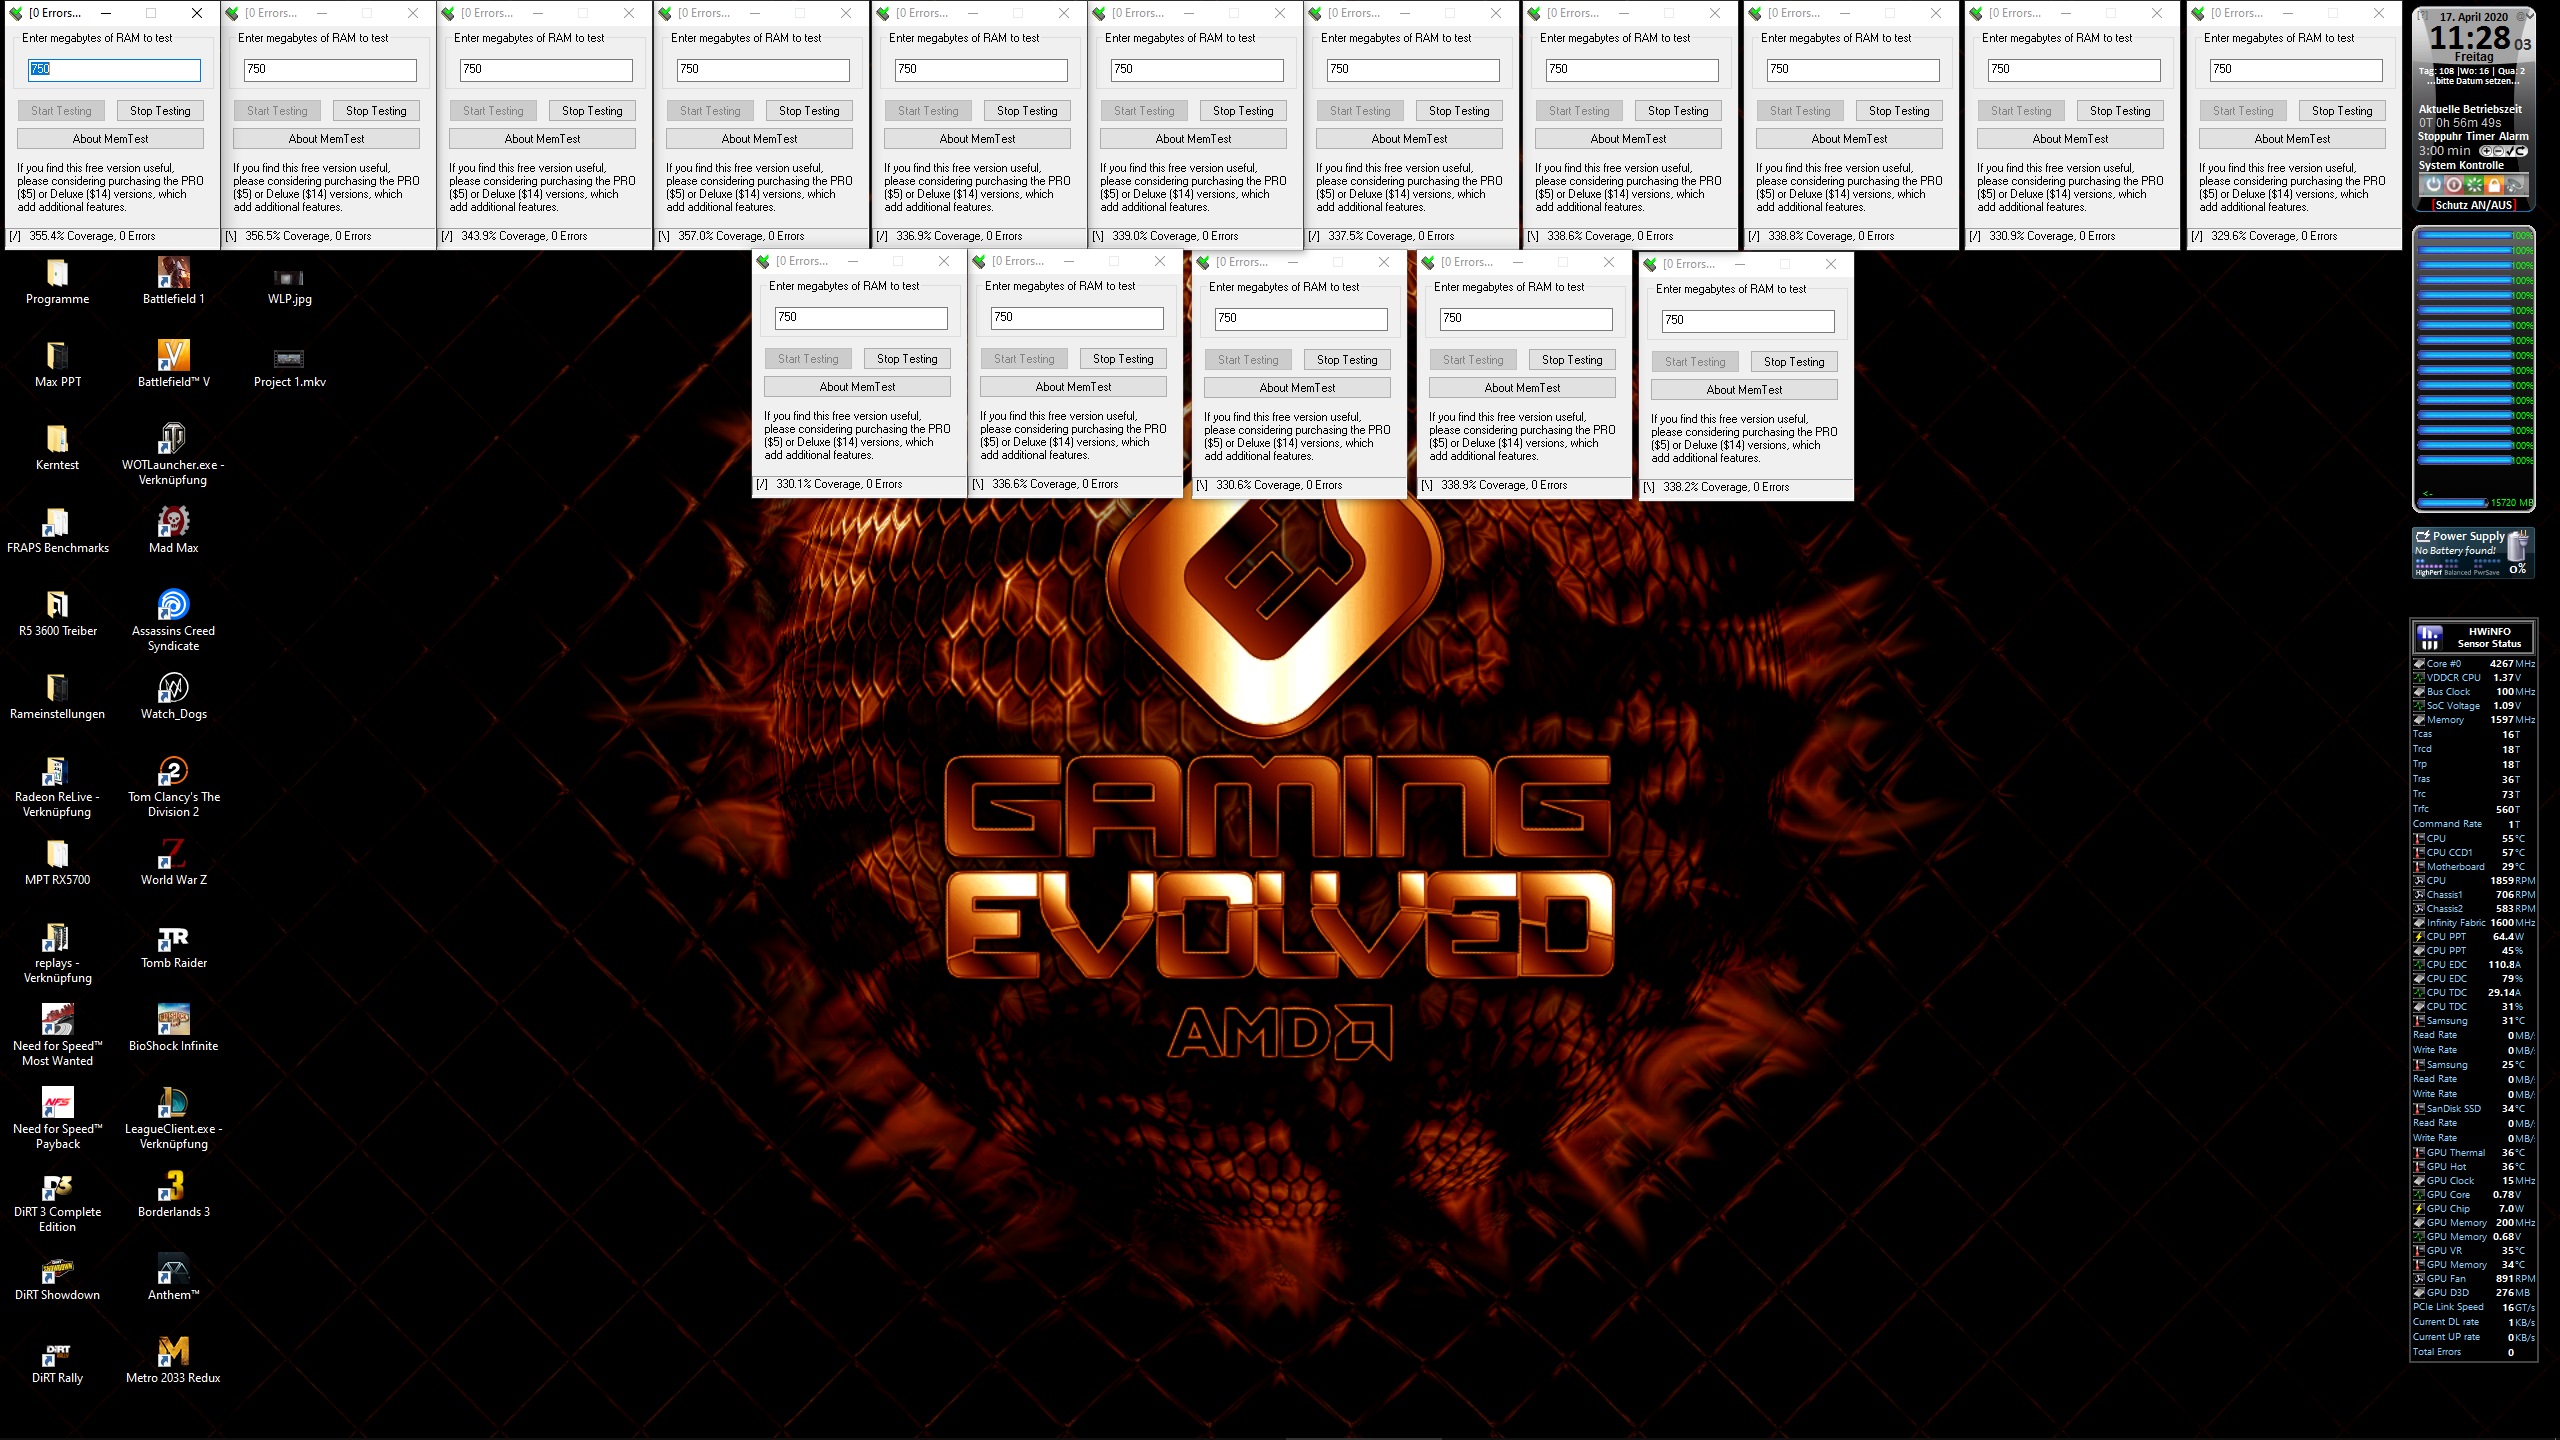
I like to have a look at the RAM/memory controller and if everything is OK and stable. Therefore the RAM voltage was also reduced by 25mV to provoke faster errors. If there are already errors in the first 100%, then you should take a closer look at the RAM and test the bars individually. Not that one is defective. For this I use MemTest under Windows (Download). Important: open a window for each thread and divide the amount of RAM equally among all windows, as shown here. Then simply let the computer run for 30-60 minutes. If there is no defect, the whole thing should run without problems later and no error should occur. Now you can set the RAM voltage to 1.35 V again.
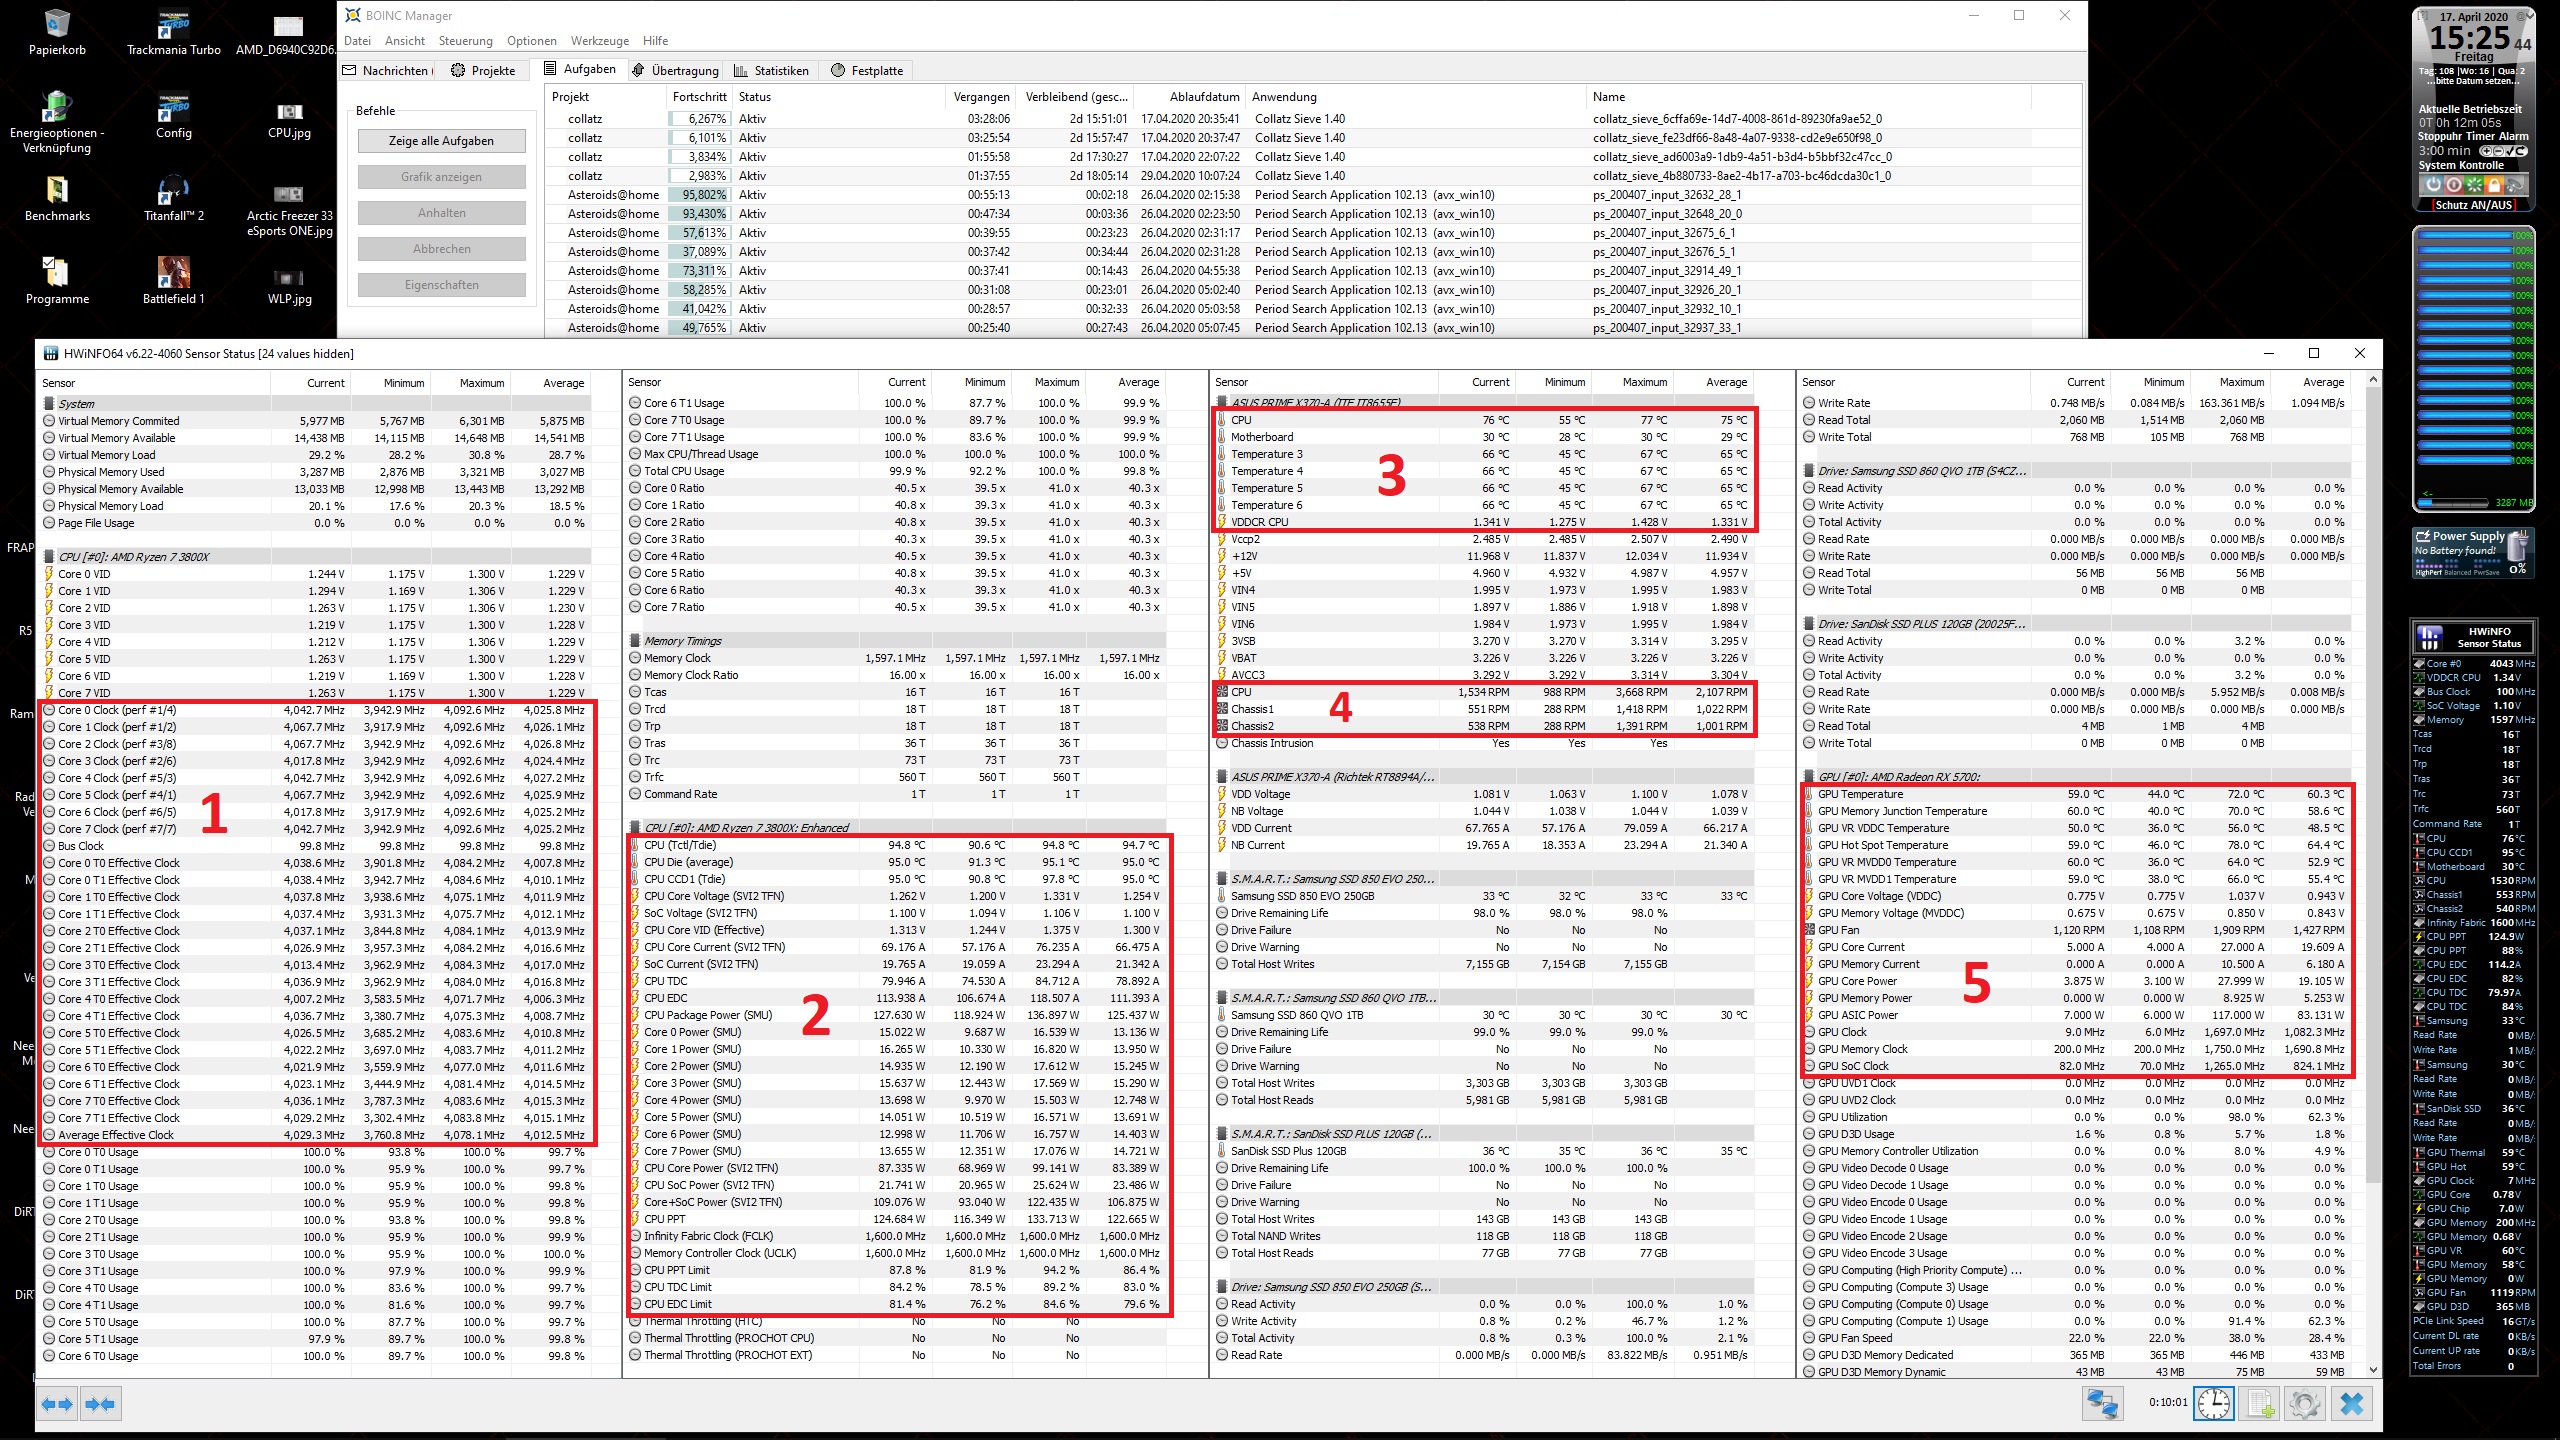
The system is, except for the RAM, in standard setting. Now we will first collect some data. Therefore I let the system warm up a bit – with Boinc for CPU and graphics card to warm up everything nicely. About 10 to 15 minutes should be enough. You can also use other programs that are listed later or play a little bit with the computer. The way is not the goal, the main thing is warm, but for this we also need programs to read out if you stay on the desktop.
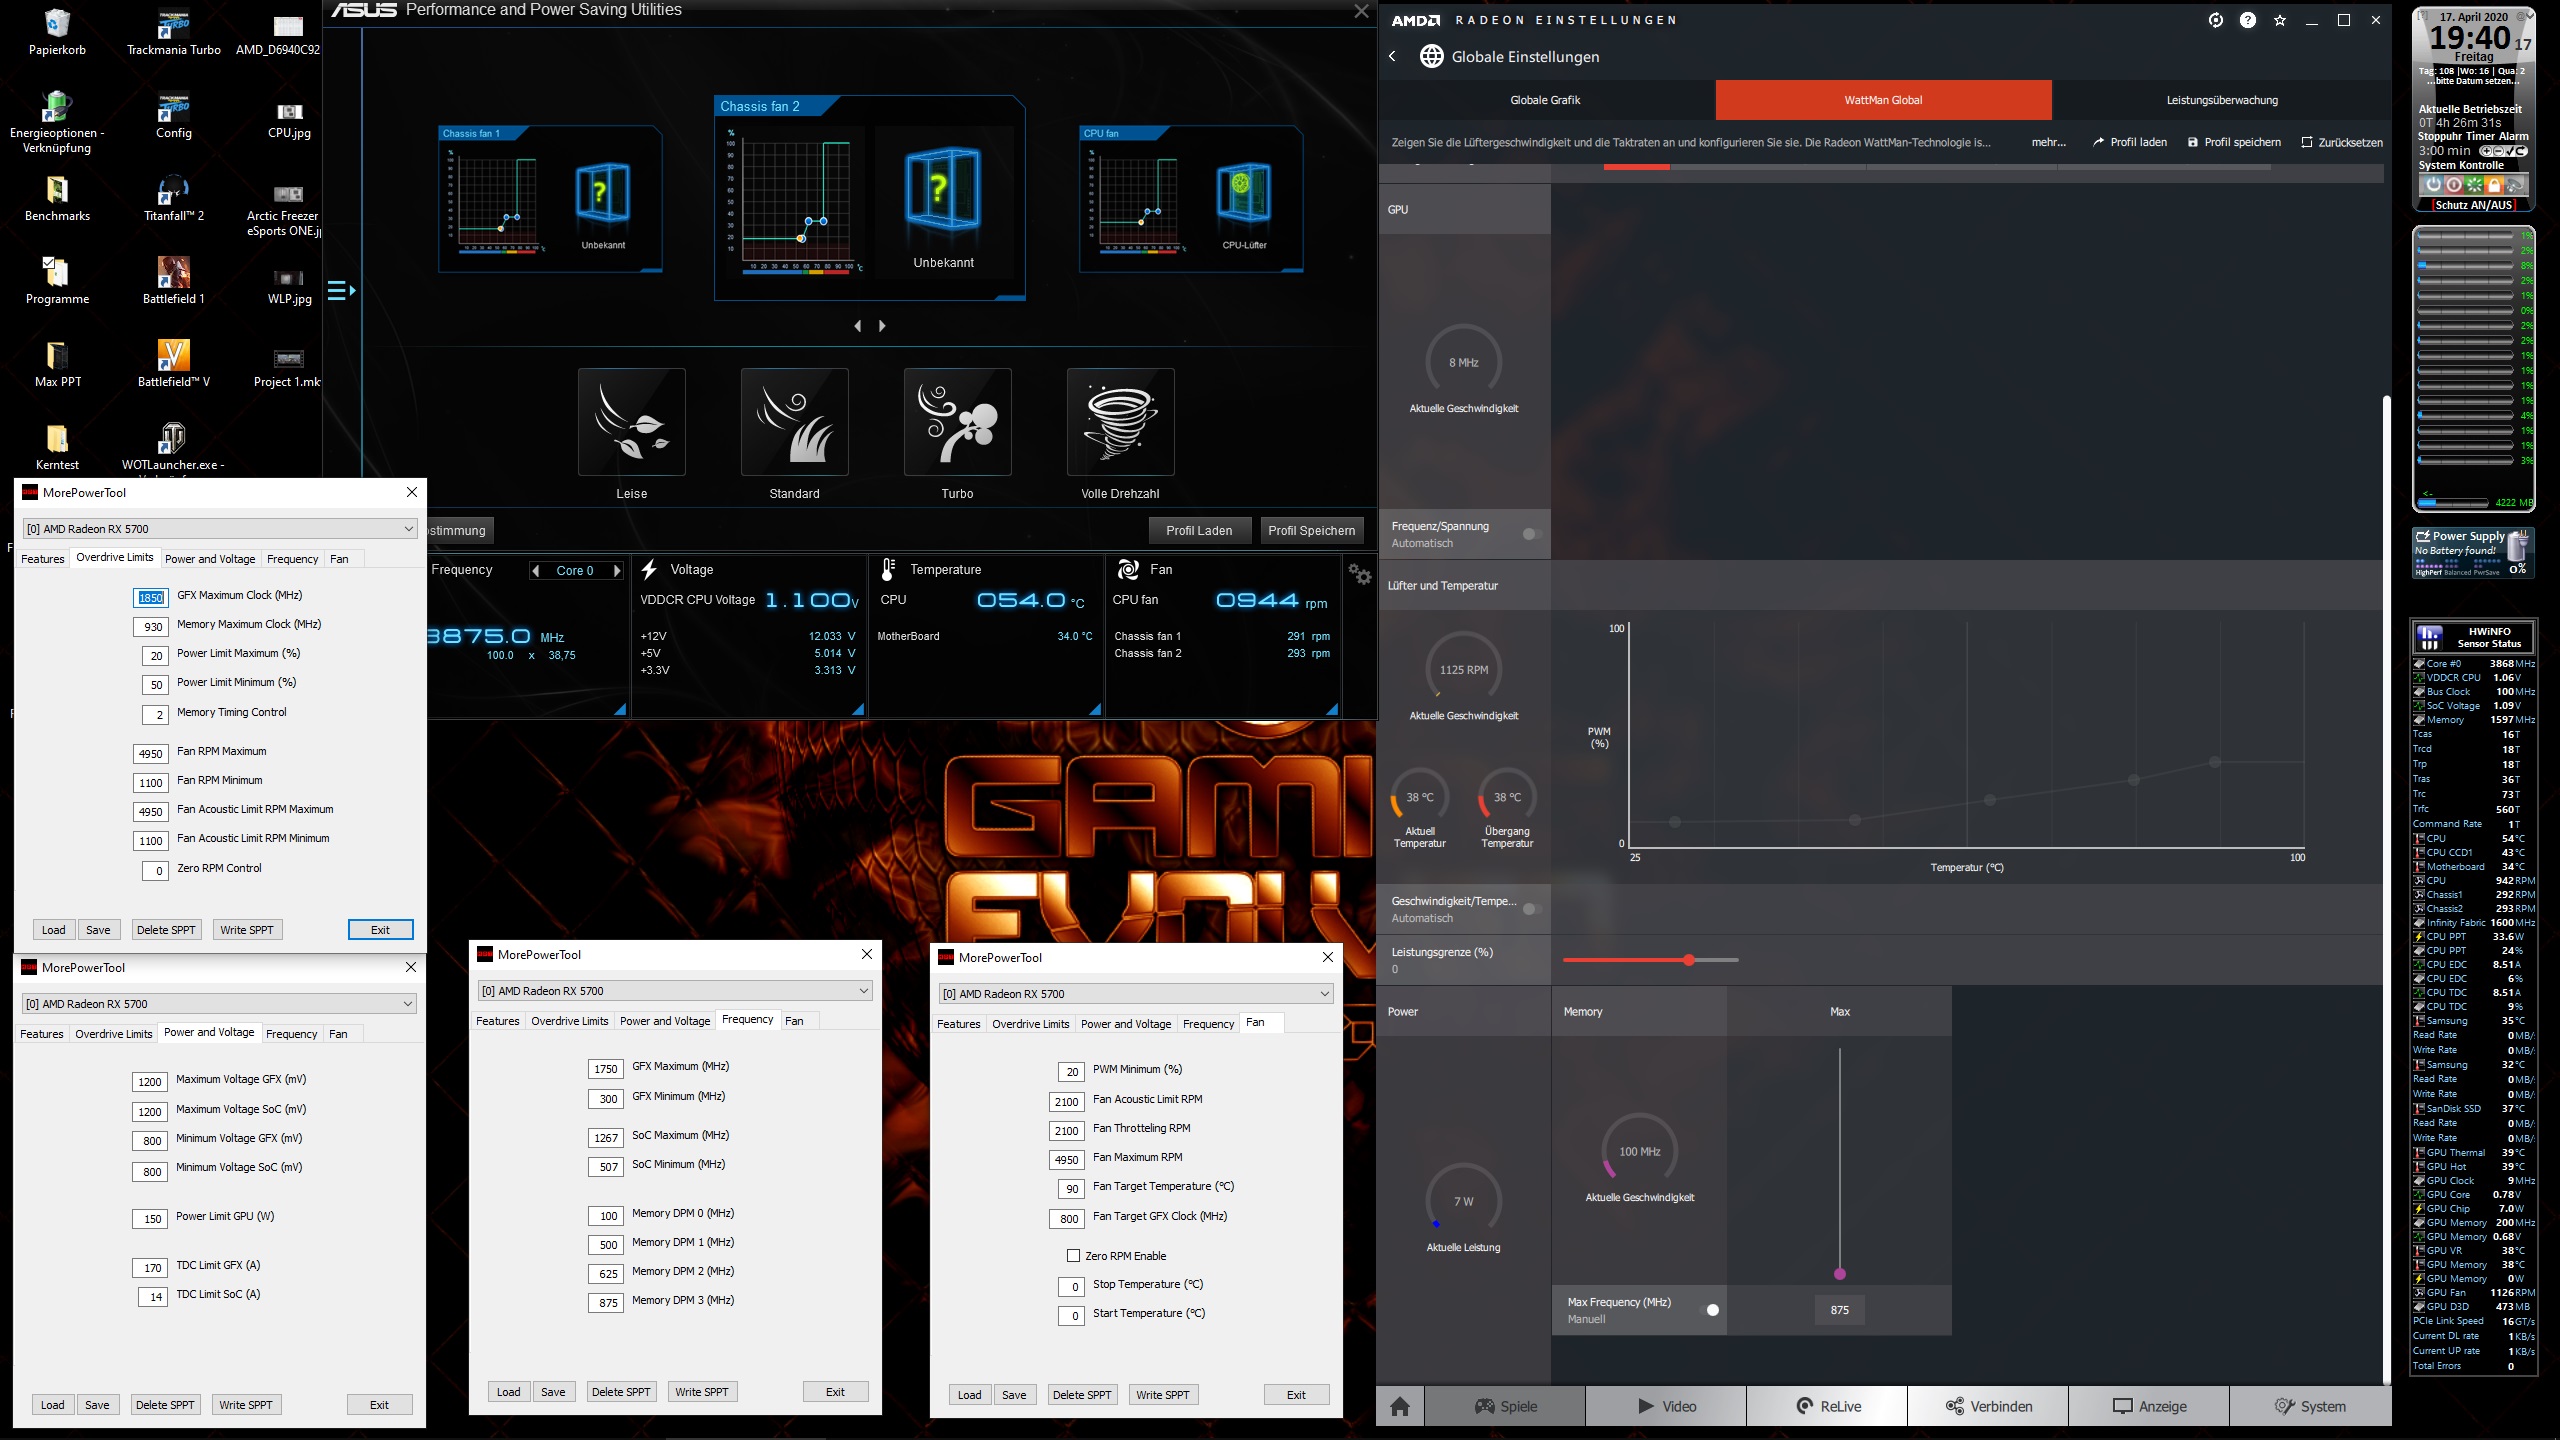
HWinfo 64 (Download) provides almost all important information. The areas marked in red are the most important ones, which are mentioned again and again in the course of the project and are interesting. The Average column is usually used.
I like to set the fans under Windows, because it is much easier to find the optimal speed. For this I use AI Suite 3 from ASUS. In the first area, the fans remain as low as possible at around 52 to 56°C. After that comes a slightly increased range, which goes from 62°C to 75°C, where the fans can just about be heard. From a CPU temperature of 76°C, the CPU fan and case fans all turn to 100%. If you prefer another board manufacturer, you can use their software and if necessary later transfer these settings into the BIOS and store them there.
The graphics card is also being worked on and the driver and the More Power Tool are used for this: https://www.igorslab.de/community/threads/red-bios-editor-und-morepowertool-bios-einträge-anpassen-optimieren-und-noch-stabiler-übertakten-navi-unlimited.2415/ I like to use the last old 2019 driver for this. But I will go into this in more detail later.
Here once again the complete test system in the tabular overview:
| Motherboard: | ASUS Prime X370-A |
| CPU: | AMD Ryzen 7 3800X, 8x 3.90GHz |
| Cooler: | AMD Wraith Prism LED RGB |
| RAM: | Crucial Ballistix Sport LT white DIMM Kit 16GB, DDR4-3200, CL16-18-18 |
| Video card: | PowerColor Radeon RX 5700, 8GB GDDR6 Reference Design |
| Power supply unit: | Be quiet! pure power 11 500W ATX 2.4 |
| Housing: | Fractal Design Focus G blue, acrylic window |
| Fan: | Intake: 2x front and 1x bottom Arctic F14 PWM PST, 140mm white Outtake: 1x rear/top Arctic F14 PWM PST, 140mm white 1x Rear Arctic F12 PWM PST, 120mm white |


Kommentieren