


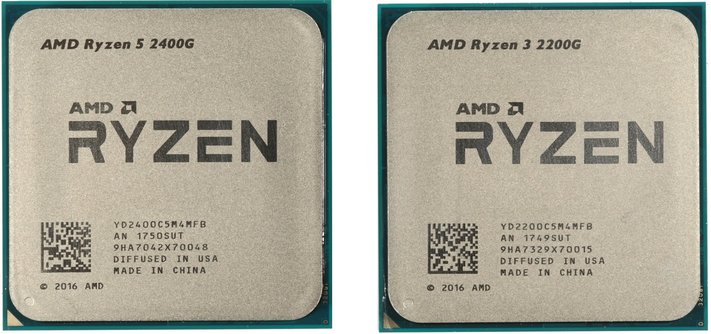
Now that the discussions about thermal paste in AMD's new APUs have made enough high waves instead of the metallic solder, we want to see how AMD's TIM beats up against a good, conventonial thermal paste and a matching liquid metal paste.
We have already combined it in the launch article "Ryzen and Vega: AMD's Ryzen 5 2400G and Ryzen 3 2200G in Test" and in the detailed follow-up "AMD Ryzen 5 2400G and Ryzen 3 2200G: Power Consumption, Clock and Temperatures" and tested that AMD is generally based on the new APUs. use the appropriate thermal paste instead of the otherwise used soft solder and which temperatures you have to reckon with as a result.
If you follow our measurements of the follow-up, the larger of the two APUs still manages not to run into the thermal limit even under Prime95 and Small FFTs with the included Boxed cooler. This only happened when you used both the CPU and the GPU part with a stress test program.
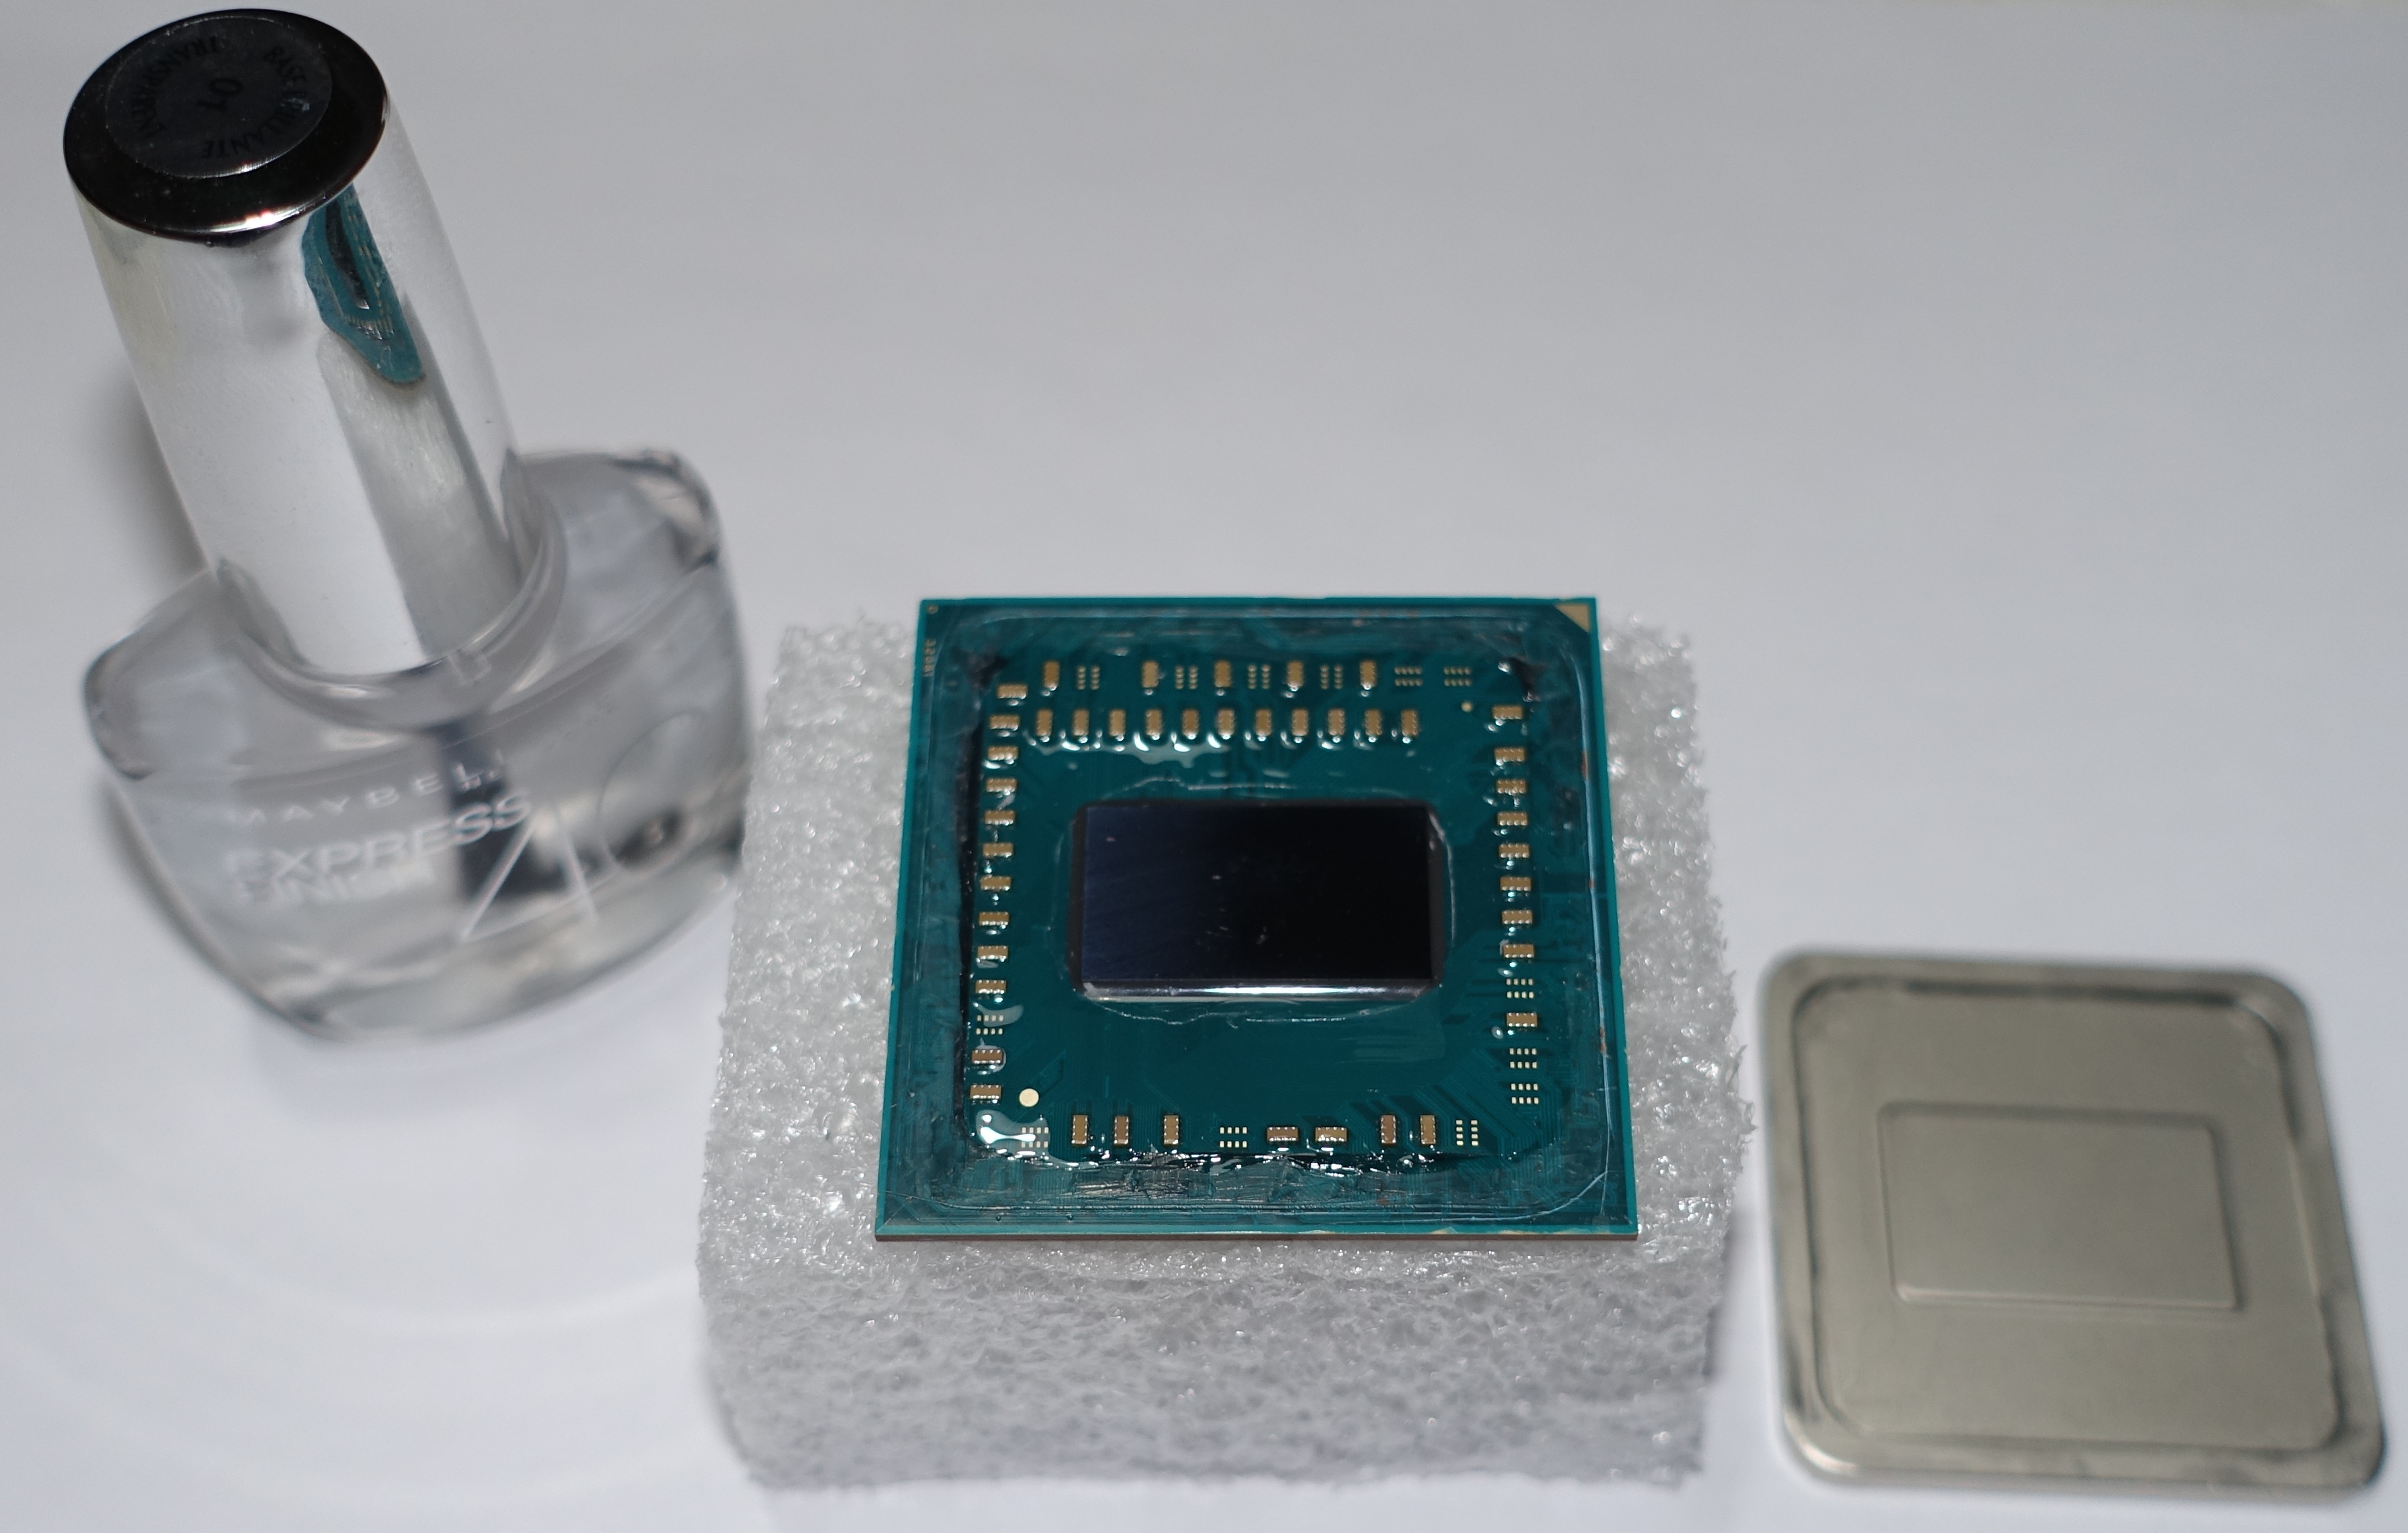
But since the question arose again and again in forums, what if (it would have been lot) and how well AMD's used paste really was, we will answer exactly that now. To do this, we will first remove the Heatspreader of the APU, clean it and perform various tests and benchmarks.
Shaved: We head the APU
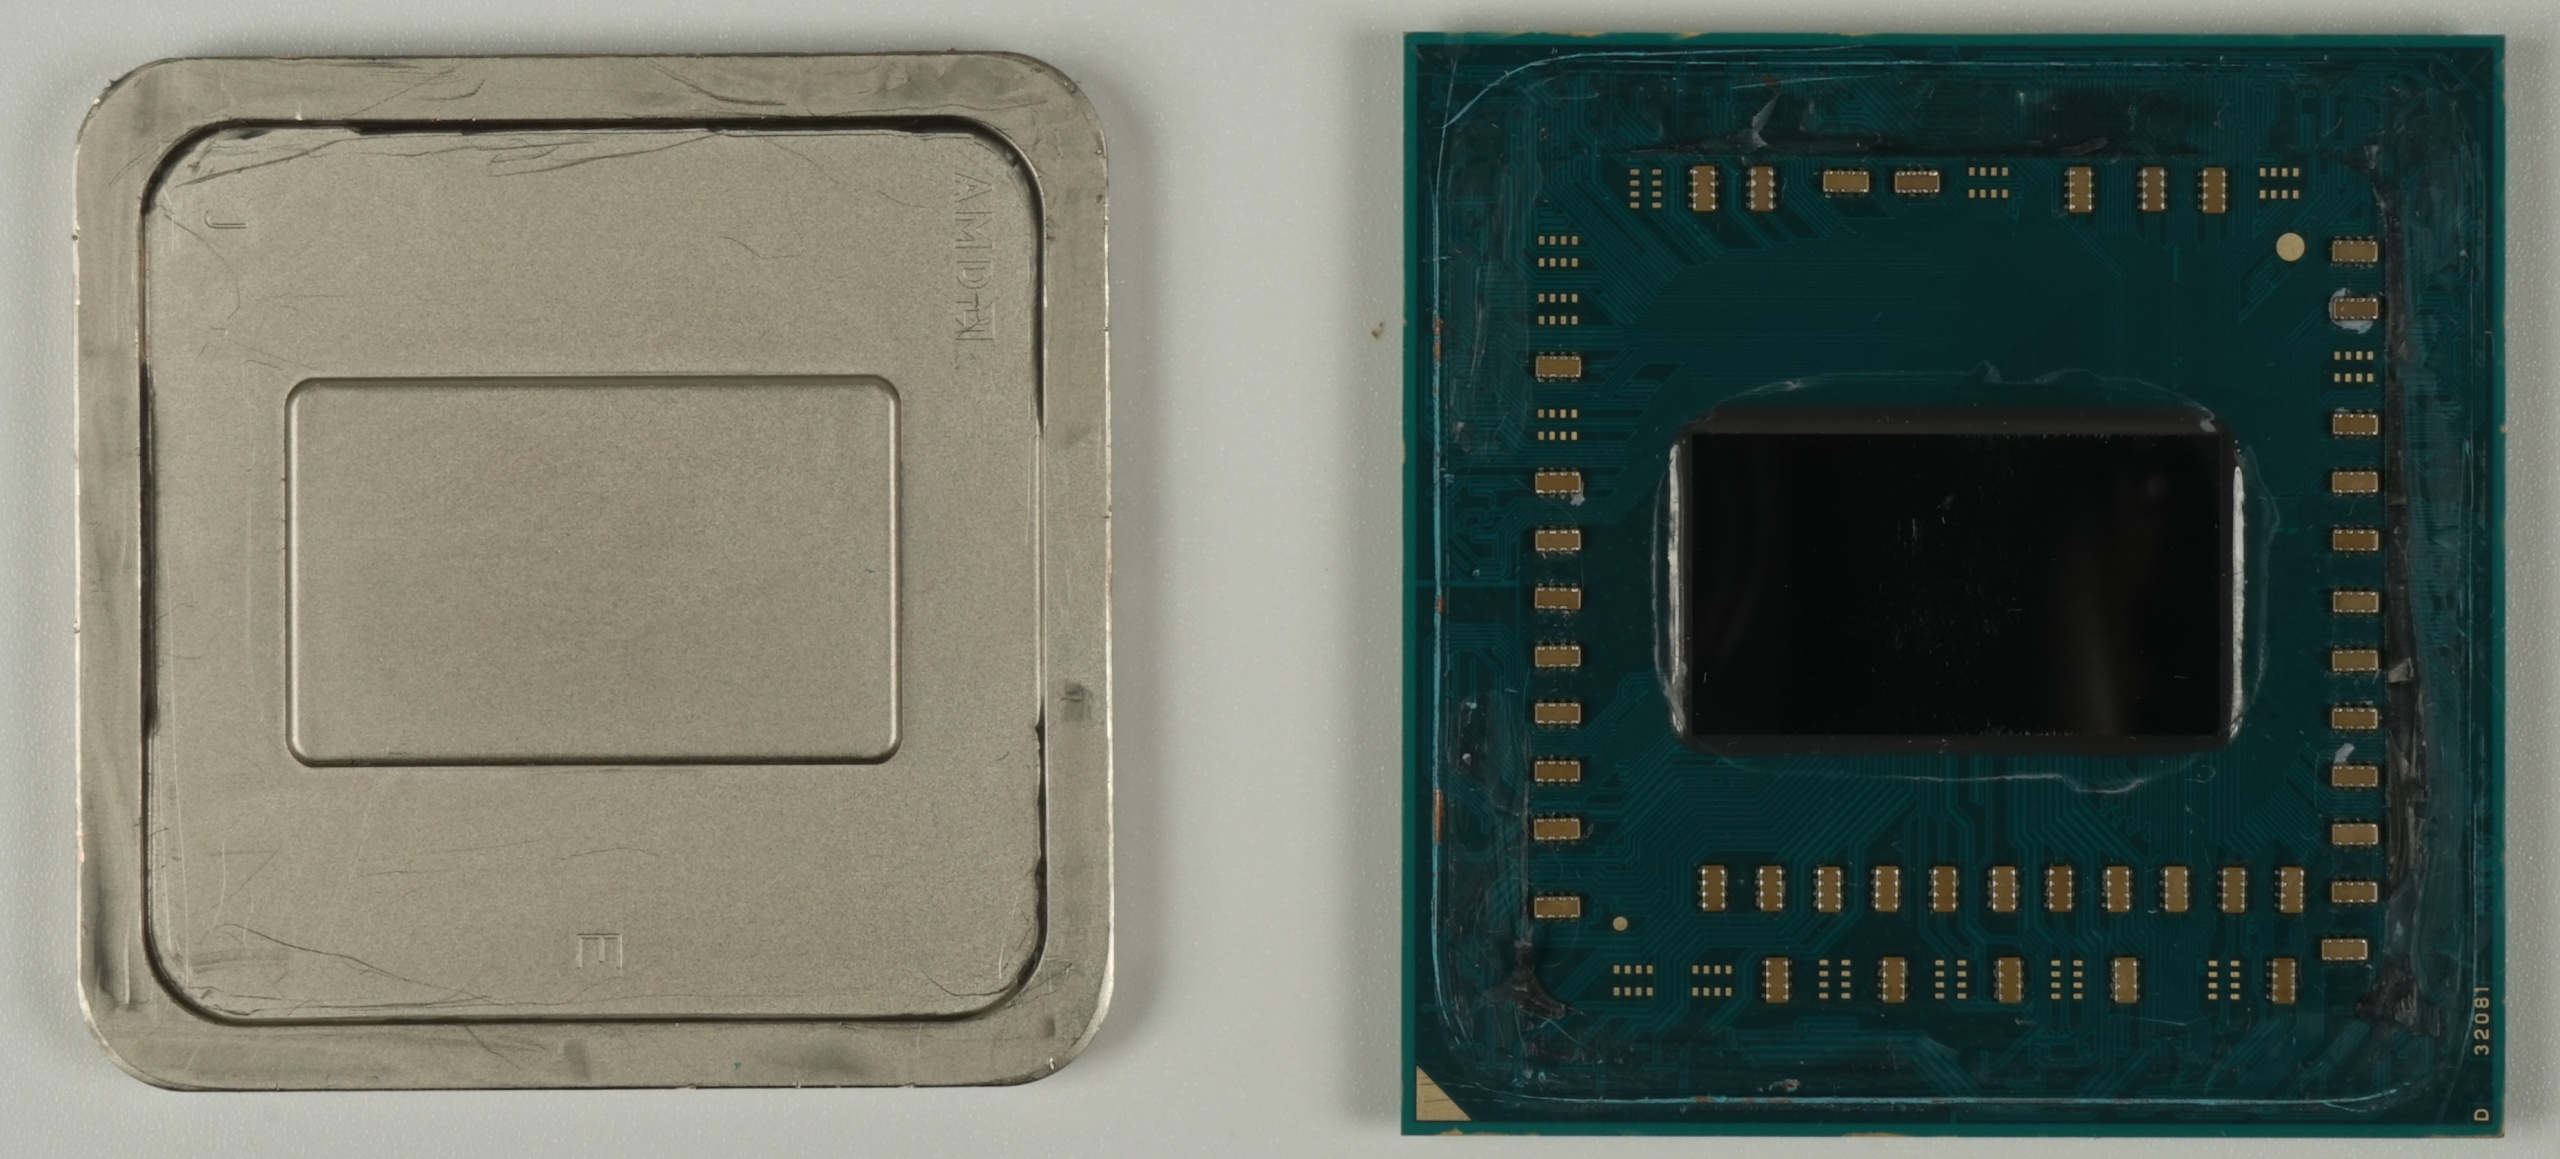
Whether you take a suitable delid tool or the good old razor blade is of course up to everyone. Since AMD is based on a silicone-like, approx. 0.2 mm thick adhesive layer, a stink-normal, old-fashioned razor blade is of course a good alternative. The cut begins exactly where AMD has provided for a recess in the adhesive.
The only hurdle is the SMD components placed very close to the adhesive layer, which must be taken into account. We therefore recommend that you place the APU upright and cut it from top to bottom. We put the blade slightly obliquely, and cut with the corner of the blade from top to bottom, several times carefully in tracks starting from the outside starting inwards. If you feel a resistance, then stop immediately and pull the blade a little upwards and then outwards. But that sounds worse than it really is.
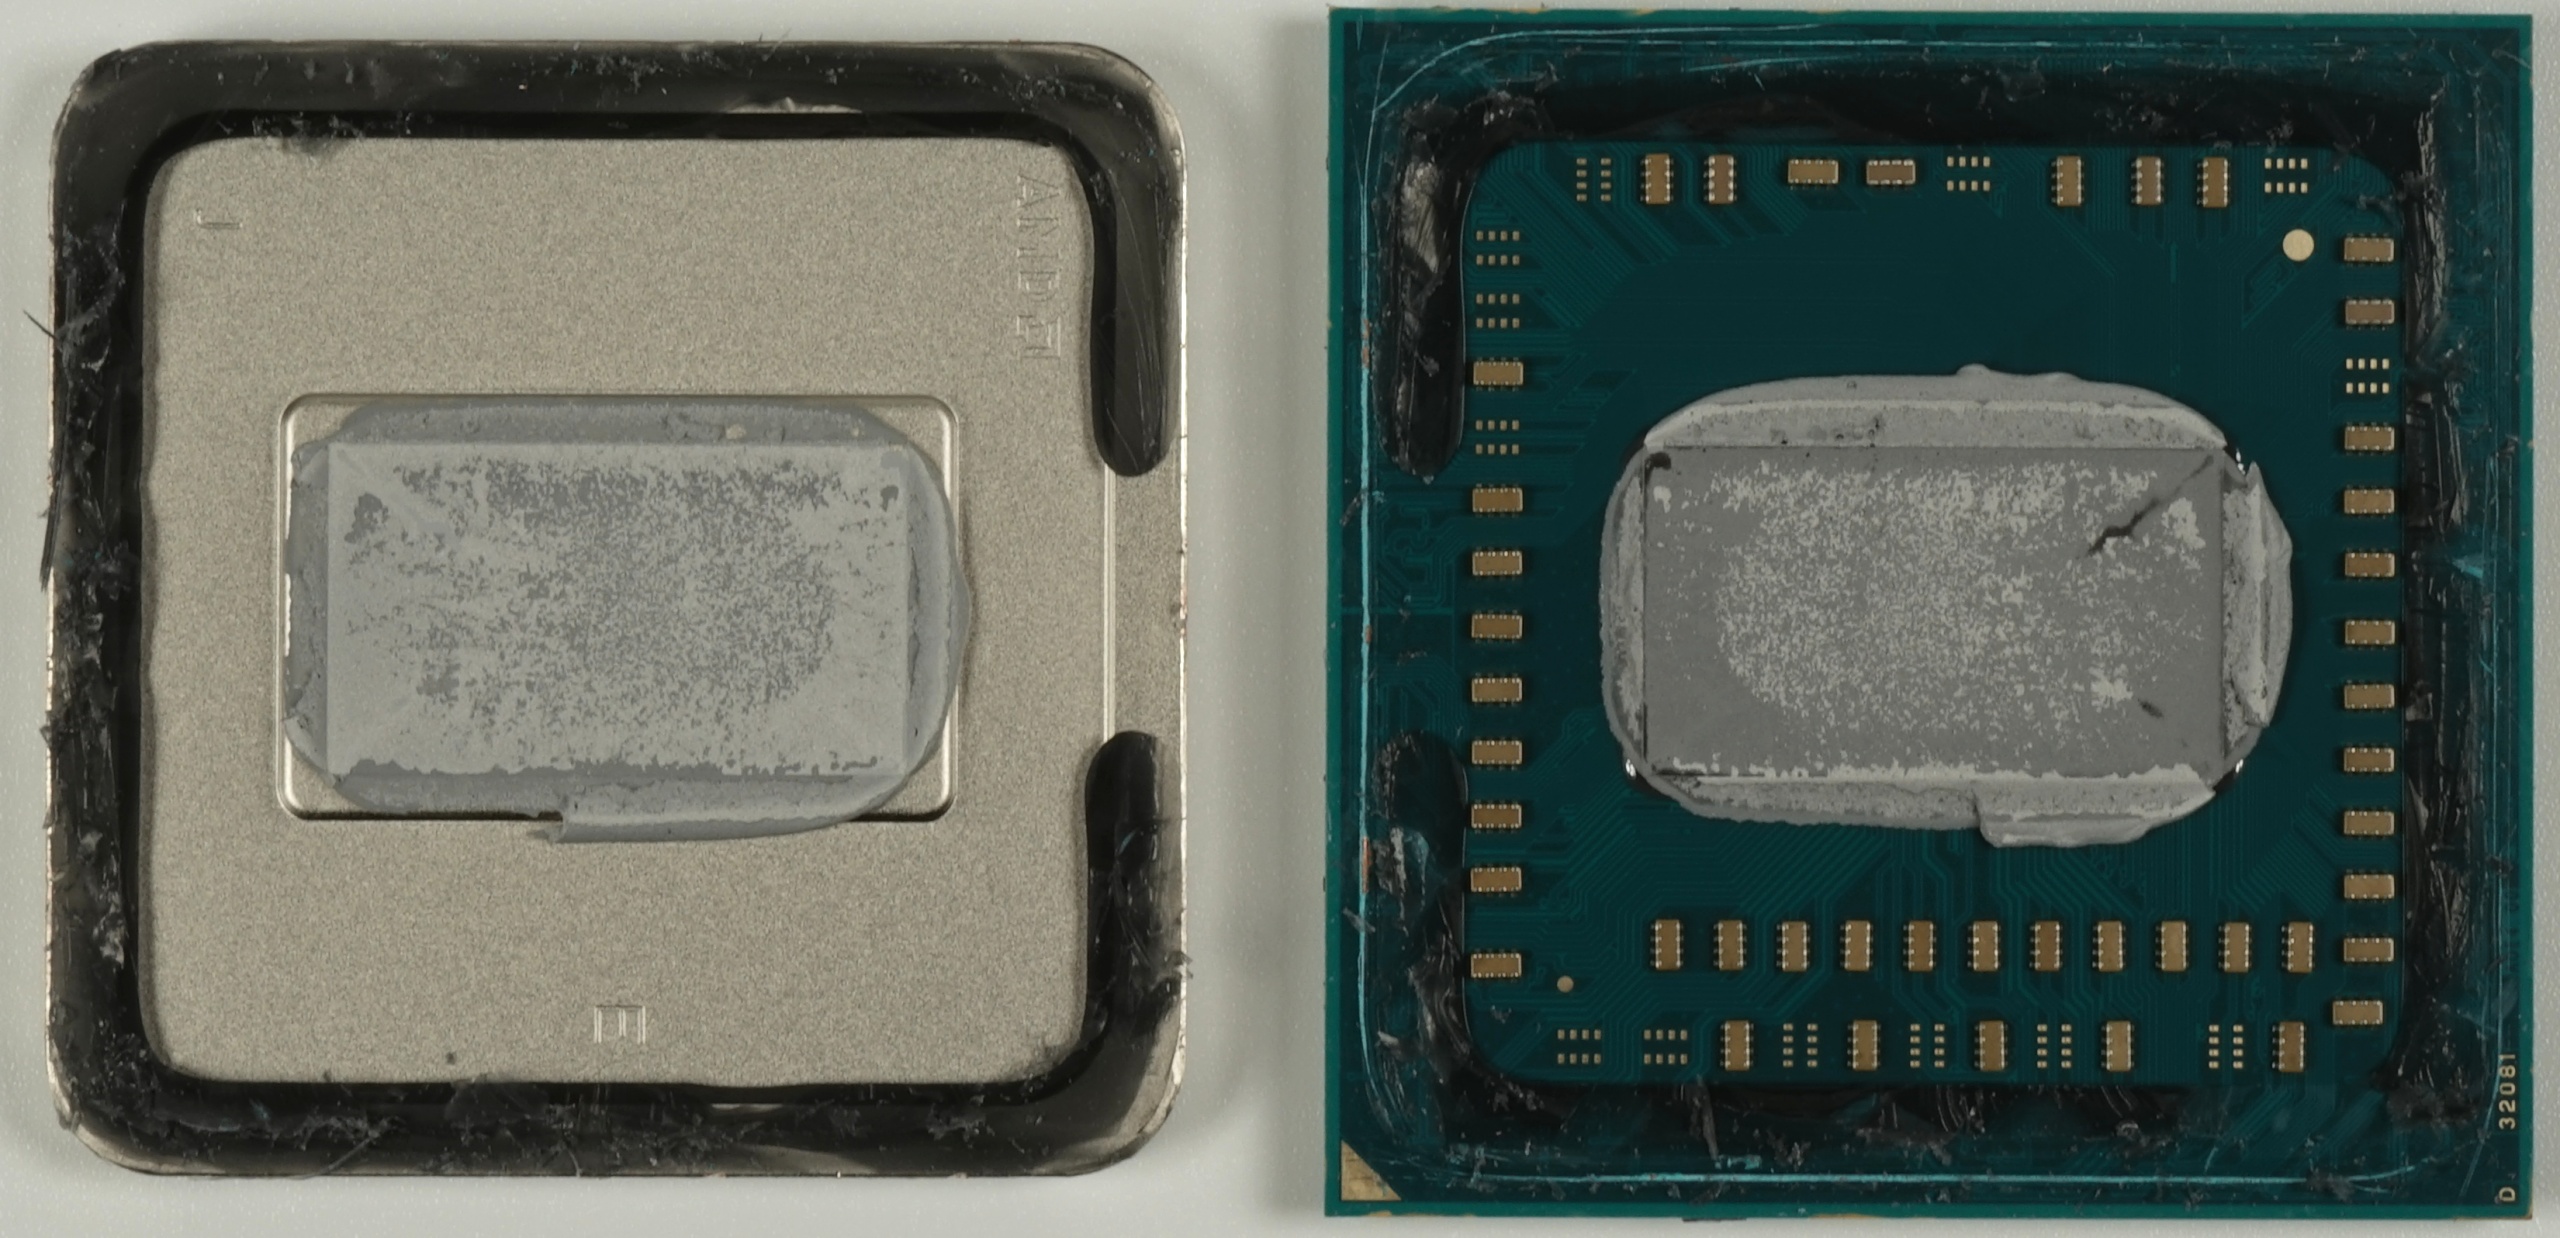
The opened APU we now free from the old, very tough thermal paste. Instead of lint-like kitchen paper, a thin and dry cloth made of fleece is recommended. It is best to wipe around the Die circularly from the outside to the inside. Only for the re-cleaning you can take some isopropyl alcohol or, if necessary, burning spirit. However, acetone and nitro solution are taboo.
Then we use the blade (preferably take a new one) to remove the residues of the silicone glue. This is necessary so that the distance of the re-glued heat spreader does not become too large later.
Intermediate stage: Conventional thermal paste
Whoever drives the effort and removes the heat spreader will hardly replace one paste with the other, but will immediately reach for the liquid metal. But we wanted to know how well AMD's own solution performs compared to the Thermal Grizzly Cryonaut, which is currently one of the best conventional and non-conductive silicone-based thermal pastes. So purely for the sake of interest and for a possible gain in knowledge – but not in order to convert the product definitively. In any case, that would be pure nonsense.
That's why we fixed the corners of the re-attached heat spreader this time only temporarily with hot glue from the outside and later removed it completely again. But the measurement results speak for AMD, so much can be spoiled now. But there's more to that.
Apply liquid metal paste
We now use Thermal Grizzly Conductonaut for the final conversion, as this liquid metal "paste" is still relatively easy to apply despite certain hurdles. It is important that the surfaces on the Die and the Heatspreader must be absolutely free of grease and dust. Otherwise the paste does not last and you build murks.
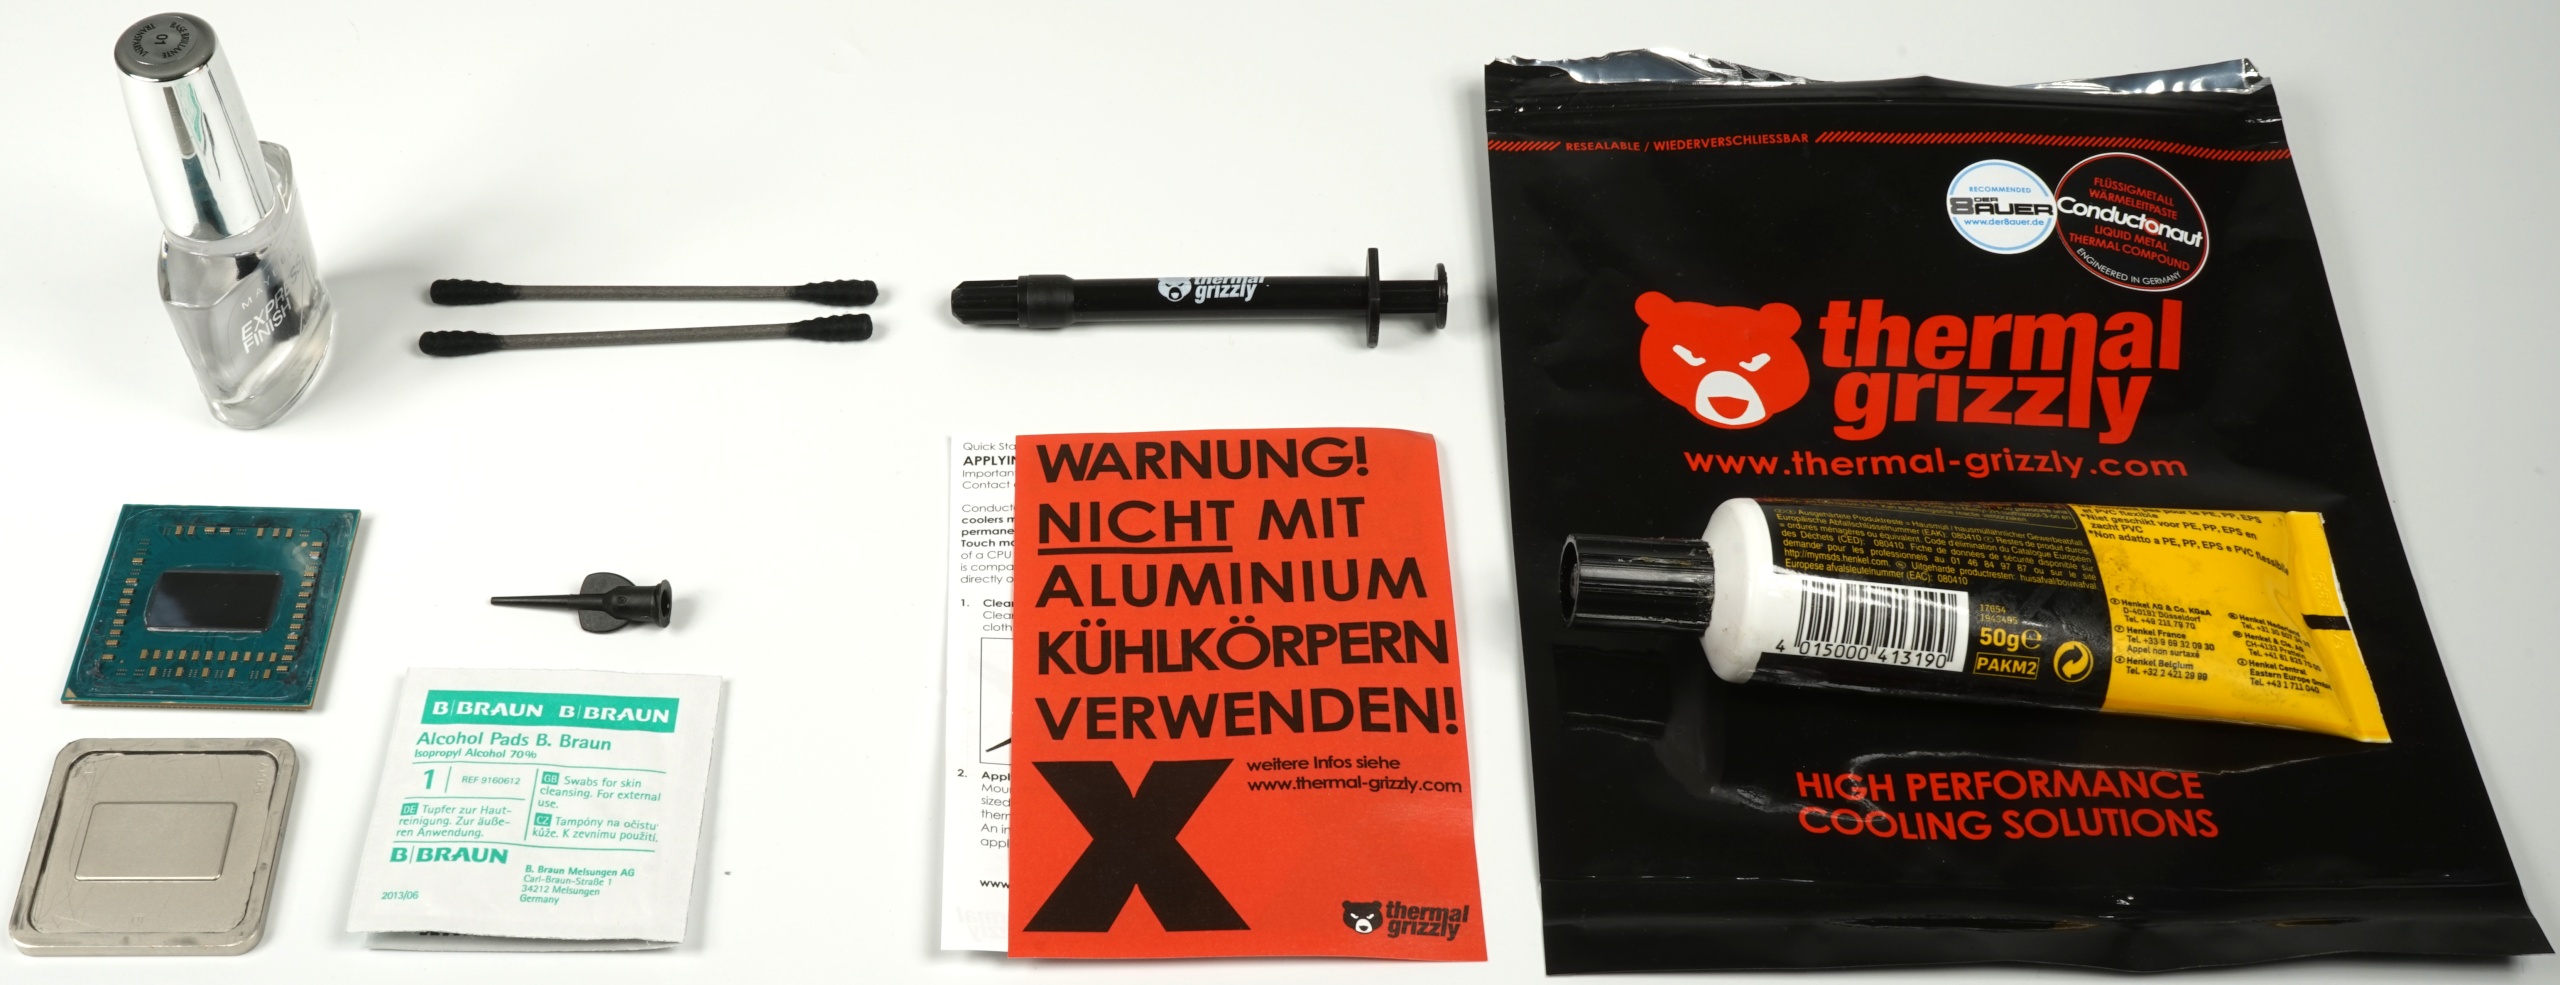
In addition, a good, acetone-free clear coat is required. Here, a slightly better, transparent nail polish is recommended without any colour or effect pigments, which you first have to shake up well before applying. In order not to break off the sensitive pins, we always put amD's CPUs and APUs in functional foam. You never know…
The order should cover all SMD components and the free, unassembled pins on a large area for the first time. If you stroke several times, you may solve the trigger. the original painting of the package on or off, which should be avoided. After that, the paint must first harden by itself. We recommend for complete drying approx. one hour at at least 20°C room temperature.
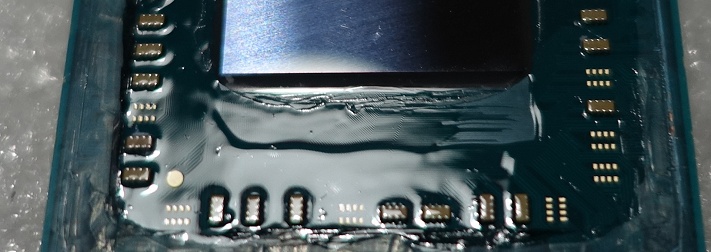
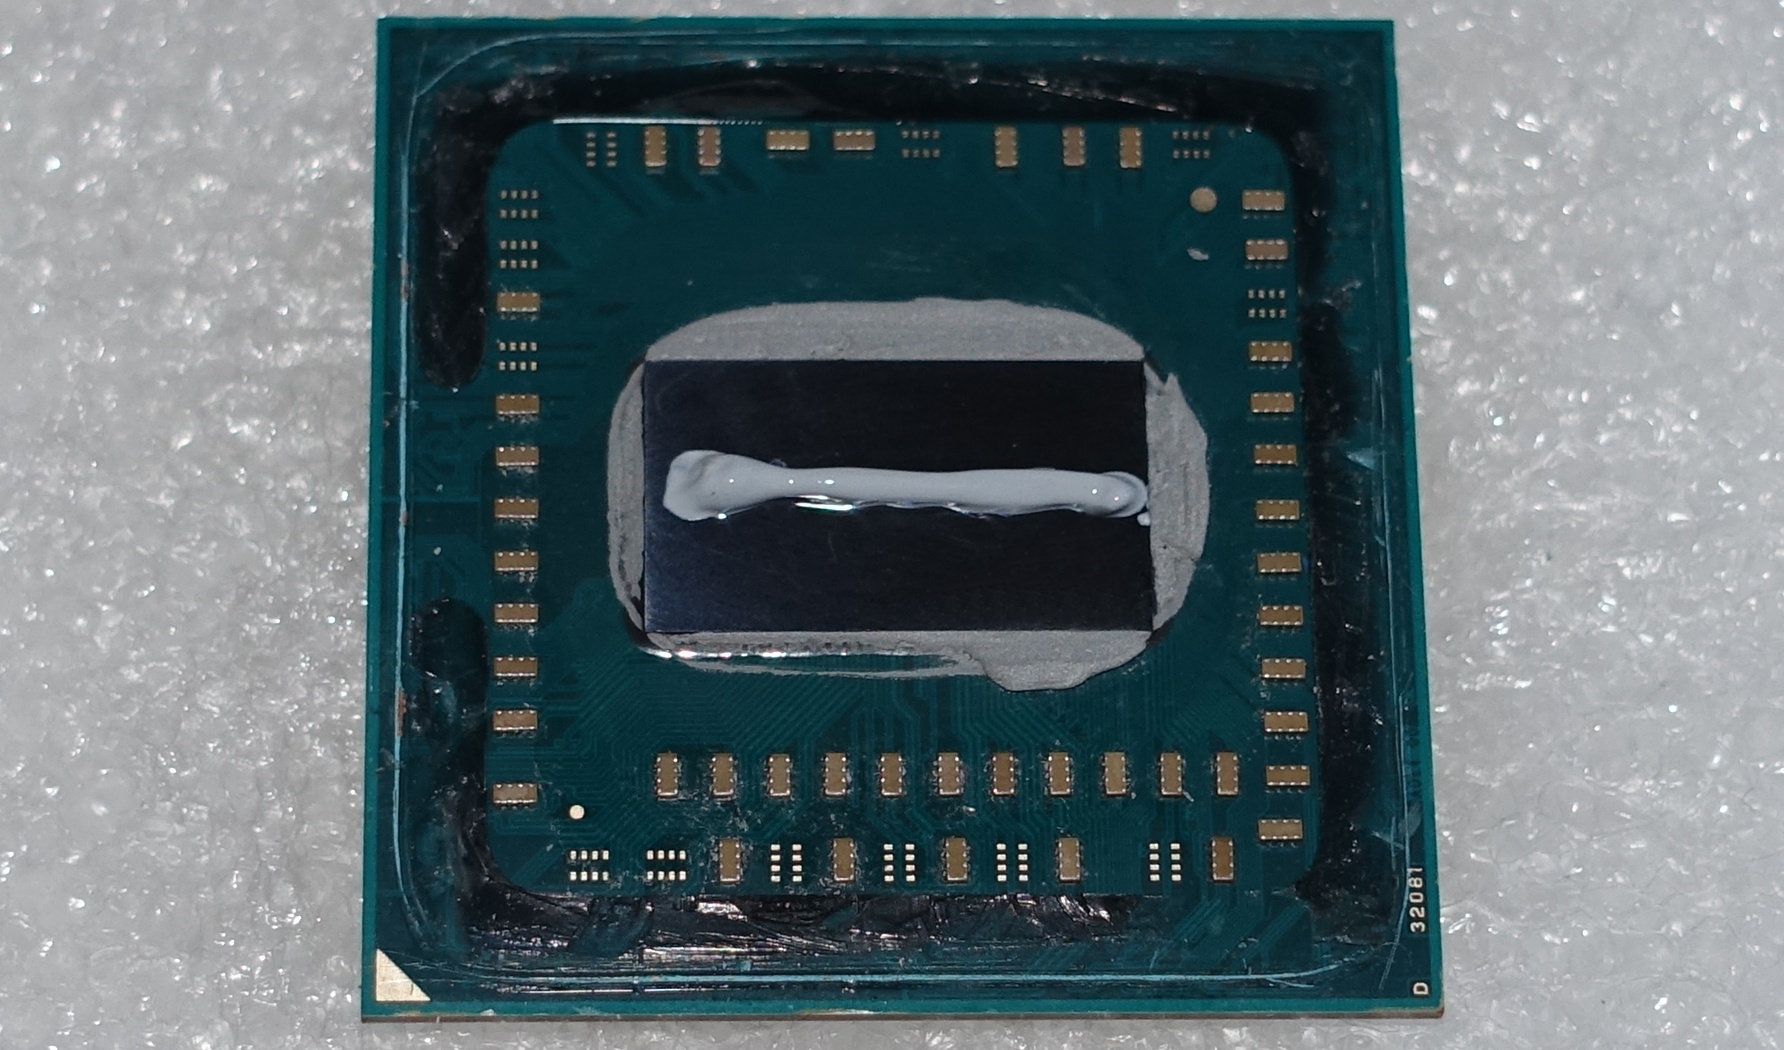
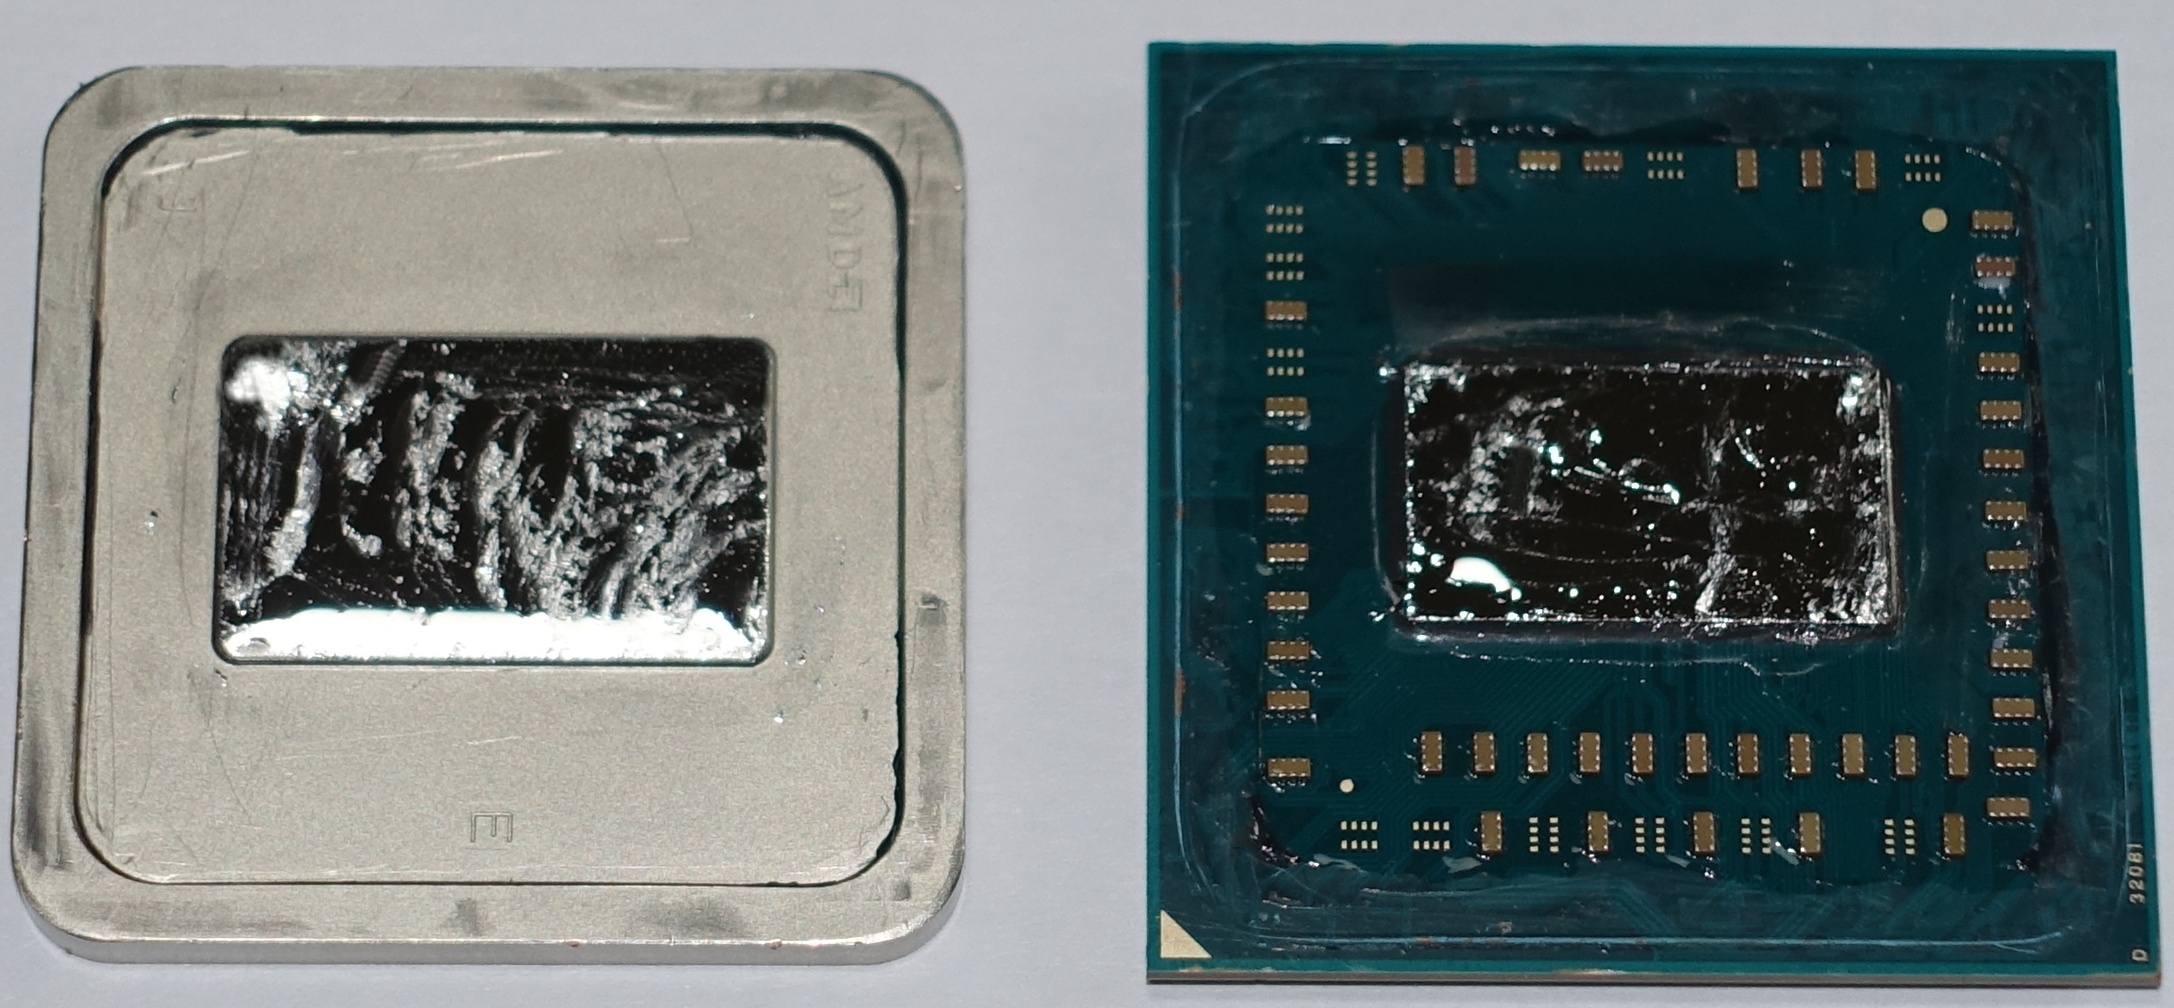
Let us now turn to the application of the Conductonaut. For this purpose, we wet both the Die and the corresponding elevation in the heat spreader very thinly. An application from the syringe in the form of a small ball is completely sufficient. Better to apply a little less and later squirt a little more if it was too little. For this purpose, the supplied applicator (the thin top tip) must be used, otherwise far too much liquid will certainly leak out.
With the supplied foam rods, we now pass the whole thing in a circular way in such a way that no liquid reaches the limits, but only the desired surfaces are thinly and evenly covered. If a little liquid metal is crossed later during the pushing, the applied clear coat protects against short circuits.
The final bonding of the heat spreaders to be re-established is done either with second glue or with silicone. Simpler and cheap all-purpose glue, on the other hand, does not hold on to the heat spreader, even if some tubes think that metal would probably work as well. It should be noted, however, that the said gap of approx. 0.2 mm must be filled in such a way that the adhesive touches both sides even after curing or Connects.
Conventional joint silicone is also suitable here. The heatspreader is wetted from both sides when using glue, but with the silicone we only apply it as a thin sausage on the edge of the heat spreader (orientation aid!). Then we put the heatspreader back on the side correctly and don't bother with swelling matrial overflows.
For perfect pressing and drying out, we now carefully place the APU in the base, apply a small blob of a good thermal conductive paste and then carefully assemble the Boxed cooler so that it is screwed diagonally alternately, not edged and does not slip. The commissioning should be made after a first short temperature check with suitable software (e.g. HWiNFO64) by a longer but monitored burnIn (Prime 95, small FFTs). An hour should be enough to reach the final performance. Please note that the silicone approx. needs a day to cure.
Test setup and test system
In order to be able to work out the limits better, the well-known maximum solution is used in parallel with the original air cooler from AMD ("Wraith Stealth") in order to put the APU to the maximum load. Instead of the AMD Boxed cooler, we now rely on an Alphacool ice block XPX and for cooling the liquid on a compressor cooler in the form of the Alphacool Ice Age 2000 Chiller. In addition, we cool the motherboard components such as the voltage converters with a tight breeze of our wind machine, which presses the room air with its 22°C almost against the board and its superstructures. We compare both: the simplest customer solution and enthusiast technology.

Interested parties can quickly get a quick overview of the summary in table form before we start:
| Test systems and measuring rooms | |
|---|---|
| Hardware: |
AMD Ryzen 5 2400G Gigabyte AB350N GAMING WIFI 2x 8GB G.Skill FlareX DDR4 3200 1x 1050 GB Crucial MX300 Be Quiet Dark Power Pro 11, 850-watt power supply |
| Cooling: |
AMD Boxed Cooler
Alphacool Ice Block XPX |
| Thermal pastes: | Thermal Grizzly Kryonaut Thermal Grizzly Conductonaut |
| Housing: |
Microcool Banchetto 101 |
| Monitor: | Eizo EV3237-BK |
| Power consumption: |
Mainboard Sensors, HWiNFO64, Aida64, Custom Software (I. Wallossek)
non-contact DC measurement on the 8-pin EPS connector |
| Operating system | Windows 10 Pro (1709, all updates) |


Kommentieren