


Instructions and commissioning
Now let’s take a quick look at the instructions. In addition to the package contents, the other model variants are also listed here. While the single and dual monitor variants are already available in the Level1Techs Store, the 3 and 4 monitor variants and their firmware are still in the final stages of development. So if you are interested in the latter, you have to be patient for a while or you can contact the technical support, who will surely be able to give you more detailed information.
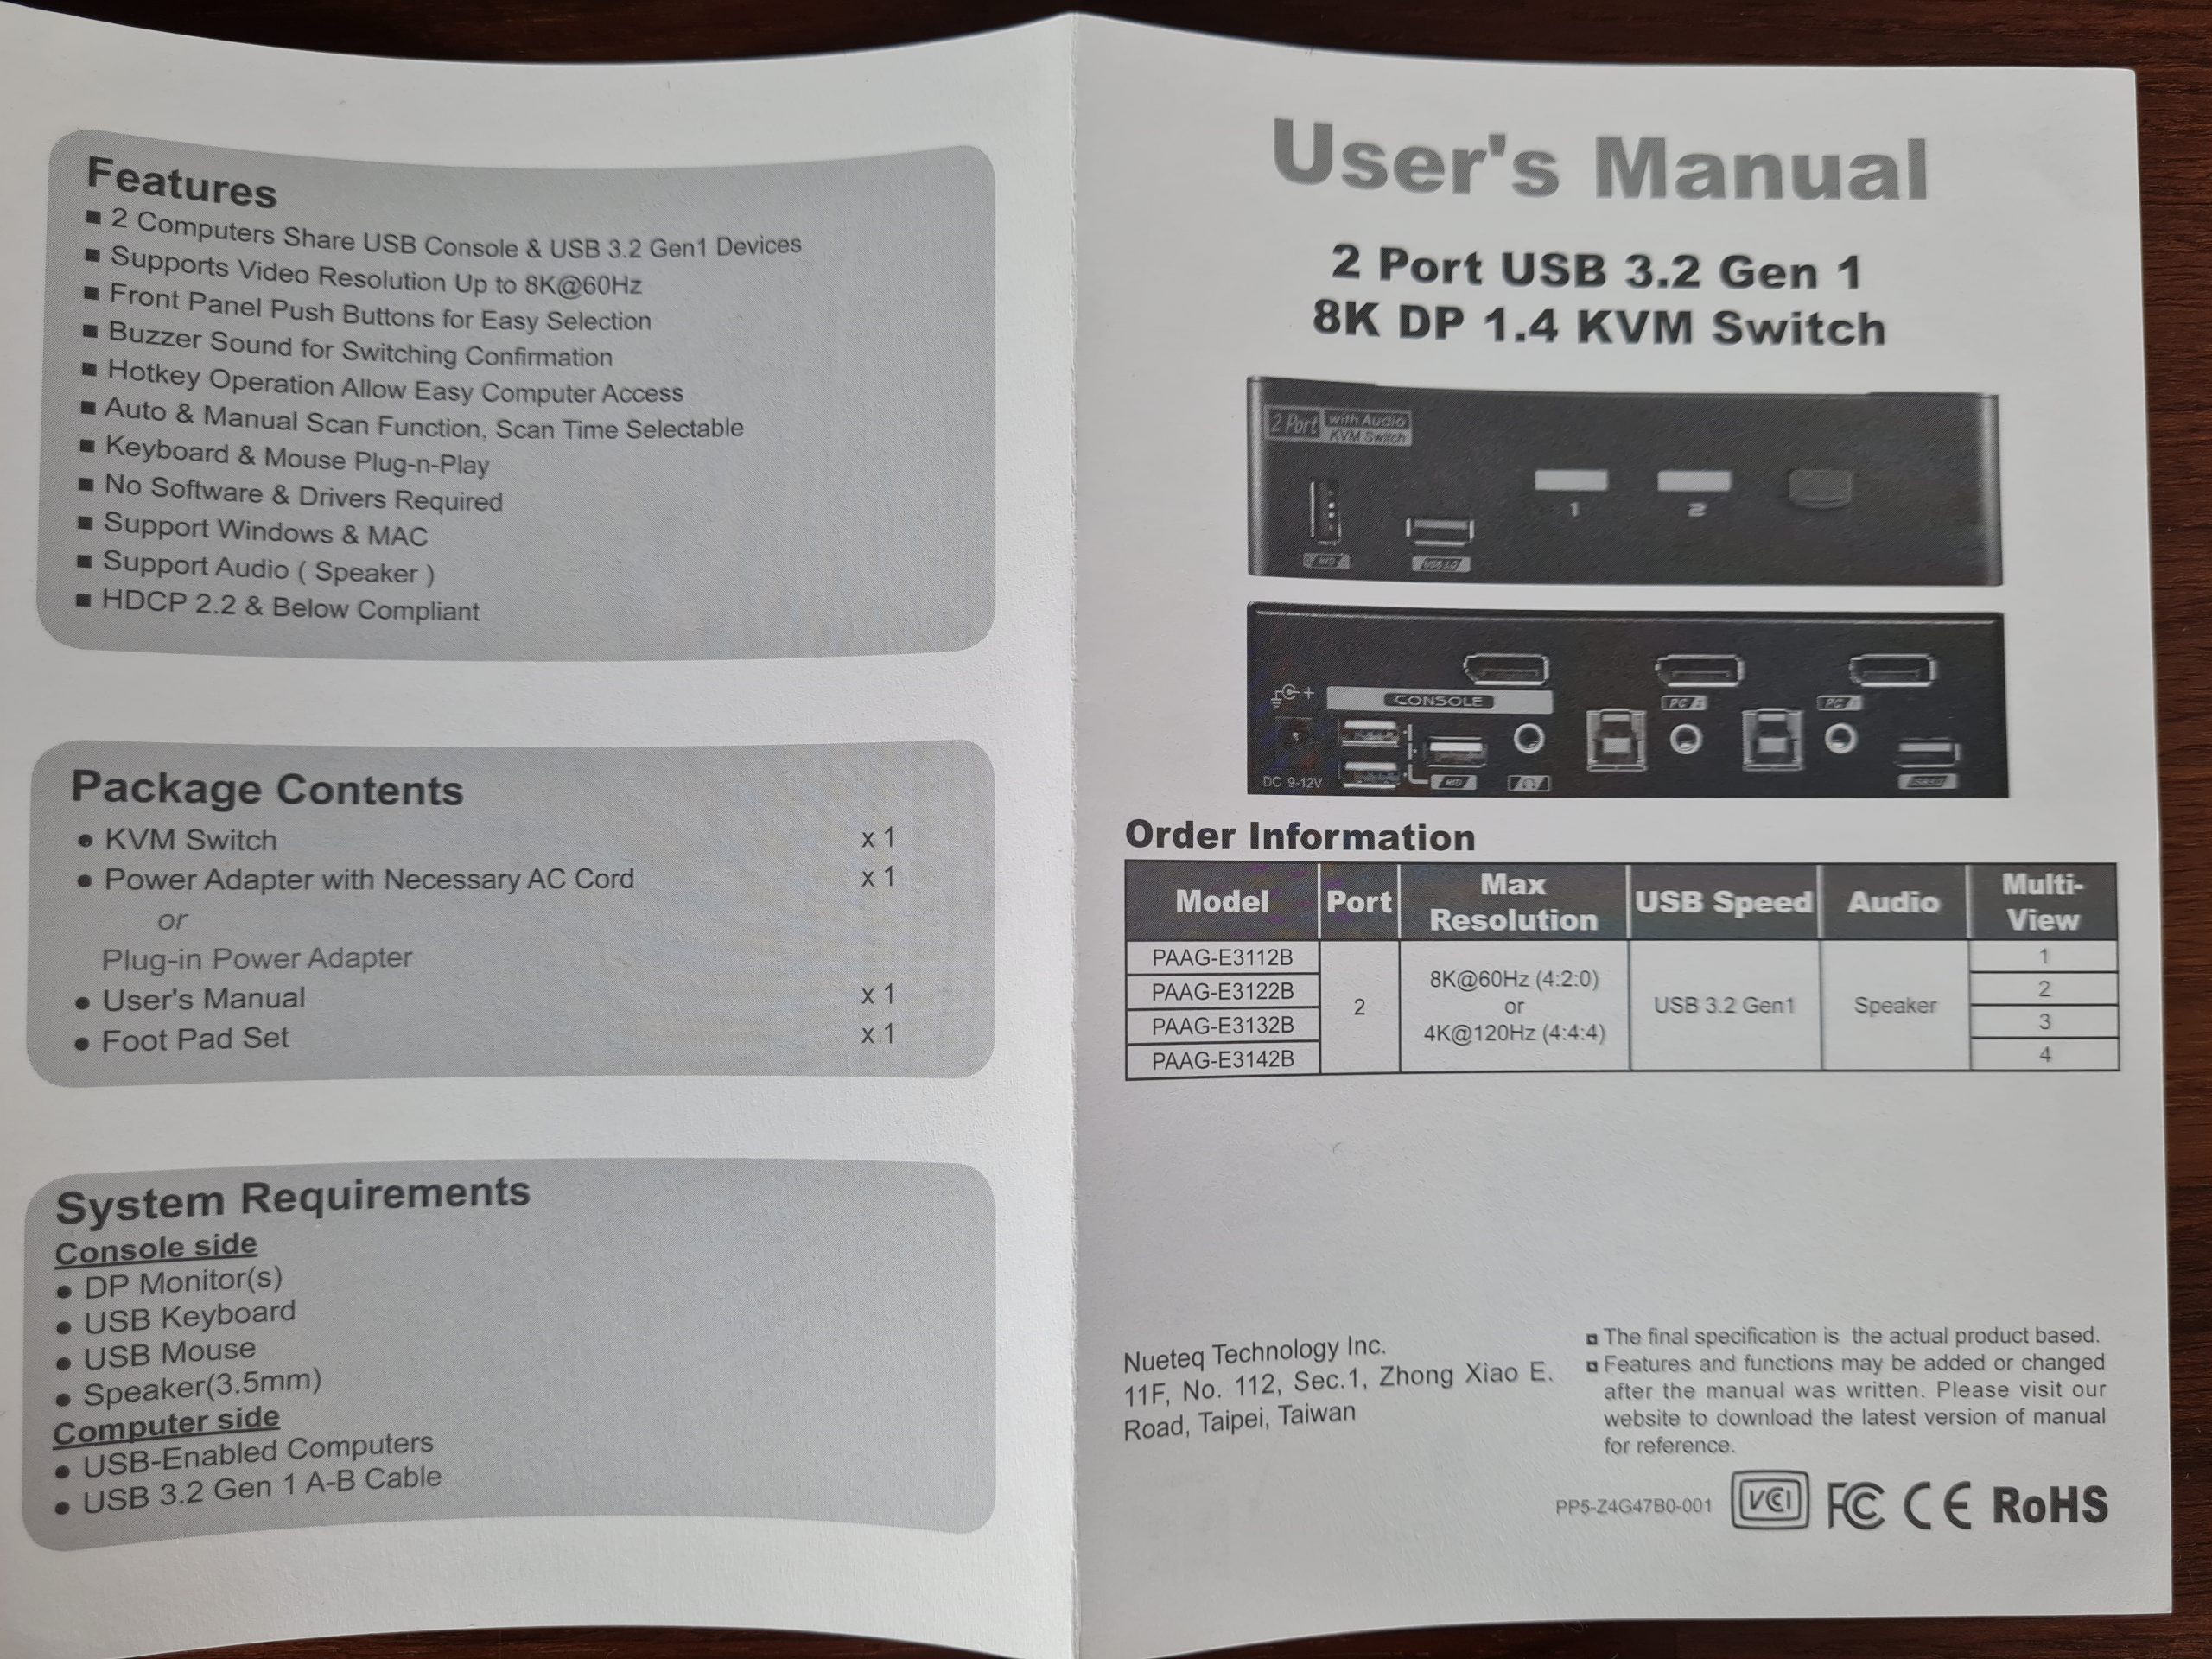
As the product name already reveals, DisplayPort version 1.4 and thus monitors with a resolution of, for example, 3840×2160 at 120 Hz and full 4:4:4 chroma subsampling are supported. As mentioned, this is only an example of the available bandwidth, higher resolutions with lower frame rates and vice versa are of course also possible within the scope of DP 1.4. So I had no problems whatsoever with running 1440p 144Hz and 2160p 60 Hz monitors, provided high quality DP cables with sufficient shielding are used. Even G-Sync or adaptive sync work just fine and there is no additional input lag. The copy protection standard HDCP up to version 2.2 is also supported. So you really get fully-fledged Displayport 1.4 through this little box.
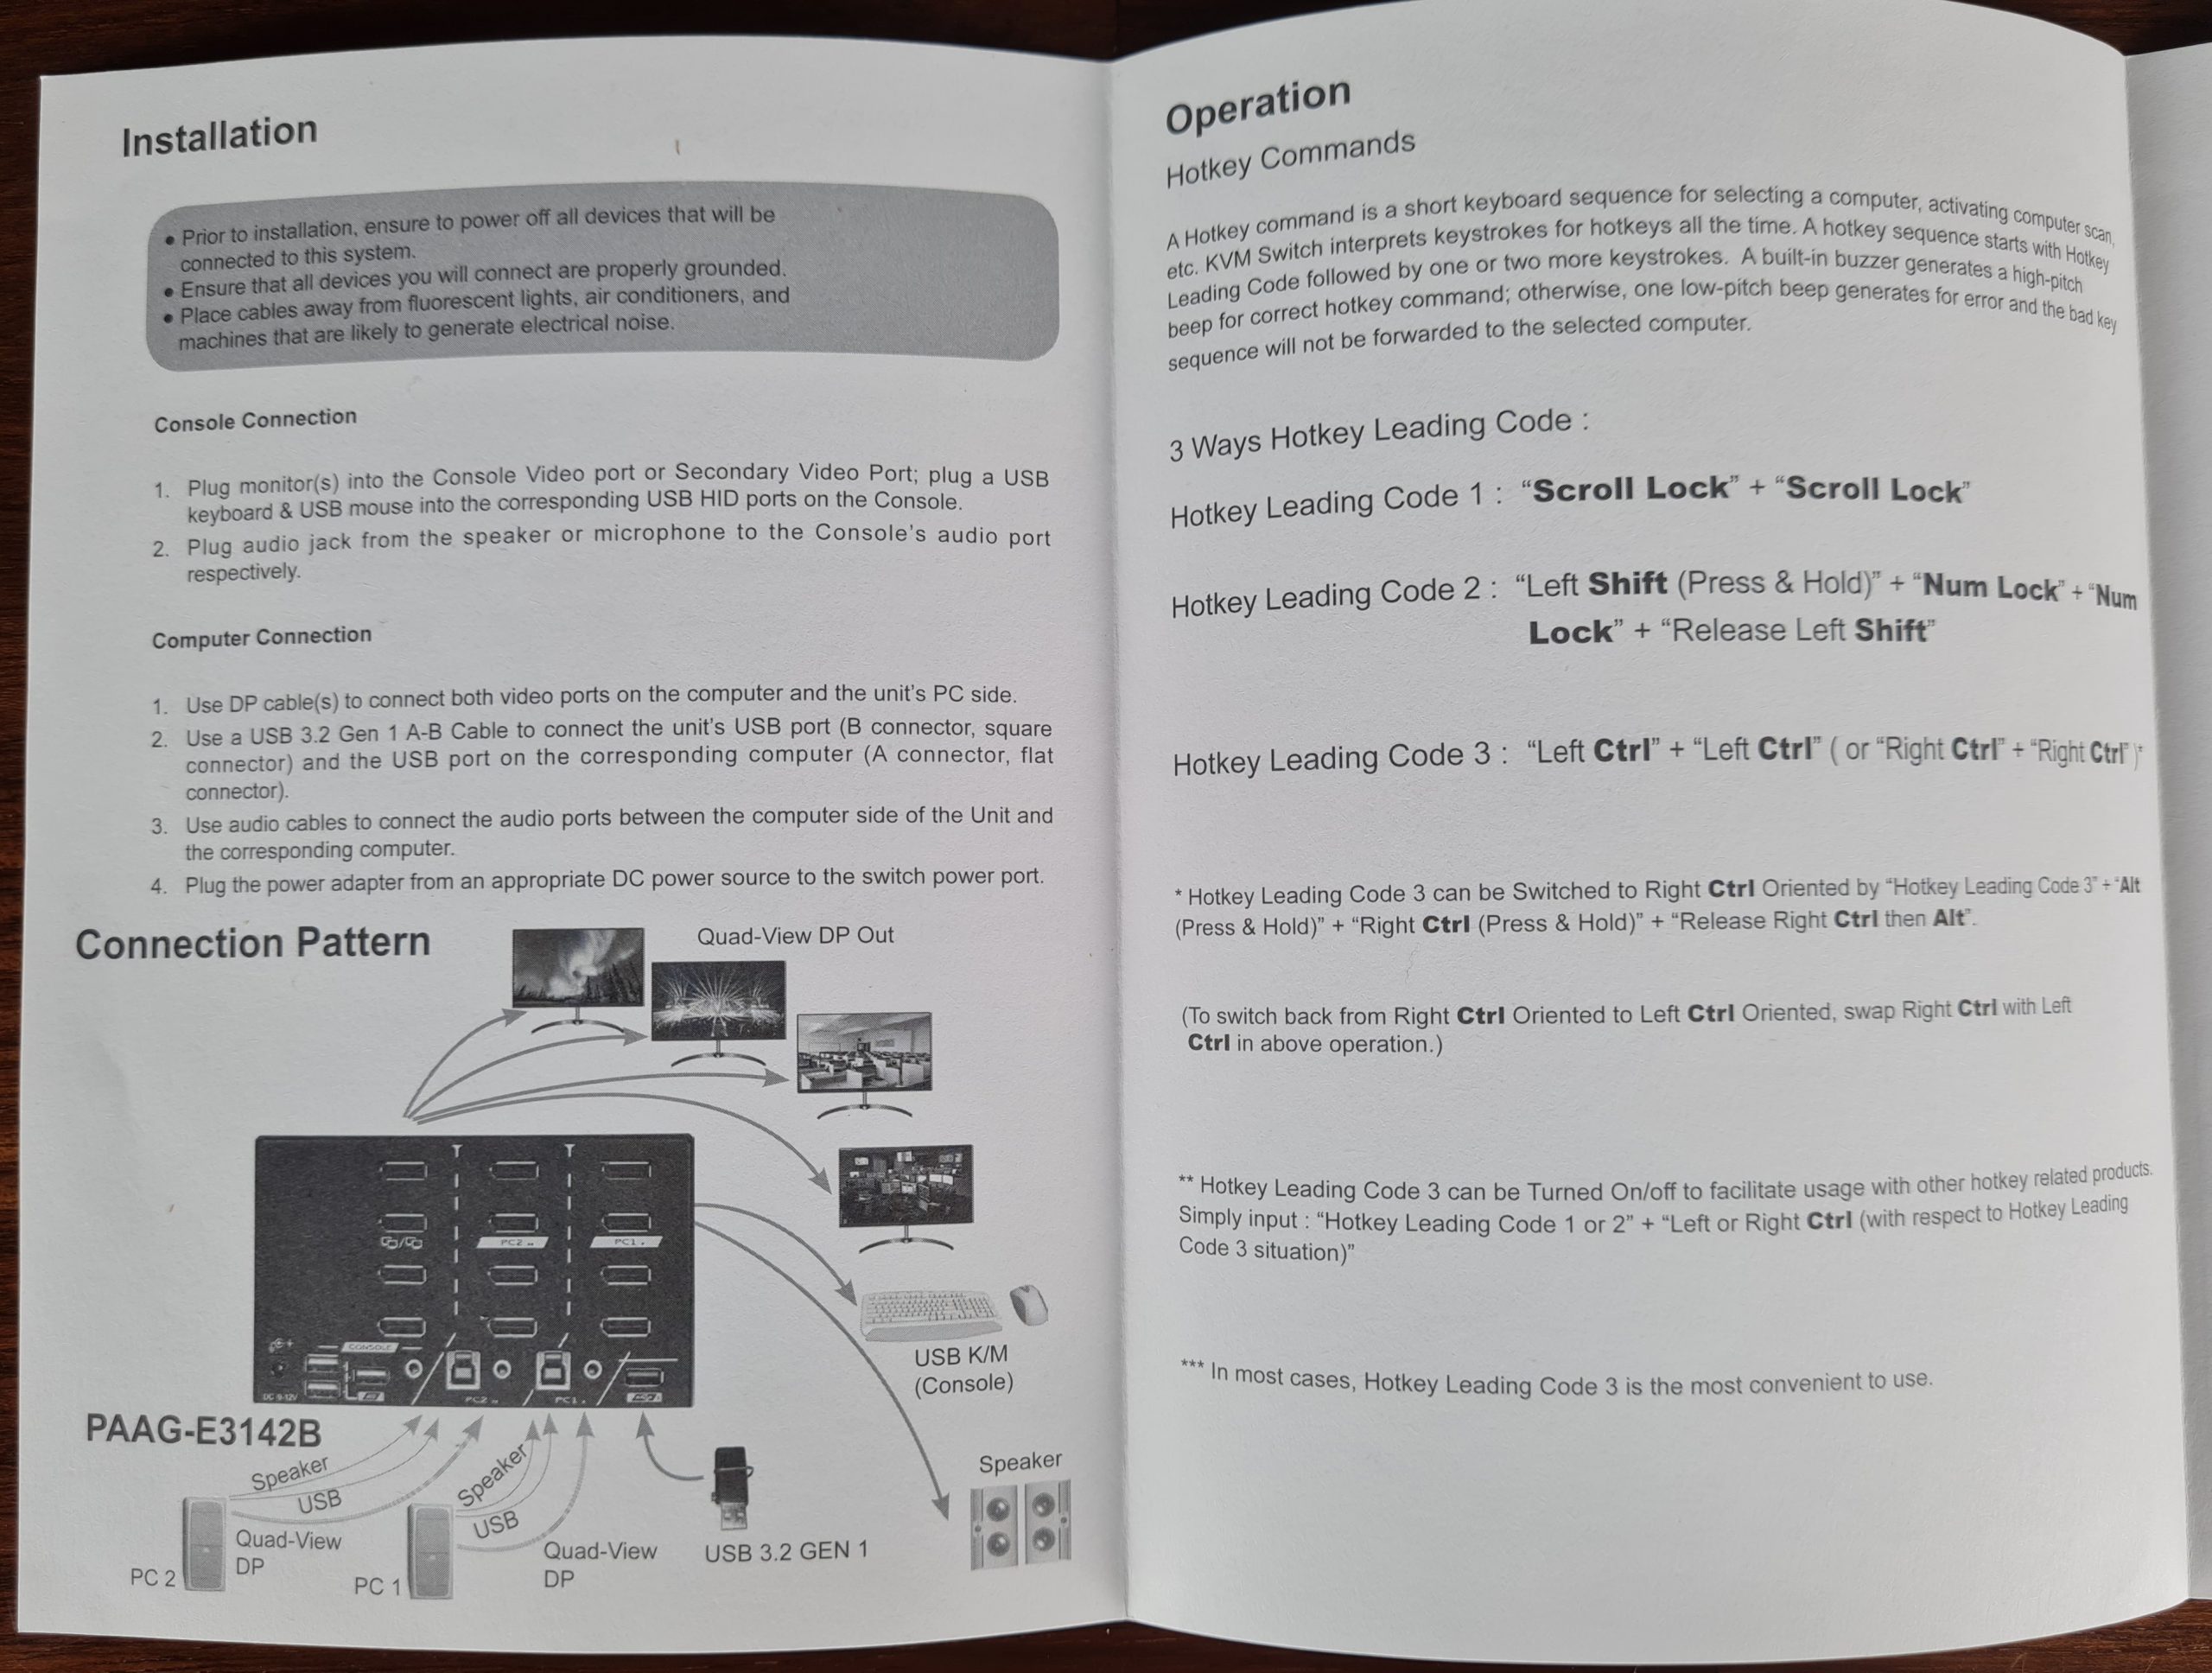
As a nice extra feature, switching between host systems can even be done via hotkey, the only requirement being that a keyboard must be connected to an HID port for this to work. Then you can e.g. switch to one or the other host system by pressing the Ctrl key twice and then pressing “1” or “2”. It is even possible to switch only video and HID ports, but keep e.g. audio or USB 3.0 running on the previous system. This is perfect if you want to listen to music from your private PC while you sort through your emails on your work PC or do anything else that requires HID-only USB devices.
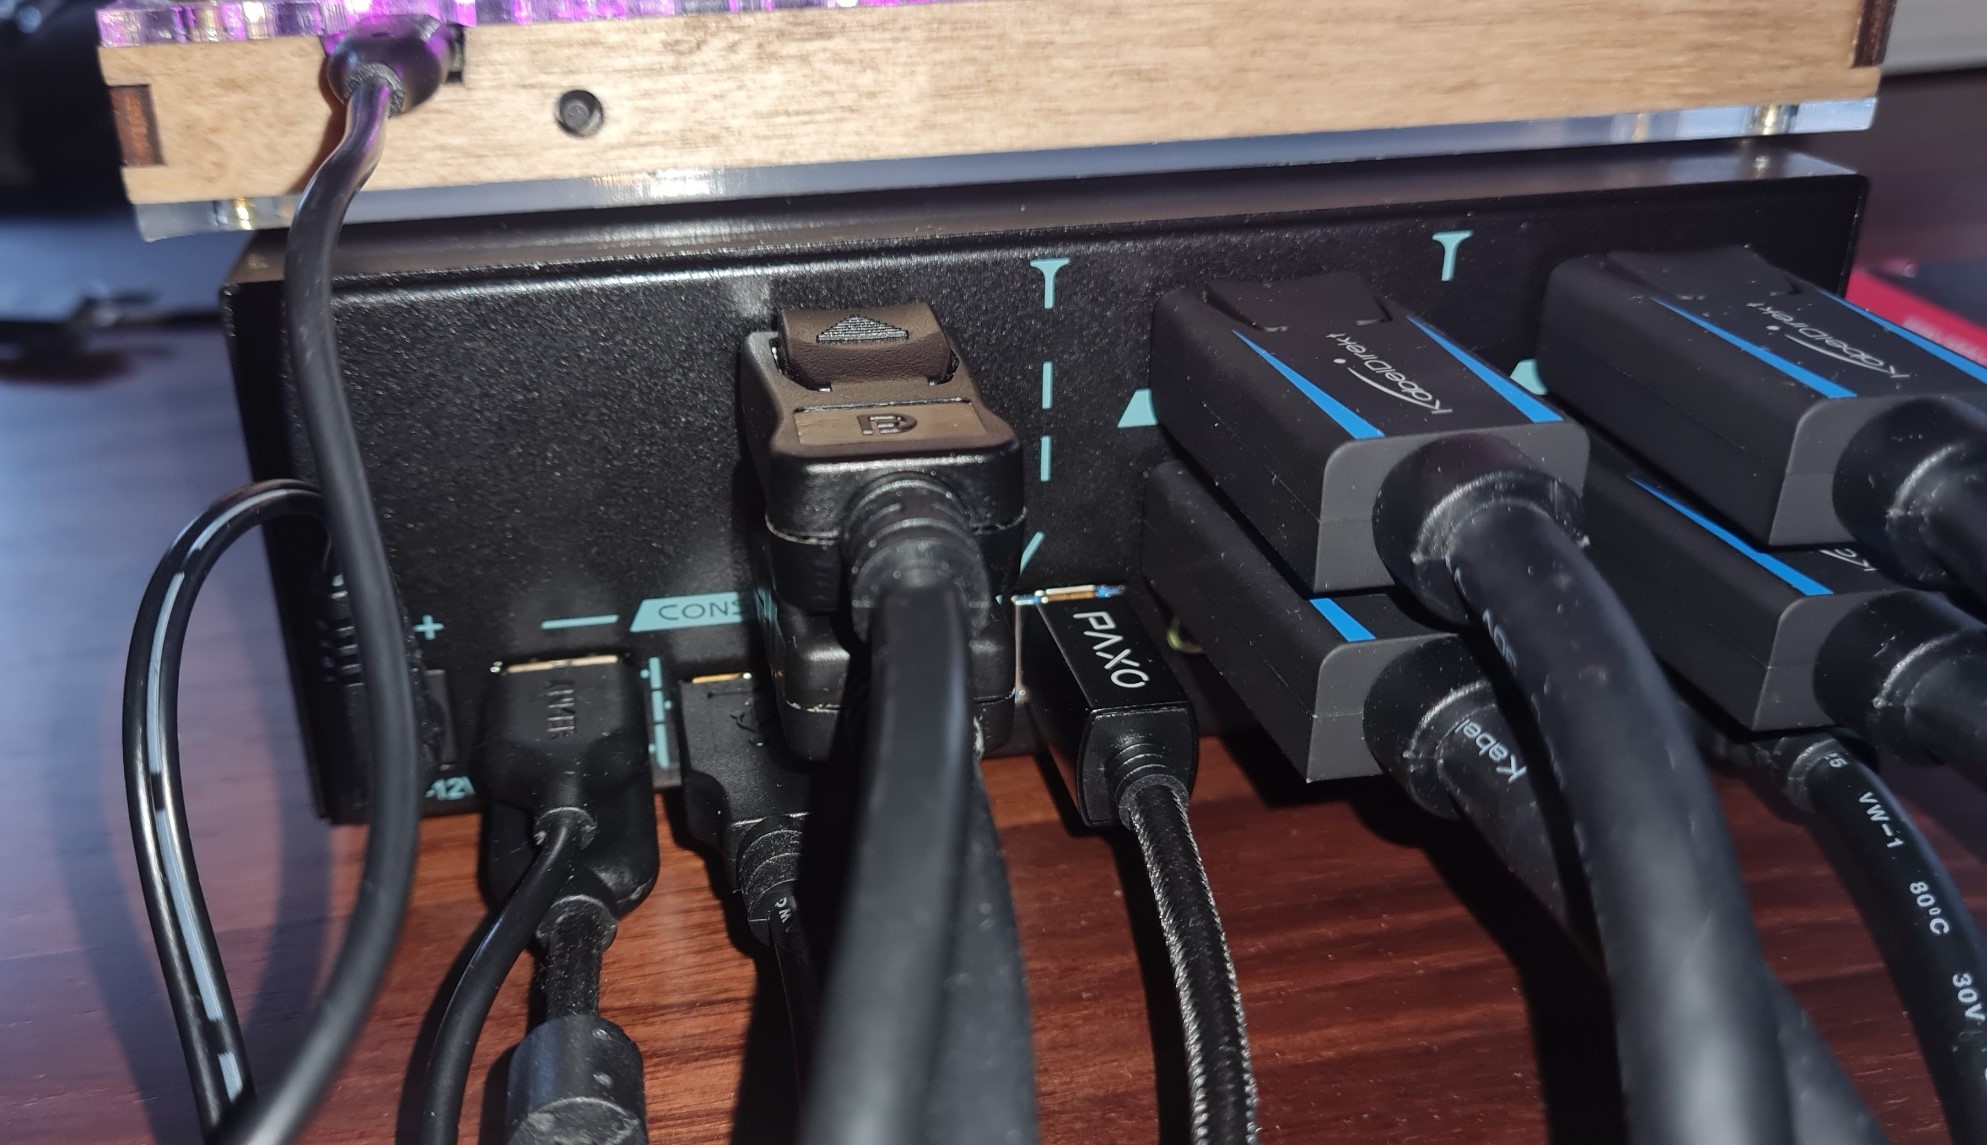
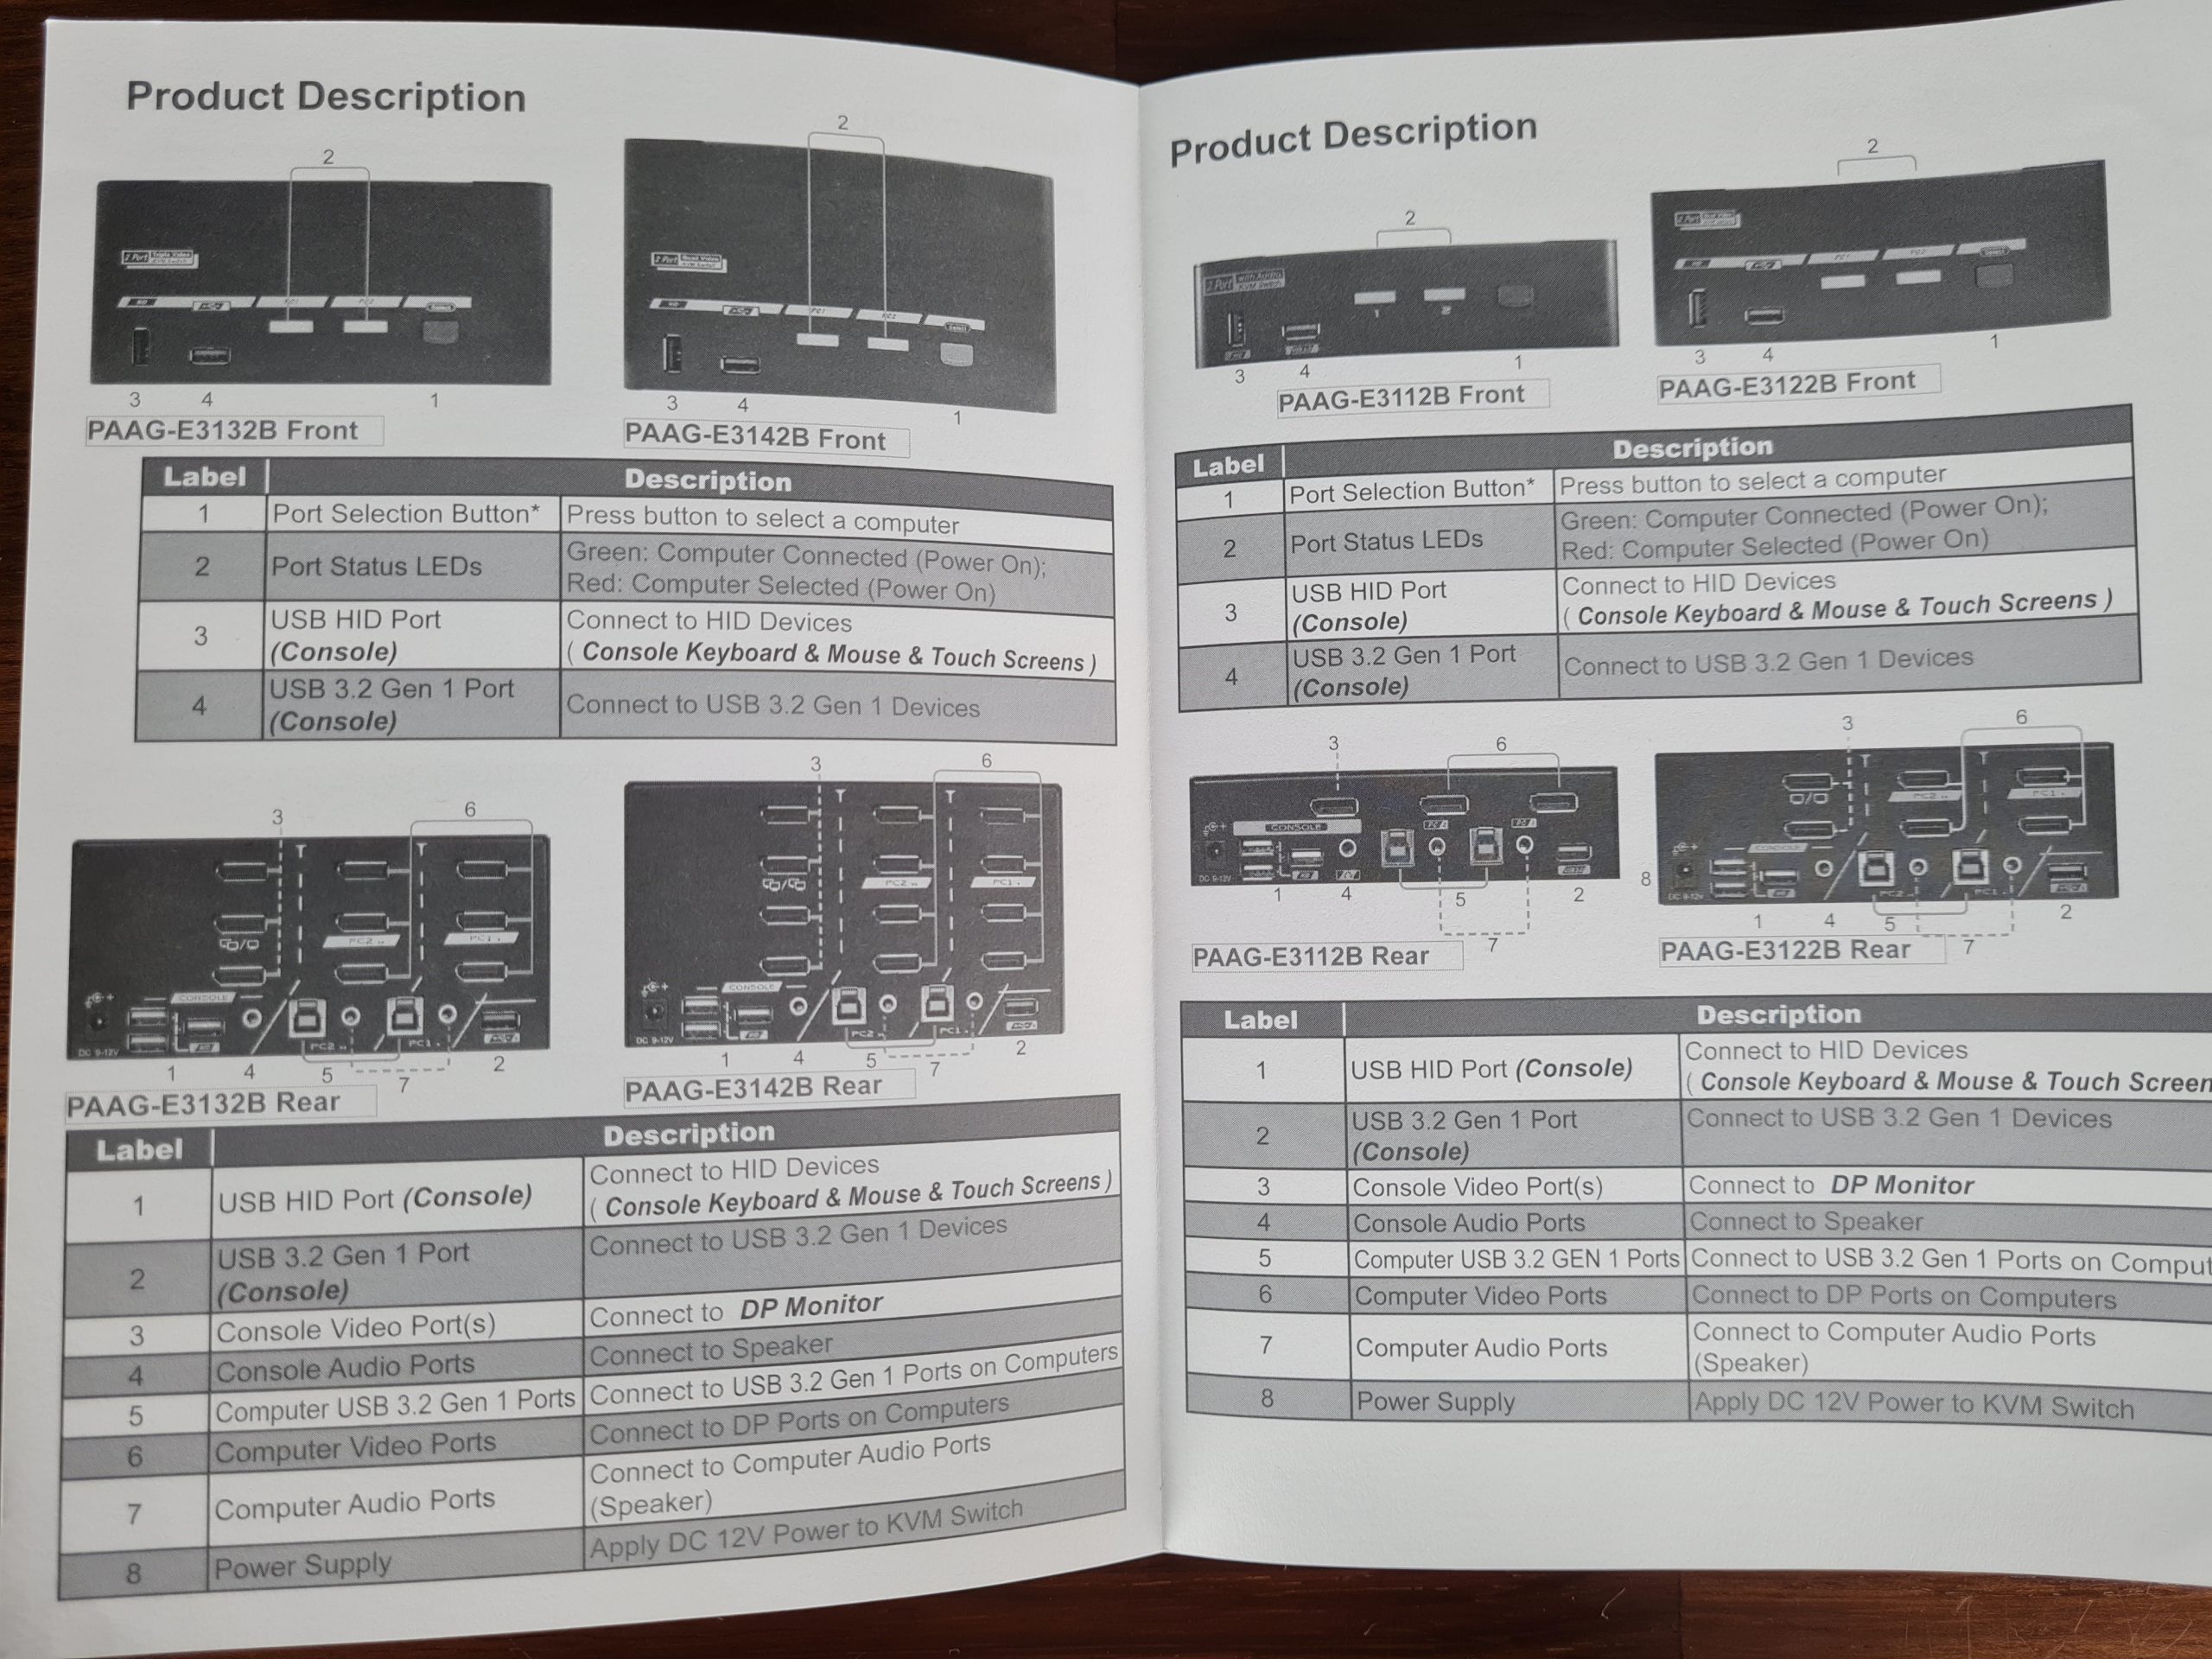
Now let’s take a look at the KVM Switch in the connected state and in operation. Each host system is connected to the uplink ports with a USB 3.0 Type A to Type B cable and two Displayport cables. The monitors are connected to the downlink ports with a display port cable and the rest of the peripherals via USB; a USB 3.0 hub via USB 3.0, keyboard, sound card and microphone via the USB 2.0 HID ports. I successfully tested the 3.5mm jacks once, but do not use them for my setup.
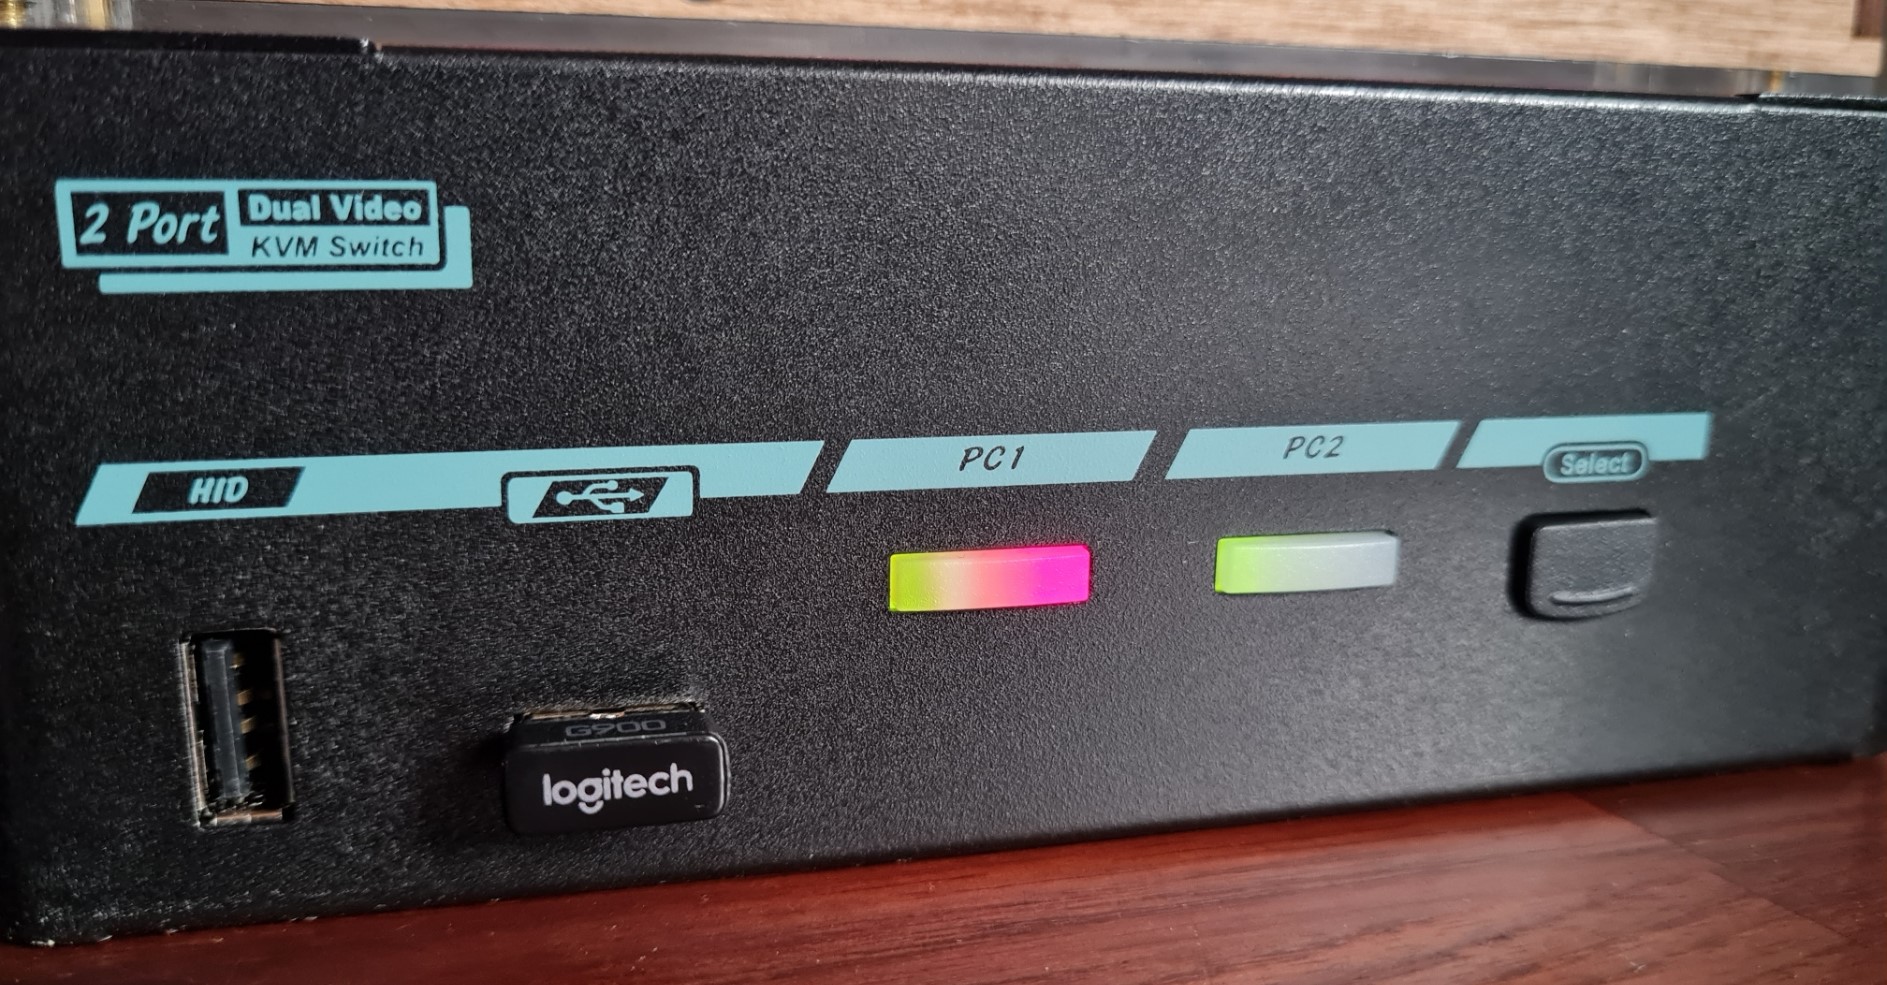
On the front I connected the wireless dongle for my mouse and that’s it. Now all that remains is to power the KVM switch and host systems via their power supplies and the setup is ready to go. This is also indicated by a green LED for successful USB uplink to the host and a red LED for active display output from the host to the monitors. The latter also switches accordingly as soon as you toggle the display output to the other host system.
User experience and conclusion
At first, when starting to use it I had to deal with some quirks. For example, immediately after startup, not all USB devices connected via the L1KVM were recognized by one of the host systems. In another case, the wireless dongle on my Logitech G900 started complaining and sporadically switched to half mouse sensitivity when plugged into one of the USB 2.0 HID ports. As it turns out, the cause in both cases was not the L1KVM itself, but the Windows 10 operating system installed on the host systems.
After the KVM switch was disconnected from the power supply and then reconnected, all USB devices were also fully recognized on the second host system. And the problem with the mouse could be solved by plugging the dongle into a USB 3.0 port. As a counter test, I also booted a Fedora Live ISO once on one of the host systems, where no more errors were observed on the USB 2.0 HID port either. As Wendell from Level1Techs put it: “usb is an evil protocol that has aged me 5 years :)” and the Windows driver stack certainly doesn’t make it any easier.
Since I was able to get rid of those initial gremlins, the L1KVM has been working flawlessly and as you would expect. There is nothing more to be said about the way it works. The usability is simple and intuitive, freely after the motto “keep it simple stupid”, but in this case you probably don’t need or want more functionality anyway. Overall, this seemingly simple product has made my home office experience extremely easy and I am thoroughly satisfied with my purchase decision, even considering the $440 purchase price tag including shipping.
“But who really needs something like that?”, many are probably thinking now. Well, it’s actually just like the ergonomic office chair or the height adjustable desk. Sure you can get by and work without it. But if you want to stay productive and healthy in the long run, you should make your stay at your workplace as comfortable and easy as possible. There is a reason why companies often invest thousands of euros in equipping a single workplace, actual hardware excluded.
And just because you are in the home office and no longer use your employer’s resources but your own, the principle remains the same. Often it is even worthwhile to simply ask the employer whether he would like to take over part of the cost of such an upgrade of the home office equipment, because at the end of the day both parties have something to gain from it. By the way, the test object was bought privately to upgrade my home office and was not provided as a sample.
If you want to know more details about the L1KVM, I recommend you watch Wendell’s video on the Level1Techs Youtube channel. And if you’ve already stopped by and you’re interested in technology in the workstation and enterprise environment, leave a subscription while you’re at it. 😉


20 Antworten
Kommentar
Lade neue Kommentare
Moderator
Veteran
Urgestein
Mitglied
Mitglied
Urgestein
Mitglied
Veteran
Mitglied
Veteran
Mitglied
Mitglied
Veteran
Veteran
Mitglied
Neuling
Mitglied
Mitglied
Alle Kommentare lesen unter igor´sLAB Community →