


We’re building a nuclear power plant a ZFS pool
Now it’s time for the actual configuration of the NAS, let’s start setting up the hard drives for data storage. As mentioned earlier, TrueNAS uses the file system and volume manager ZFS. To understand the contexts, we will learn some “vocabulary” on the way, learning by doing, so to speak.
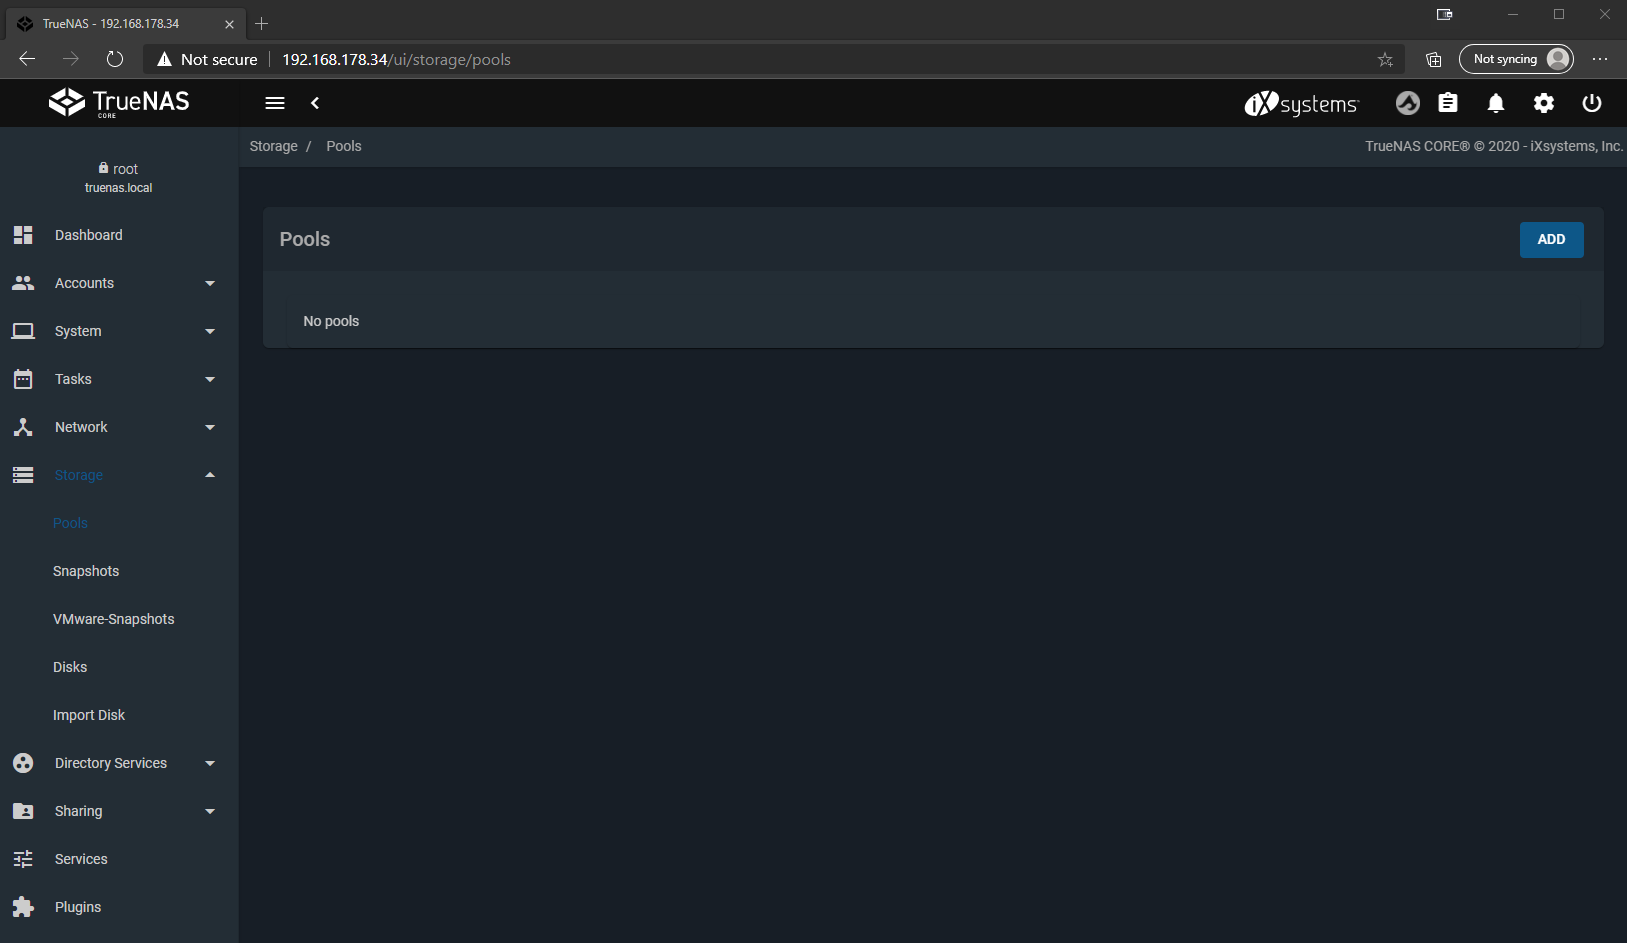
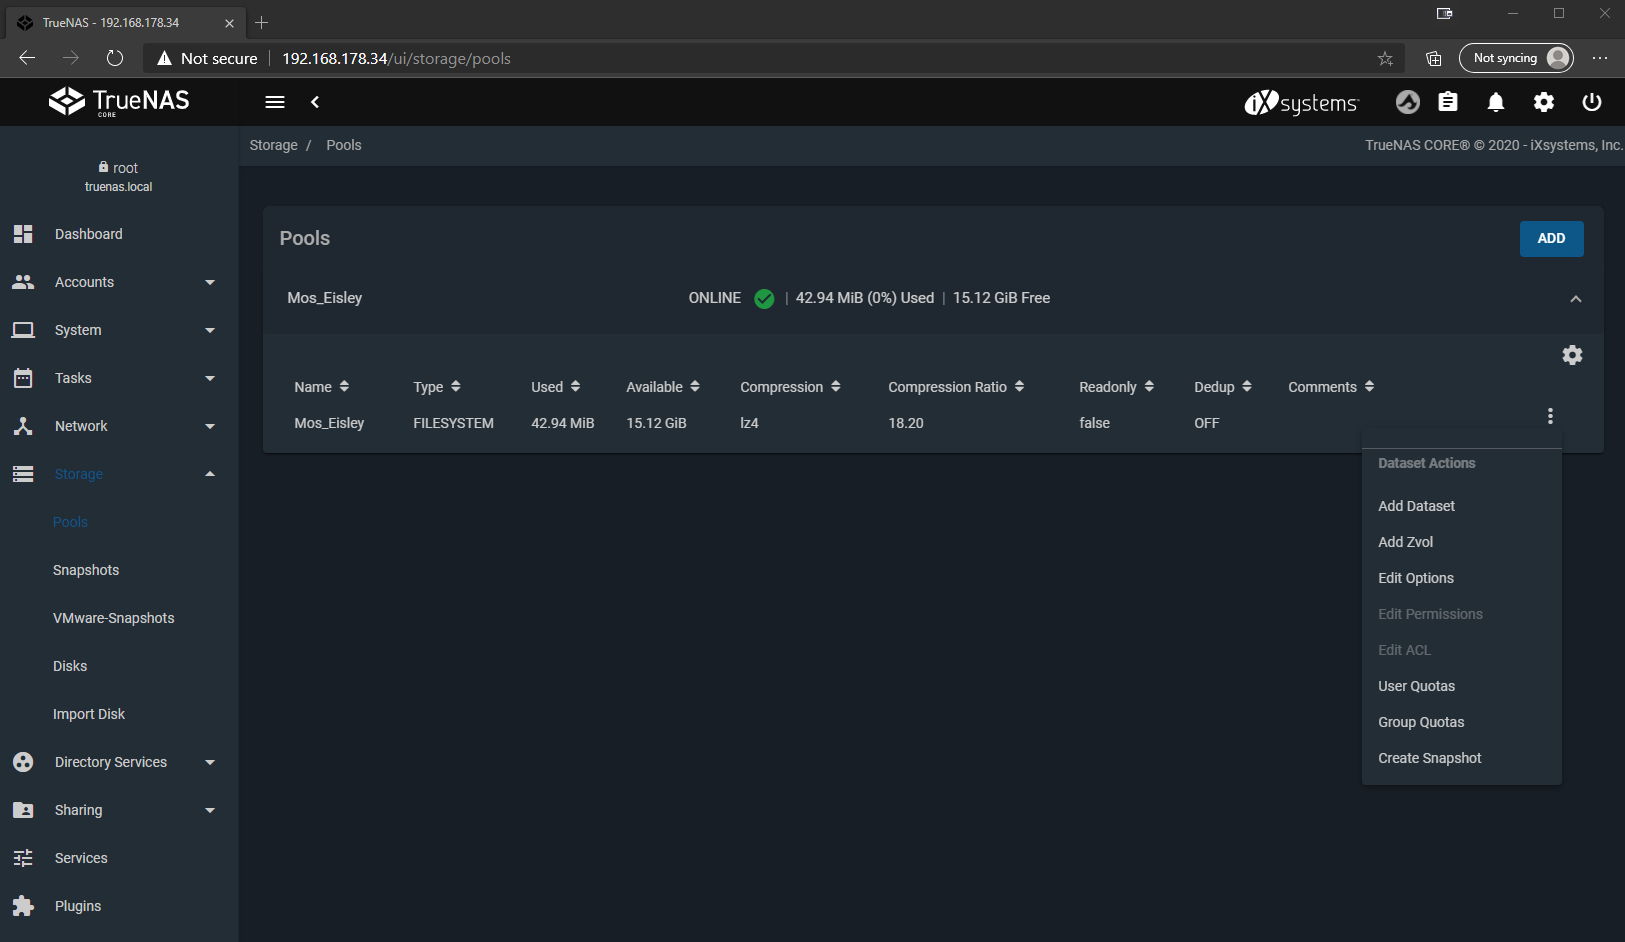
So we open the section “Storage” in the navigation bar on the left and click on “Pools”.
“Pools” in the context of ZFS are combinations of “Vdevs” to a storage unit, at whose level basic IO parameters can be defined. What now is a “VDev”, we will talk about that in a moment. Pools can be extended, reduced, exported and imported. This is roughly comparable to an “array” in a classic hardware raid, but let’s not get too hung up on that analogy or I’ll get in trouble from the ZFS cracks.
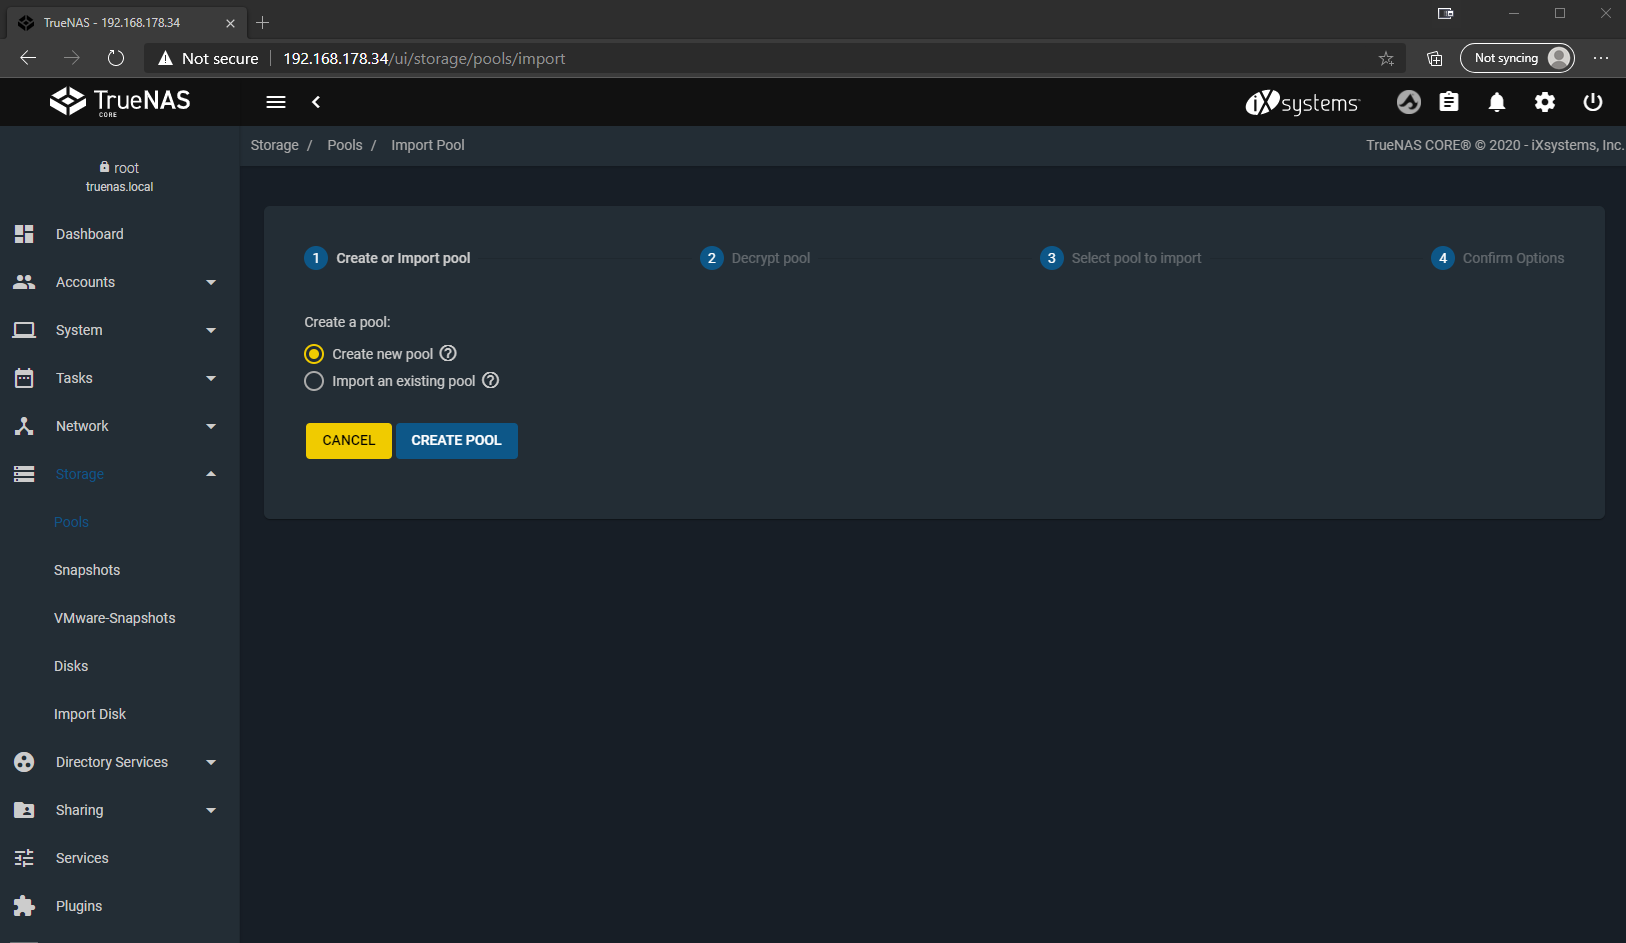
We click on “ADD” in the upper right corner to create our first pool. If a ZFS file system was already active on the hard disks before, we could import an already existing pool here, e.g. in case of a hard disk move or a restore of the system. But since we are setting up a new pool, we choose “Create new pool”.
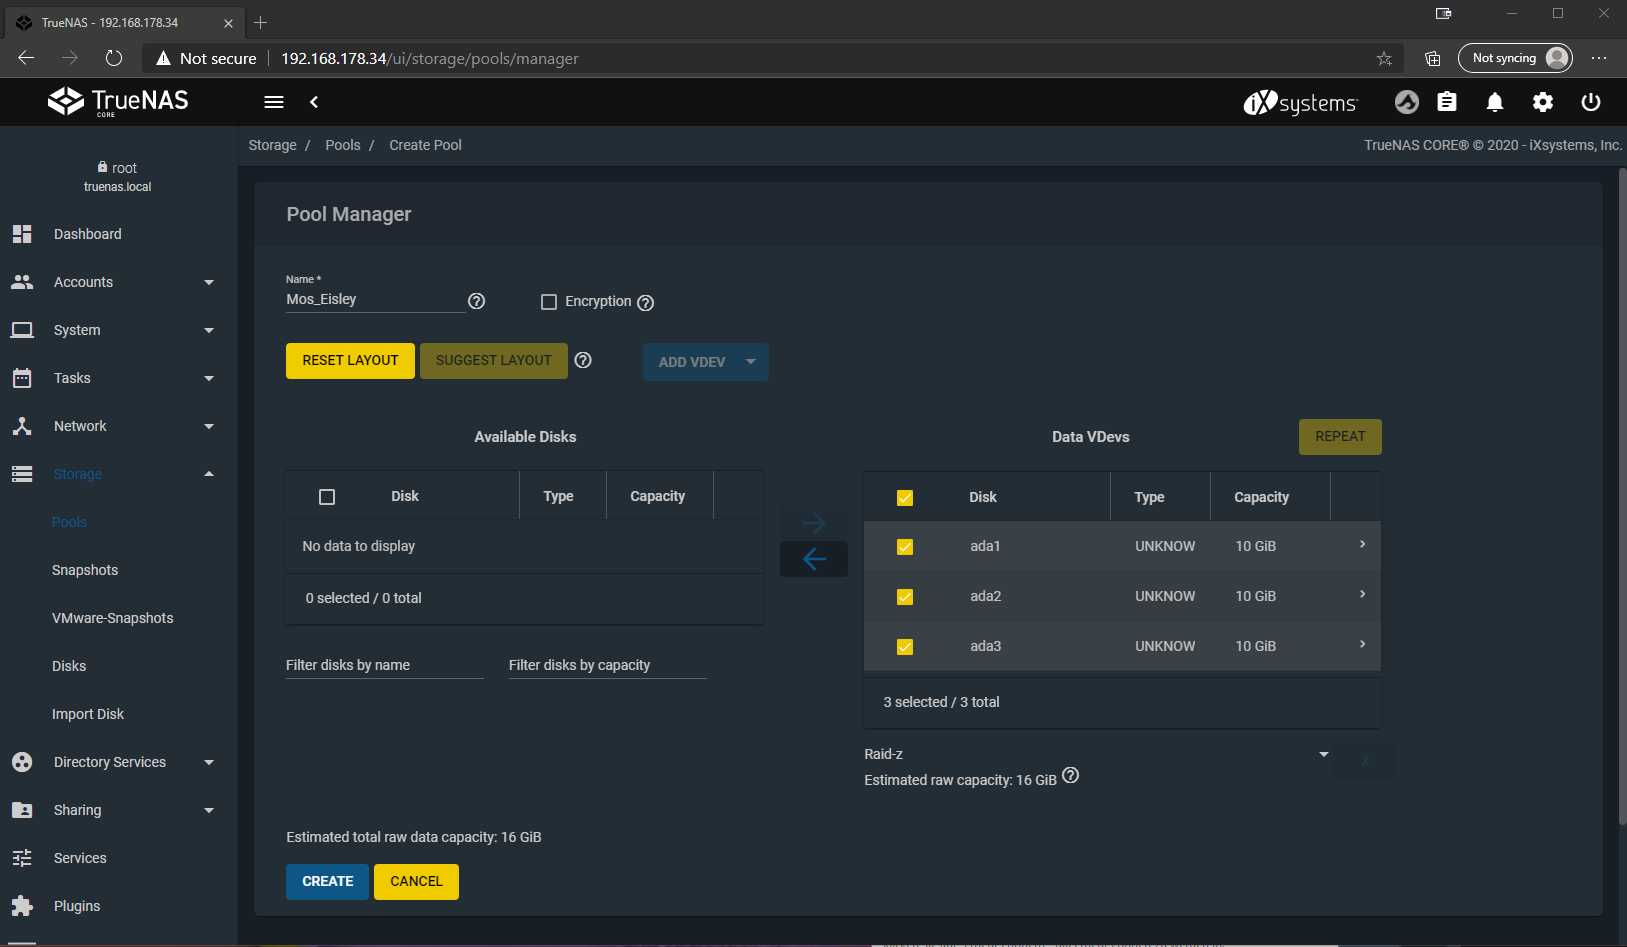
Now we have to give the pool a name we want and select the disks we want to include in it. After we have checked hard disks and clicked on the right arrow, they are now listed under “Data VDevs”. A “VDev” in the context of ZFS is a grouping of hard disks into a virtual device. Why virtual? Because such a virtual device can also contain several physical devices, which provide fail-safe protection for each other by using a redundancy algorithm. This is also the case here, among the selected disks we have the option to choose the type of redundancy, between Stripe (analogous to RAID 0), Mirror (analogous to Raid 1) and Raid-z (analogous to Raid 5 or 6), where the “z” indicates the number of parity bits per file and thus hard disks that may fail, e.g. with Raid-z1 one hard disk can fail.
In short, with striping no disk may fail, with mirroring all but one may fail and with raid-z the number of parity disks may fail before data loss occurs. The more fail-safe the configuration, the smaller the usable storage space. Here I choose Raid-z to have a good compromise between redundancy and storage space. Since I only have 3 hard disks in this case, this automatically results in Raid-z1. With 4 disks we would have the possibility to go to raid-z2 and so on, depending on how many disks we want to keep for parity information.
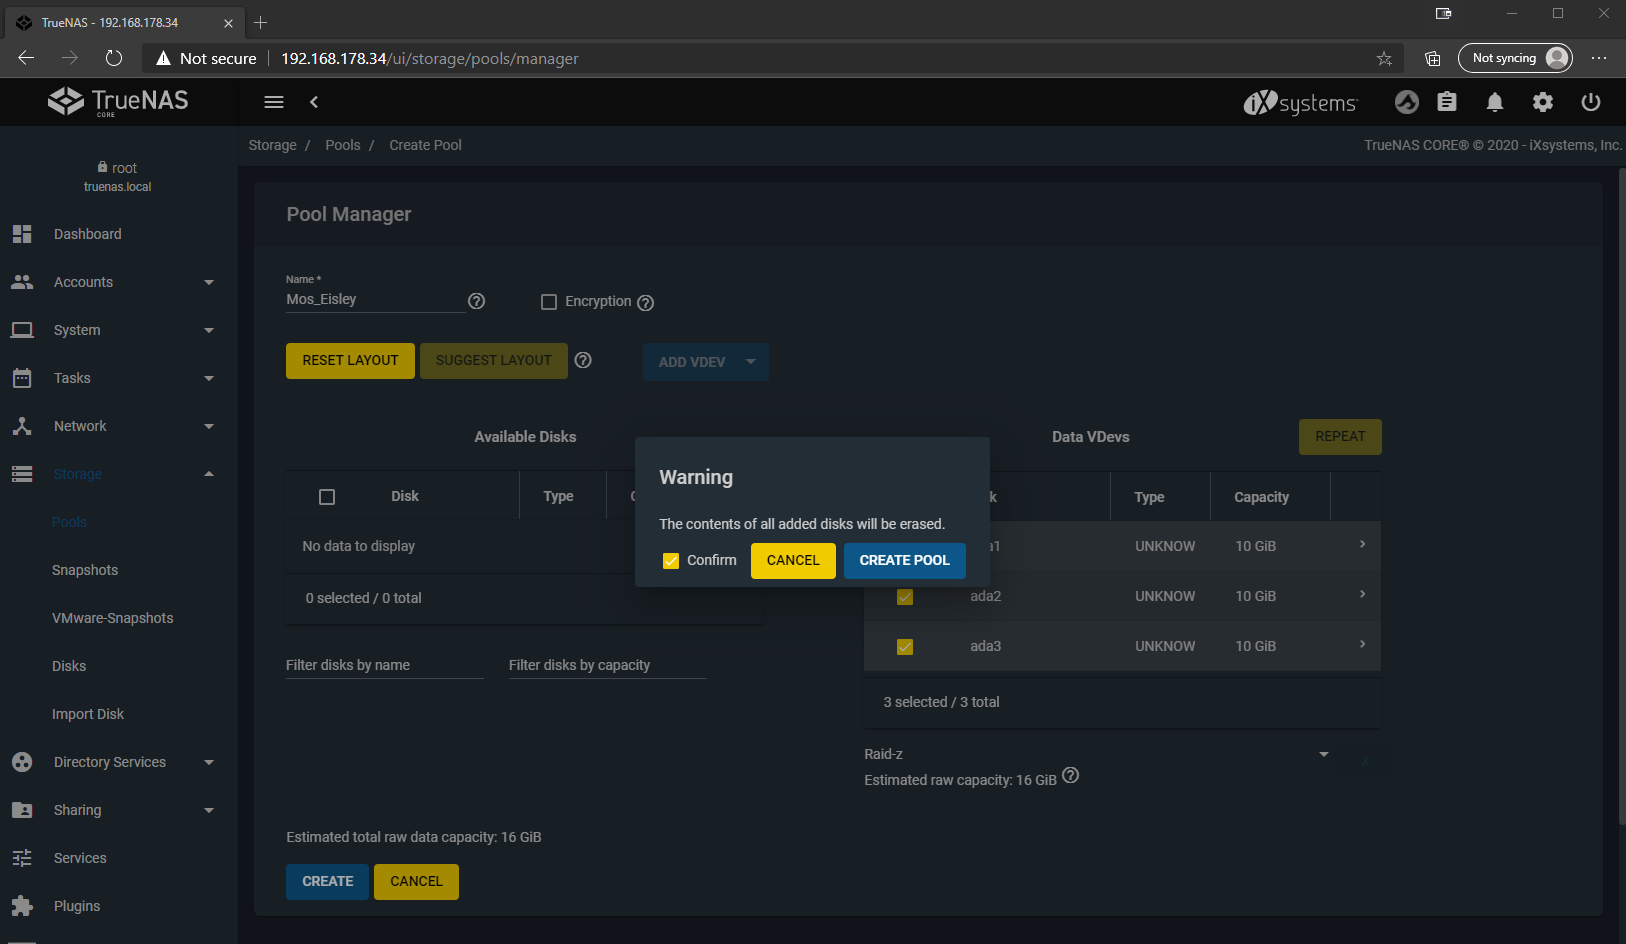
We confirm that all previous data on the disks will be lost and click on “CREATE POOL”.

And now we have already combined the hard disks into a fail-safe storage unit, which we can now divide up and make available to our various storage-needing clients in the network.
One more word about redundancy: ZFS takes care of calculating the parity information in software and storing it correctly on the hard disks. This is one of the reasons why ZFS has a comparatively high demand on CPU and RAM resources, but you are not dependent on dedicated hardware, such as a raid controller, which could cause problems if the controller becomes defective or the hardware is moved.
Everybody gets his piece of cake – Datasets
Now we can divide our storage pool into datasets, which we can then make available via various protocols and connect to clients. “Datasets” are quasi the pieces of cake that we now cut out of the pool to serve to our guests. By dataset we can now define how the storage space is handed out, e.g. via SMB for Windows clients or via NFS for Linux clients, and we can define permission structures, i.e. restrict who can or cannot access what. Datasets are comparable to “partitions” in conventional file systems. Of course you can also define quotas and reservations here, in case two users fight over the last piece of cake…, uh storage space.
Let’s go, we click on the Hamburger menu or the 3 white dots of the pool we just created on the right and click on “Add Dataset”.
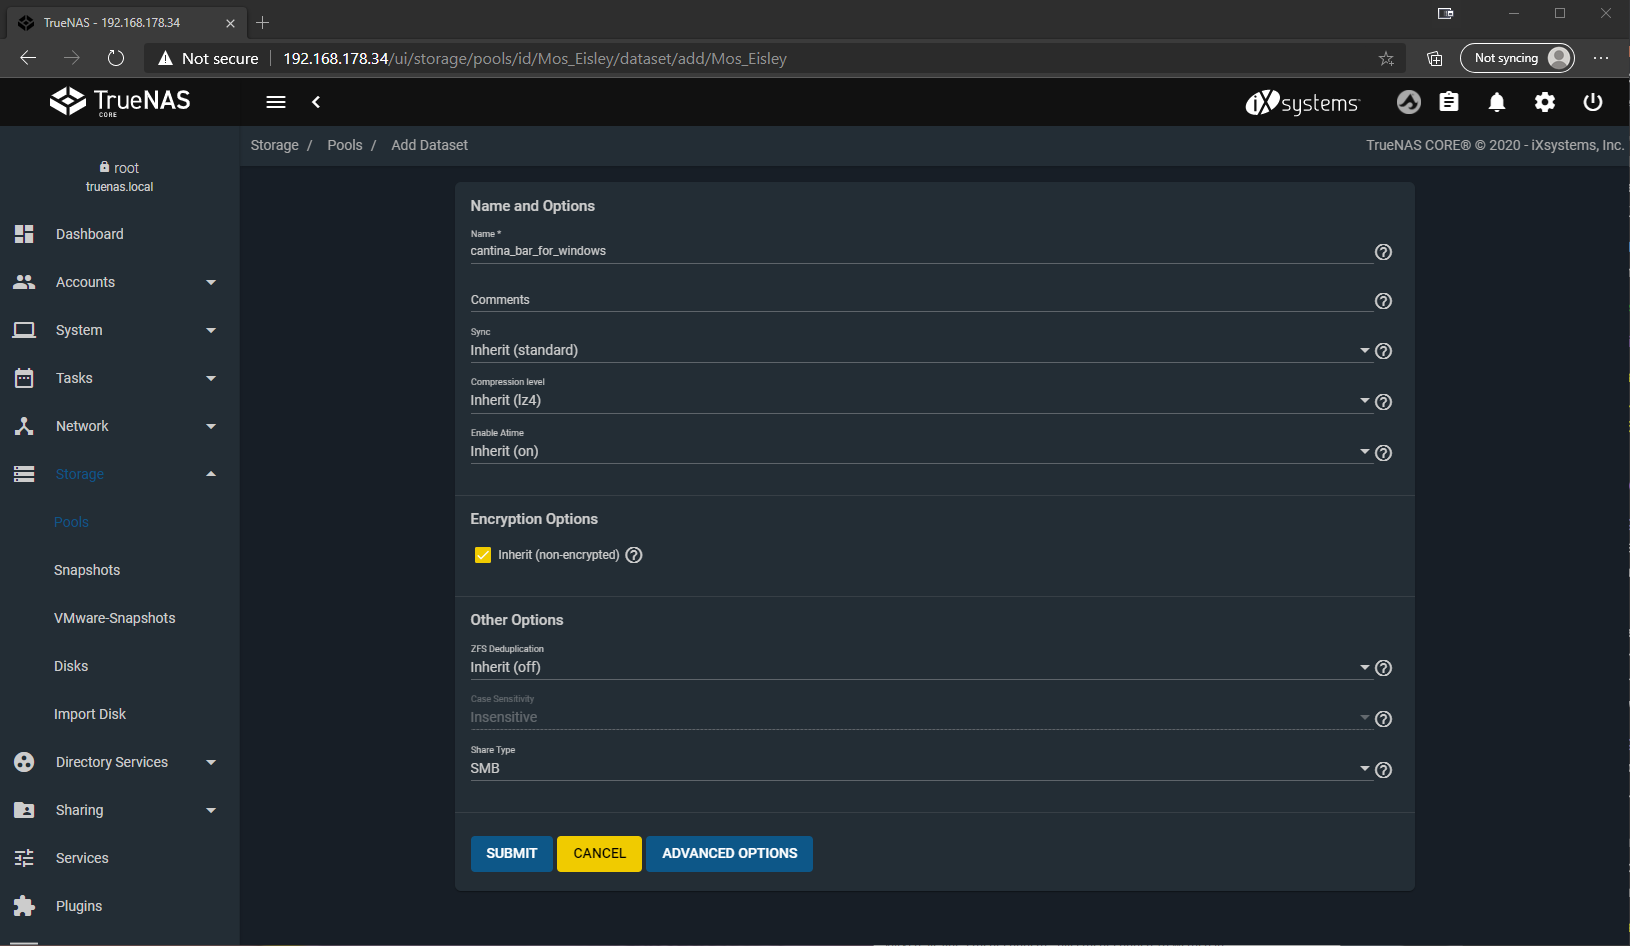
Here we can again give our dataset a descriptive name and define various parameters. If we leave them on their default, the settings are inherited from the pool to the dataset. Since this share is intended for Windows clients that will later connect to SMB, I select “SMB” at the bottom of Share Type. Then click “Submit”.
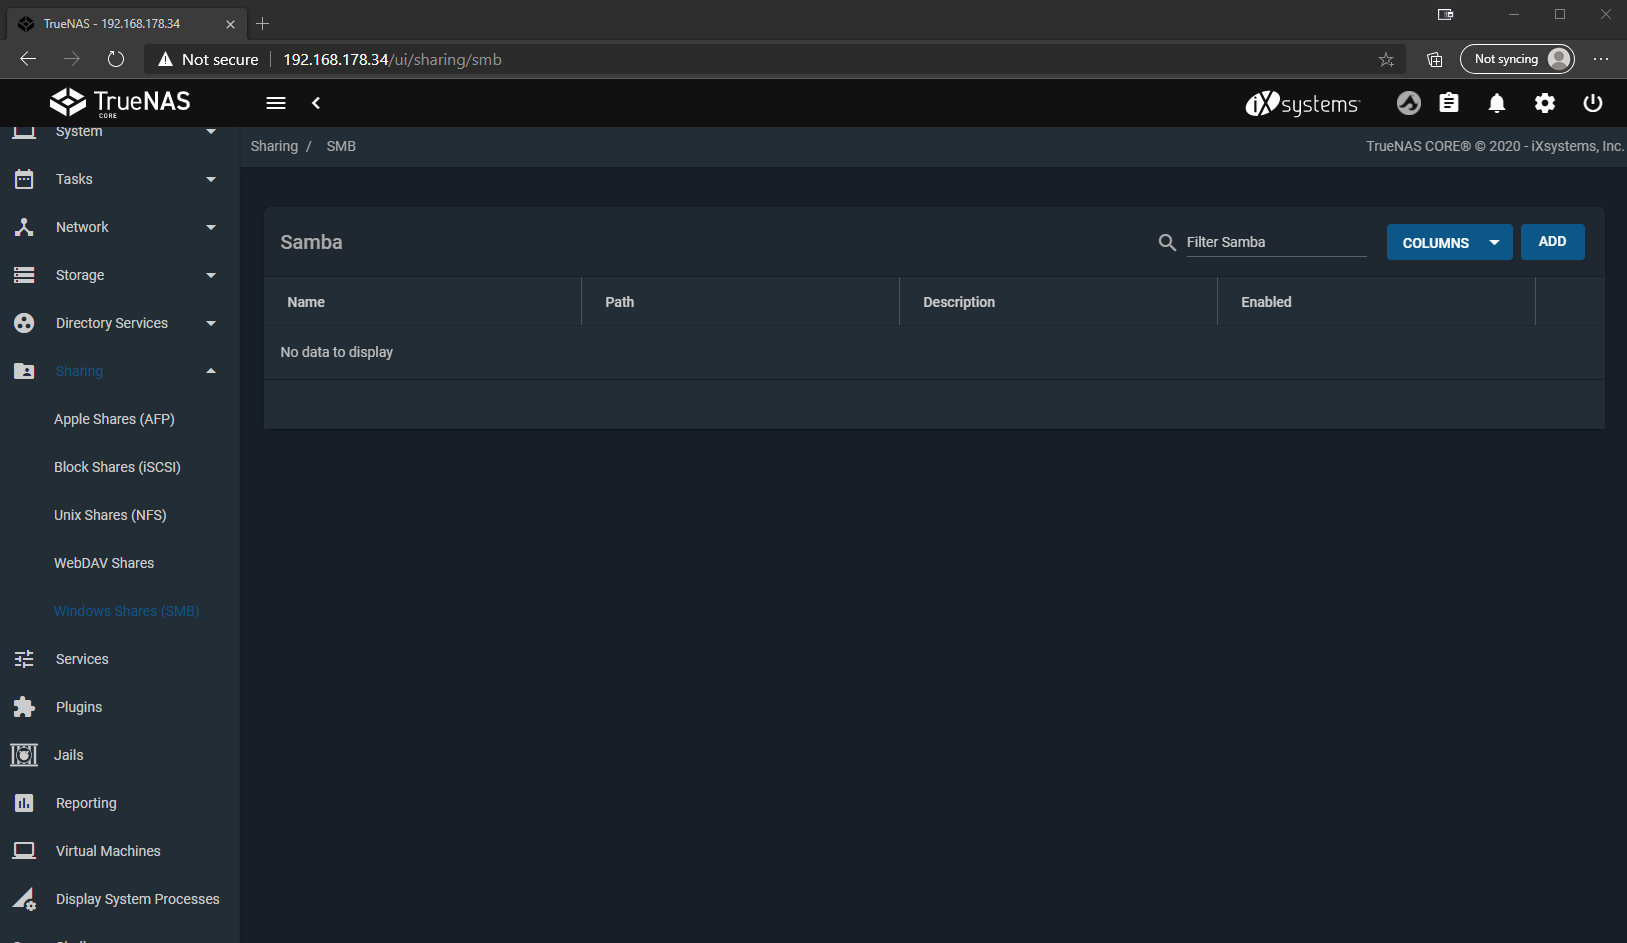
Now we only have to set up the share to be able to connect the dataset from a client. To do this, we click on “Sharing”, “Windows Shares (SMB)” in the navigation menu on the left, since this share is intended for Windows clients, and on “ADD” in the upper right.
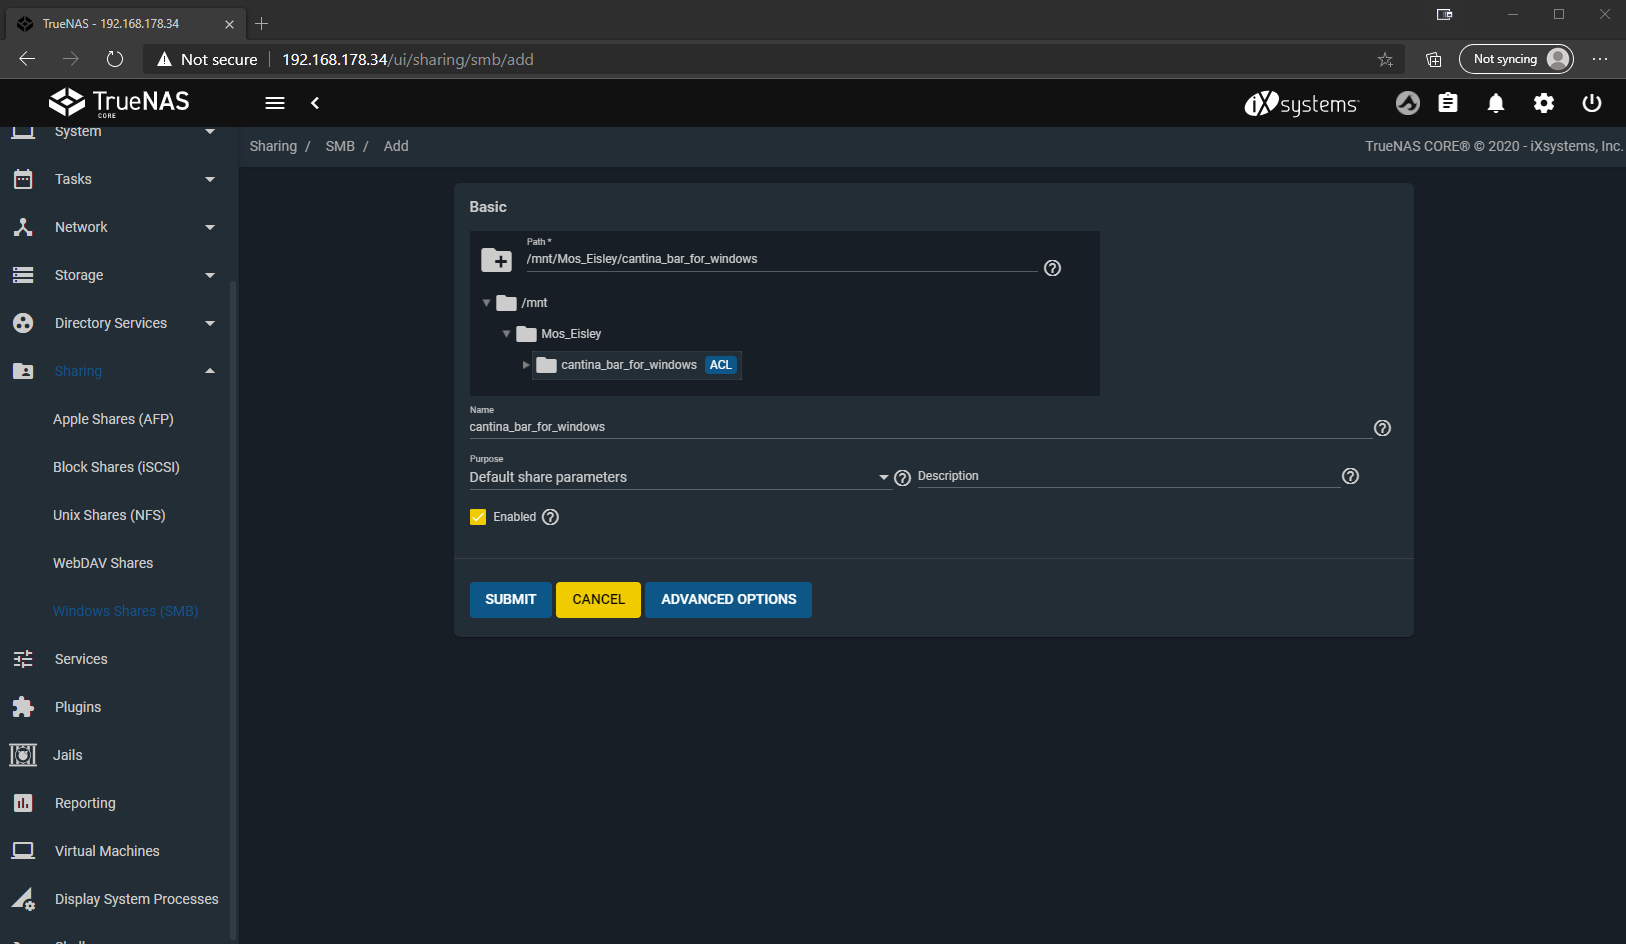
Here we select the dataset we just created, which thanks to the selected share type already has ACLs that are necessary for Windows, and click on “SUBMIT”.
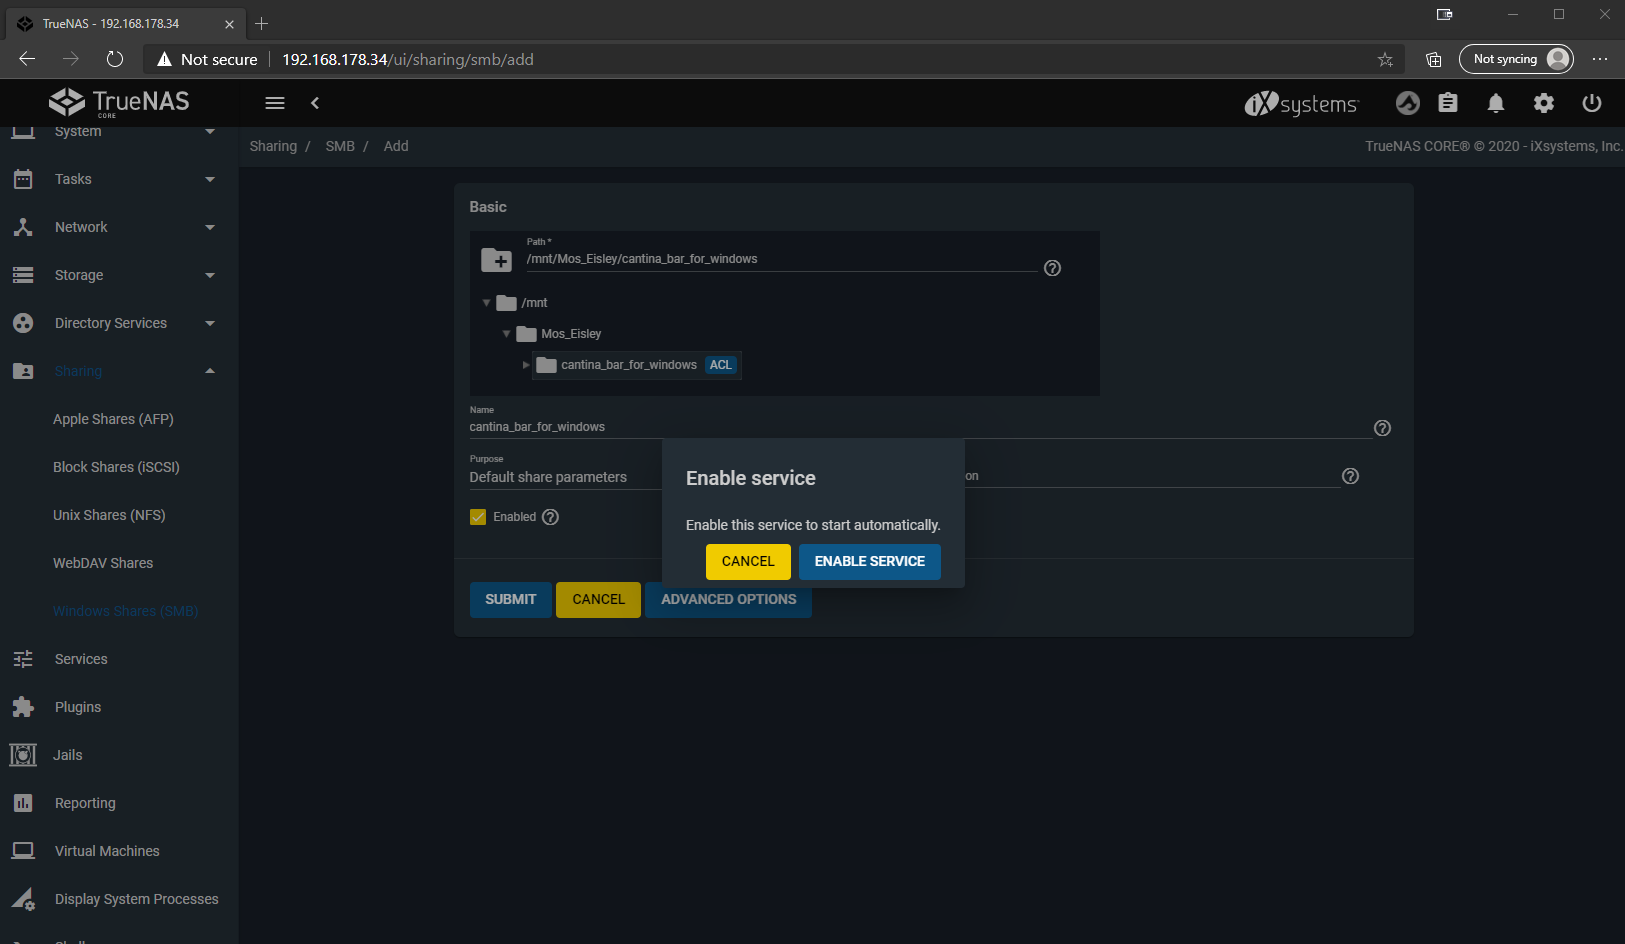
Since this is the first SMB share, the system also asks us if we want to activate the service permanently, which we confirm.
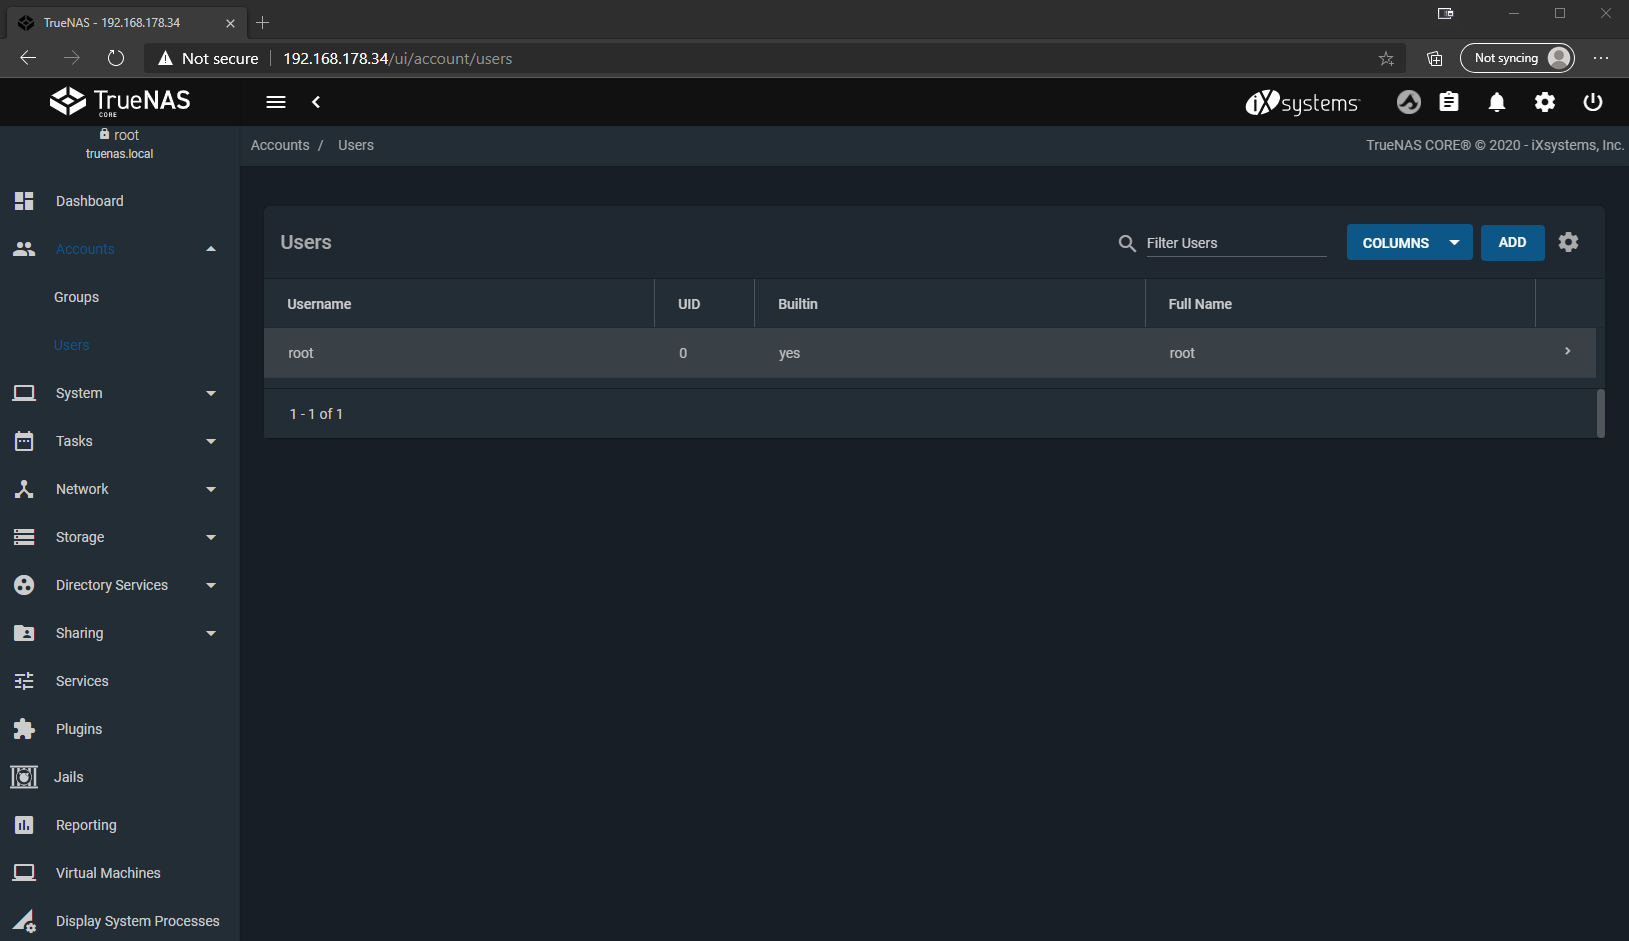
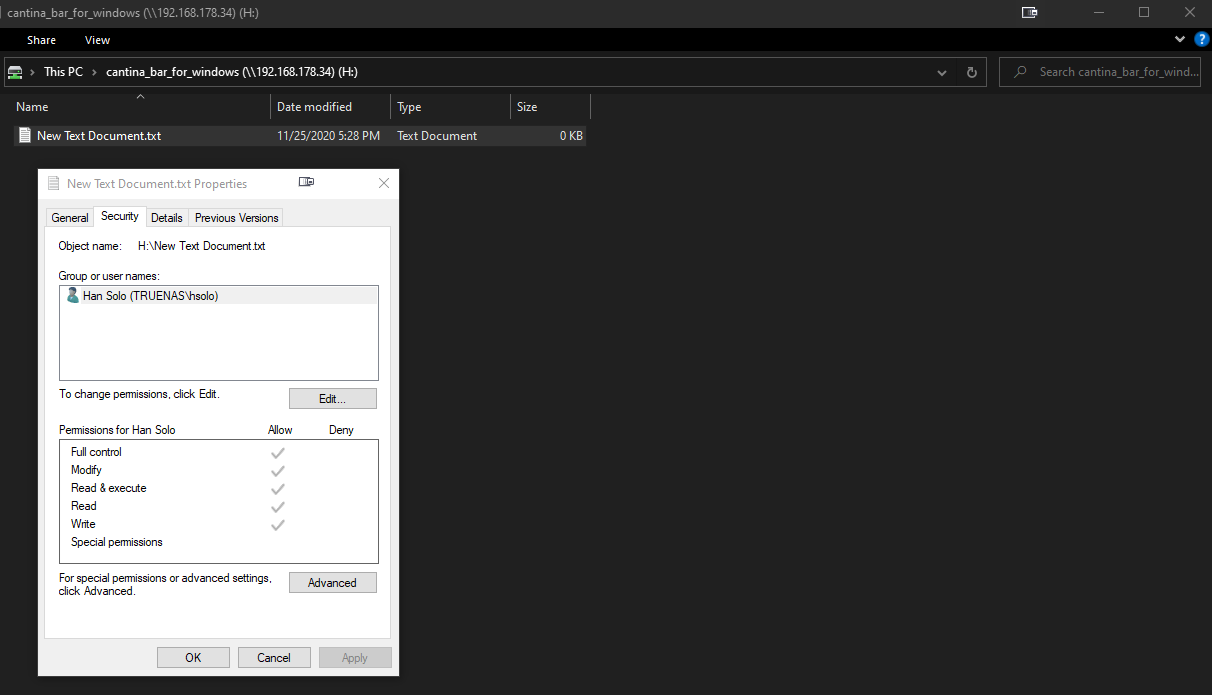
Now the share is already active, but nobody is allowed to connect to it yet, which makes sense. So we create a local user with the appropriate rights by clicking on “Accounts”, “Users” on the left side and “ADD” on the top right.

Here we can create a user with username and password and don’t have to change anything else of the defaults.
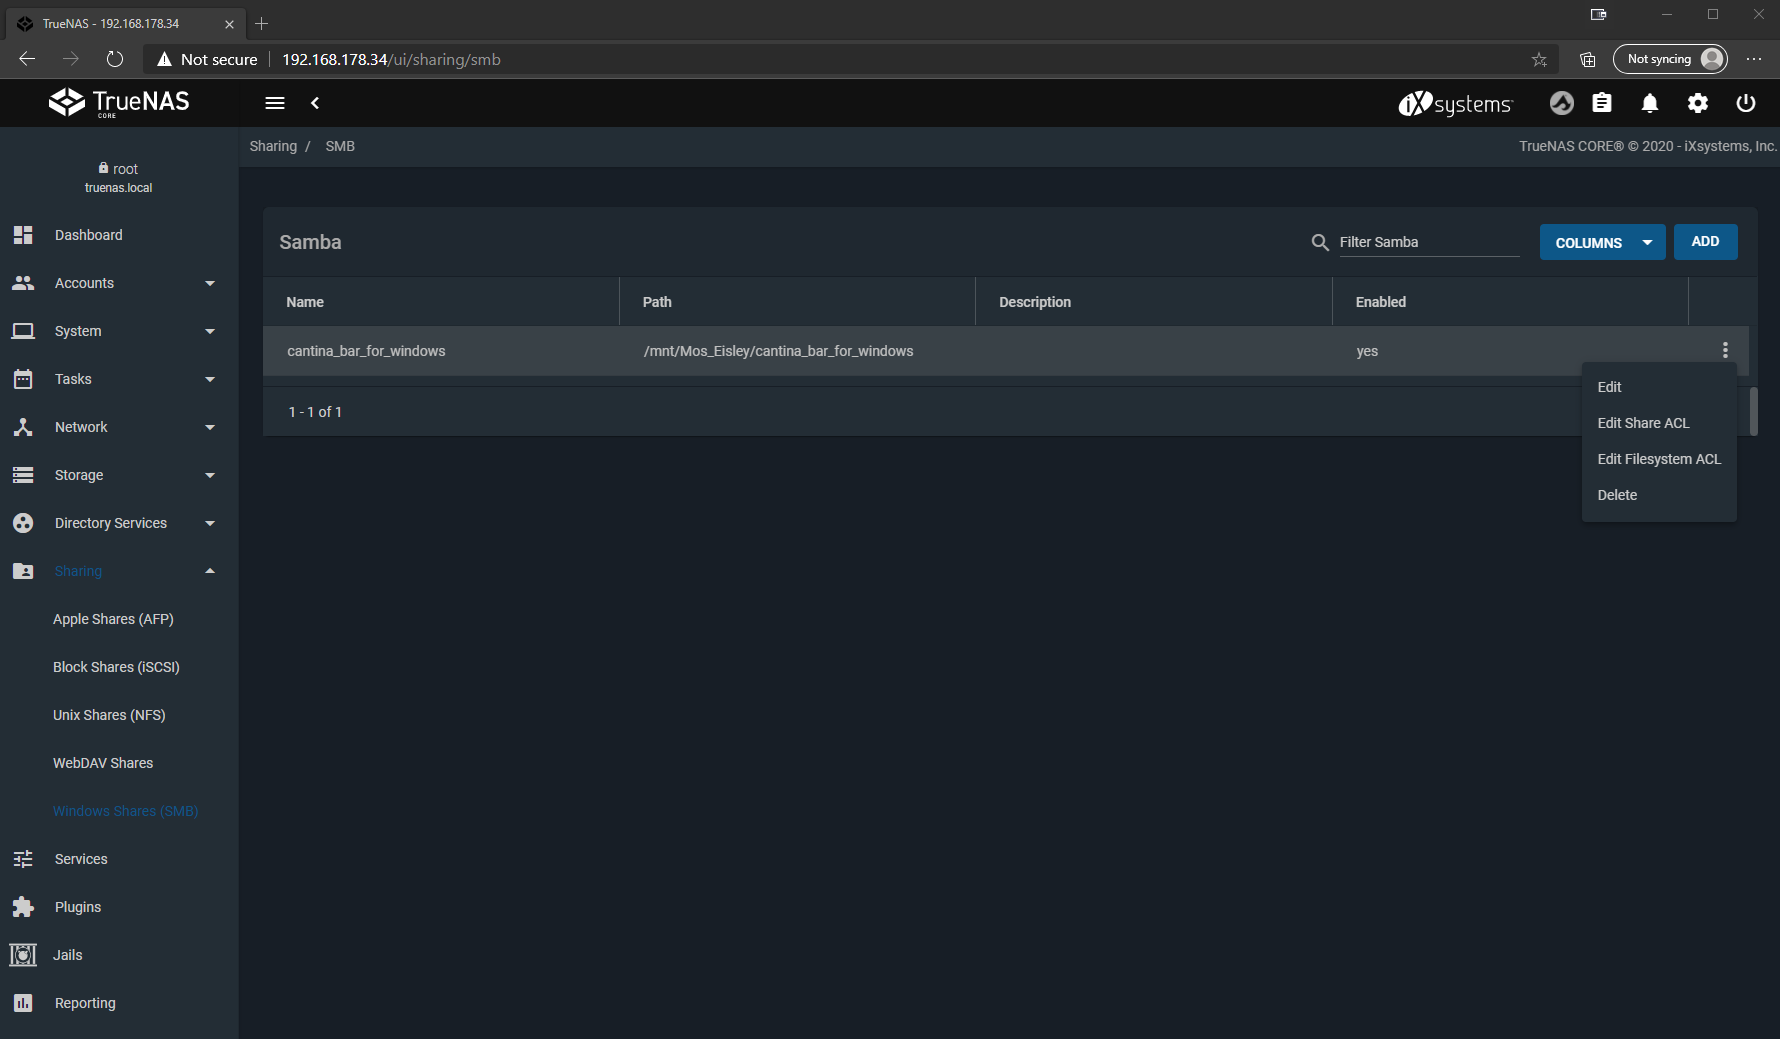
Now we authorize the user accordingly by clicking on the 3 points on the right under “Sharing”, “Windows Shares (SMB)” and then on “Edit Filesystem ACL”.
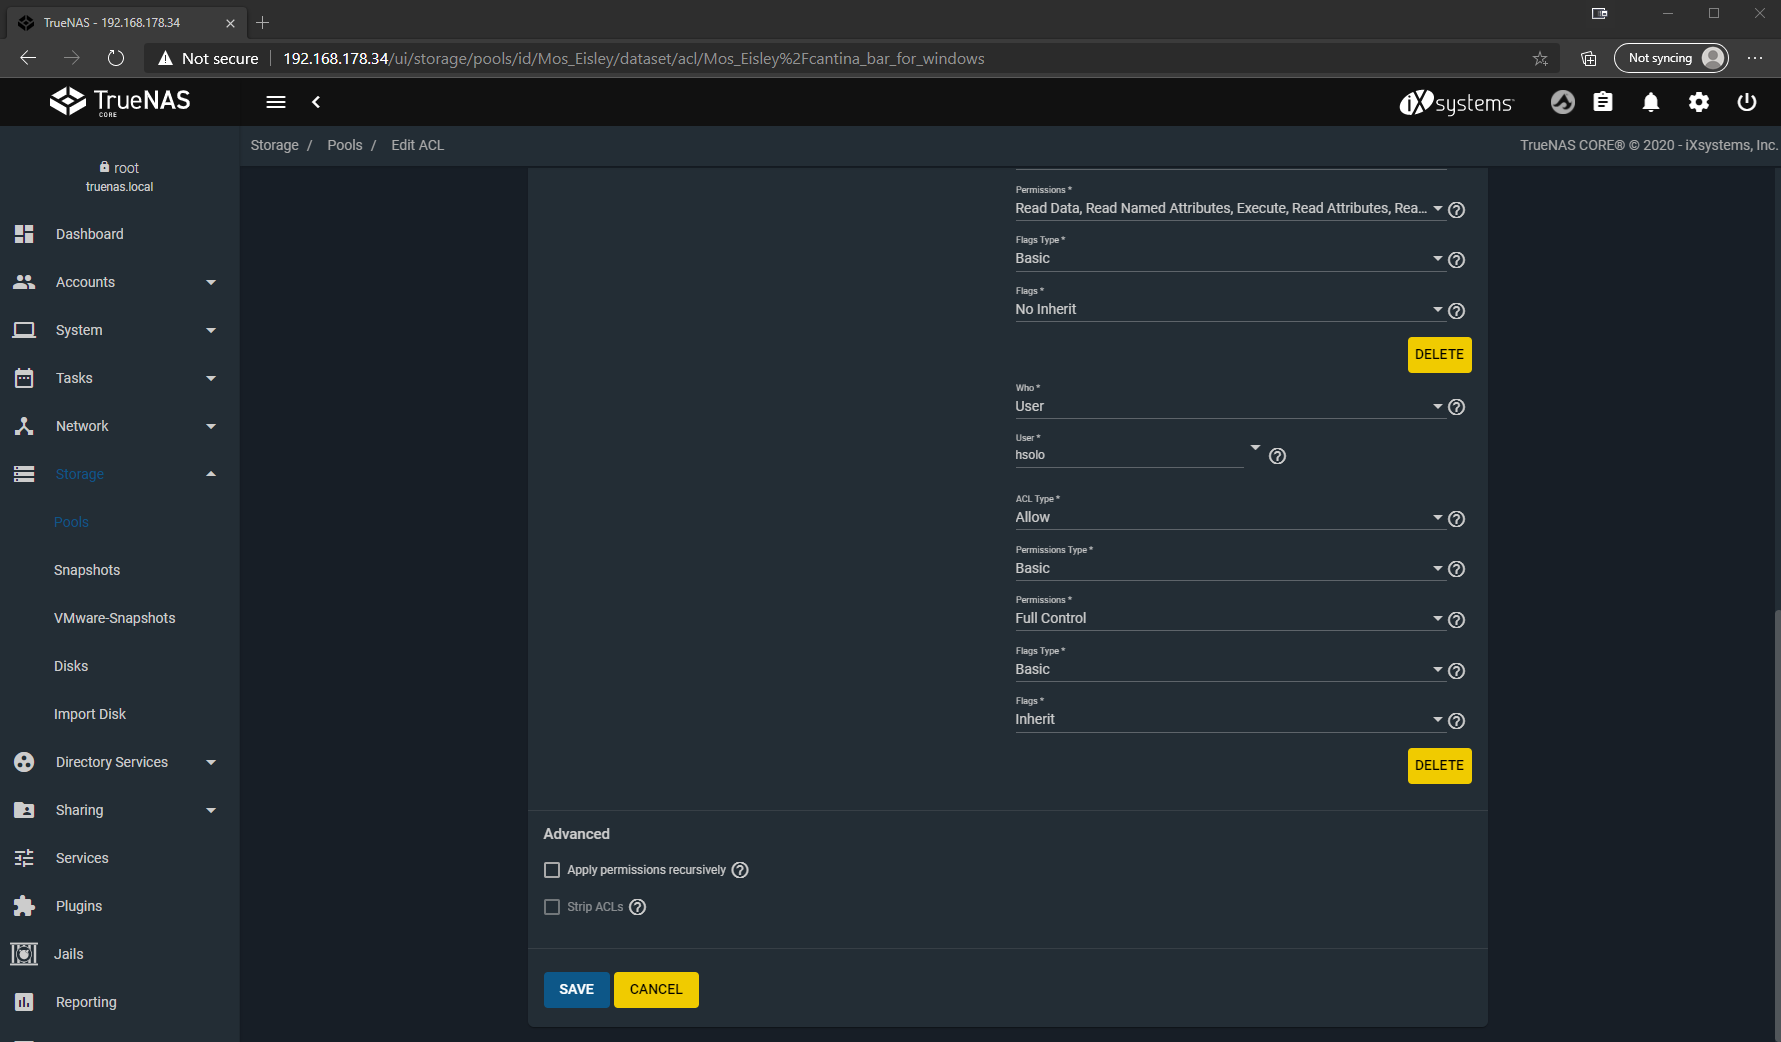
Now we click “ADD ACL ITEM” at the top, select our user and his desired rights at the bottom left of the added object, click “SAVE” and that’s it.
With a Windows client of your choice on the same network, we can now connect and use the share as the created user. Et voila, your personal NAS at home! Of course, we’ve only scratched the tip of the iceberg so far, but we’re already in a better position than with a bunch of USB disks, because on the one hand we’ve created a central storage location and created fail-safe in case an HDD dies on us. Everything else you can and must find out for yourself, because everyone has different requirements and as mentioned at the beginning the necessary steps are already documented in detail in the official Wiki.
Finally, I want to show you some of the really cool features of TrueNAS, without which you will never want to store your data anywhere else again with a clear conscience.
Snapshots – Time travel for nerds
ZFS offers an integrated snapshot mechanism for block-based data backup. What does that mean? You can restore versions of your data created in certain intervals, e.g. if you have accidentally deleted something or if you need an old data state. And because it’s block-based, data that hasn’t changed since the last snapshot doesn’t require additional storage space.
You can create these snapshots manually, for example if you know that a big change of data is about to happen that you might want to undo. Or you can define Periodic Snapshot Tasks, i.e. automatically create snapshots daily, weekly, monthly etc. and store them for a defined period of time.
That’s how it can look like:

These snapshots can now be viewed in the web interface and restored if necessary, but can also be made visible to the client by a setting the dataset.

On the share we will then find a .zfs directory with the snapshots, in this case a manual one, but the automatically created snapshots will show up here as well. From here you can also copy old files directly back to the actual share and the directory is even read-only, so you can’t overwrite old files by mistake. Definitely nice to have!
Plugins – want private video streaming?
In addition to the normal functions of a file server, TrueNAS can also provide other services with the help of plug-ins. For example, if you use your NAS to store data for movies and series, you can stream directly from your own NAS to your TV using the Plex Media Server plugin.
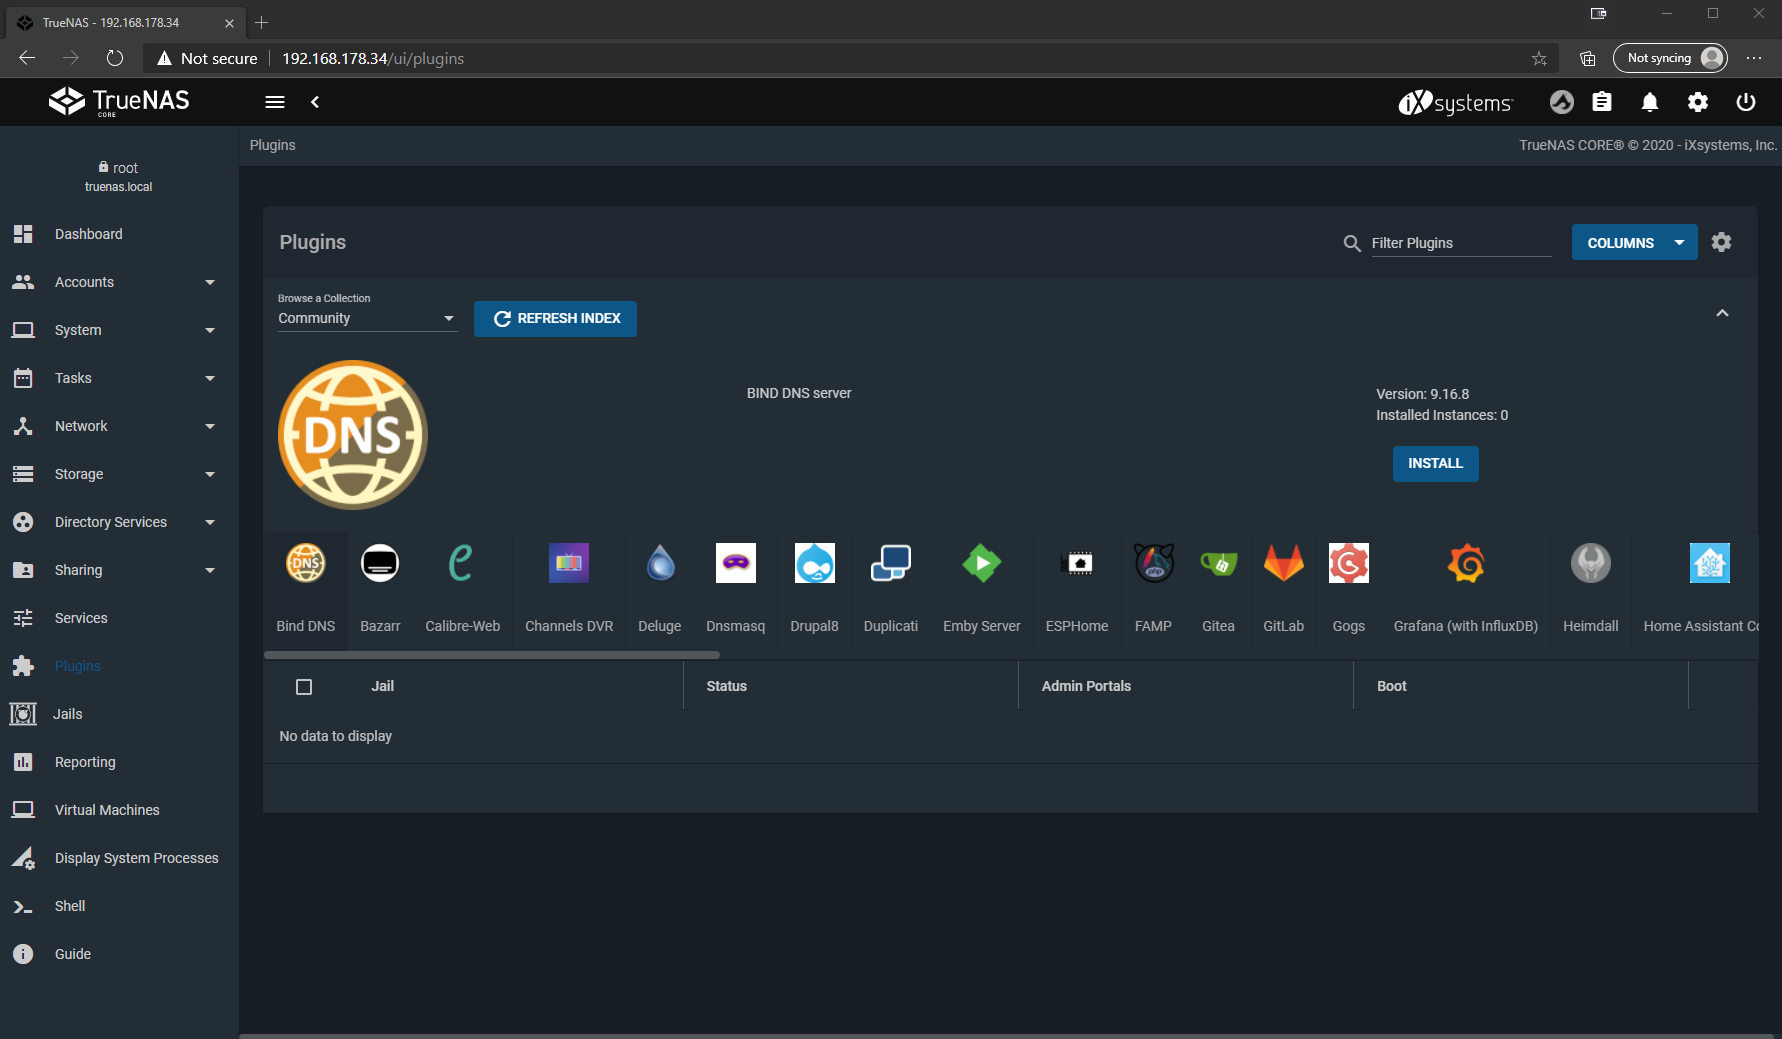
And that’s just the beginning, because in addition to the plugins provided by iXsystems, there are also a bunch of community plugins that allow you to force your NAS into almost any server role. Examples are: Bind DNS, OpenVPN Server, Gitlab and Homebridge to name a few.
These plug-ins are plug-and-play and can be installed and set up with just a few clicks. Oh yes, and as mentioned at the beginning, as a virtualization host TrueNAS works out of the box, without any plugins.
So our DIY fileserver is also extremely versatile!
E-Mail Alerting – Reporting makes free
To get notified when, for example, a hard disk is failing or other events occur that would require our attention as an admin, we can of course regularly check the web interface. But that is annoying and let’s be honest, nobody would do that regularly anyway. Luckily, there is alerting and the possibility to set up an outgoing email server.
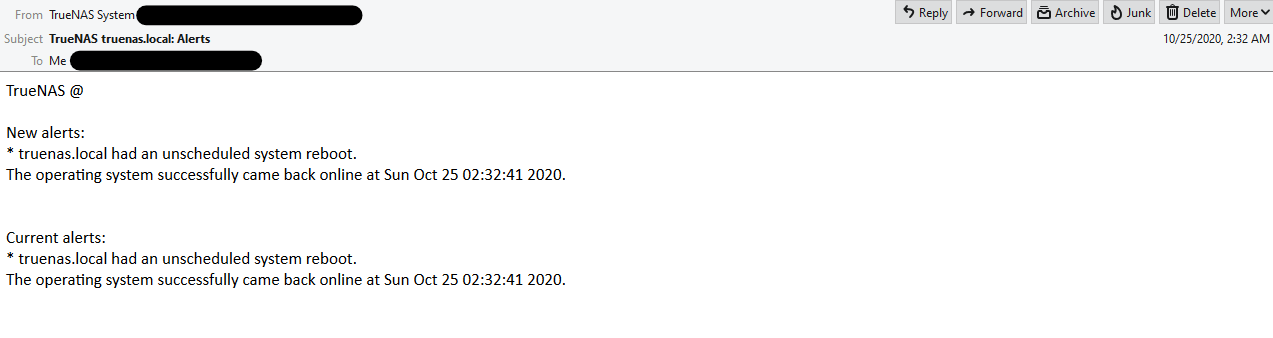
Here we can set any mail server on the Internet, for example Gmail. As soon as this is done, we can enter any valid email address as recipient in the Alert Services, check the functionality with a test email and that’s it. By default, the system notifies us of the most important events and we don’t have to worry about missing anything.
Of course, the prerequisite for email alerting is that the system itself is still alive or alive again. So if your house burns down or there is a power outage, the NAS won’t be able to scream in time, but usually in such a scenario you will have bigger problems that you hopefully already know about.
3-2-1 – Cloud Sync Tasks
The rule of thumb for data storage is known to be 3 data copies, 2 media, 1 external backup. 2 data copies and 1 medium are already fulfilled with our NAS by the redundancy in the software. In order to have a safe copy of your data even in the event of a disaster, such as the house fire just mentioned, the Cloud Sync function is a good option.

It is exactly what it sounds like: You store the login information for a Could Storage provider, such as Google Drive, Dropbox or Microsoft OneDrive and then define regular tasks again, when which data should be synced into the cloud. Provided that you have enough upload bandwidth on your internet connection, you can automatically backup your data to the outside world and stay calm even in case of a house fire, at least as far as your data is concerned. And for the paranoid or bad boys among you, you can also set up “remote encryption” in the Sync Task, so that your data does not end up unencrypted on someone else’s server.
This means that the 3-2-1 rule is also fulfilled, because in addition to the two local data copies in the ZFS pool, we also have a copy in the cloud. This is therefore also a second medium, since it differs from the physical properties of a hard disk, that is: cannot fall down and break. And last but not least, we now have an external repository in case the worst case occurs.
Conclusion
That everything is becoming more digital is no news. Be it pay slips, tax returns, or simply invoices, everything is increasingly only provided in digital form. Of course, this makes many things easier and more convenient, but you should not forget to manage your data responsibly. Now you can of course make the world comfortable again and simply push everything into the cloud, but this will become costly on the one hand after a certain amount of data is exceeded and on the other hand you will give your personal data to a foreign company.
For me, TrueNAS manages the balancing act between effort, cost and benefit, because almost everyone has an old computer and a few hard disks at home, the setup is comparatively simple and the customization possibilities are almost endless. Furthermore, the software is mature, free in the core version and your data will not leave your home network unless you want it to.
For those who maintain a media library with movies, series, photos, games, etc., a dedicated NAS is already set as the ideal solution for home use. But maybe you can save the cost of a ready-made solution with the next upgrade and instead, with a little time and tinkering, you can put together an even perhaps better solution yourself.


Kommentieren