


Overview and requirements
You know what that’s like? In and around your PC there are dozens of hard disks, on each one there are different files, you never find anything and space is always limited anyway. Now, you could just buy a ready-made NAS from, for example Synology or Qnap, but that’s not an option for small wallets. Wouldn’t it be handy now if you could simply take an old PC, install the hard drives in it and create your own file server with little effort? Yes, you can do just that, and the software is even free.
And before the first readers run away because they hear the word “Linux”, don’t worry! Even for me as a trained IT human, who jumps around on Linux servers every day, the ui of the web interface was completely sufficient and even surprised me positively in places. Not once did I have to use the command line – that’s how mature and polished the software we’re looking at today has become.
But before we dive into the practical part, I want to give you some background information first. Nowadays a lot of things are “free”, but in most cases the devil is in the details. Whether the user data is secretly sold to advertising companies, microtransactions are lurking around every corner, or you are stuck in a subscription model after a short test phase, the user often does pay one way or another in the end.
Not so in the case of TrueNAS, because behind it is an open source software model based on the better known FreeNAS, openZFS and FreeBSD. In addition to the free TrueNAS Core version, the manufacturer iXsystems also offers paid versions with support. Thus, the manufacturer can finance the development costs together with offering complete solutions for enterprises, and for the private consumer the result is a small free version for the server at home.
Now what’s all this gibberish supposed to mean? Simply put, TrueNAS Core is free, works well on virtually any x86_64 hardware because the user base is very large and the software is constantly evolving, and there is no reason to believe that the company will have to finance itself at the expense of private users. And you don’t need special file server hardware like raid controllers, because all the reliability and logic is in the software.
If you want to know more details, I can recommend the TrueNAS Wiki as an entry point: https://www.truenas.com/docs/hub/intro/whatis/
There you can find everything from general Q&A on the product to detailed guides with tweaks for specific hardware like Ryzen. Therefore I will only go over the installation steps superficially in the following, because on the one hand the documentation already exists and on the other hand it will be updated there regularly, e.g. when new hardware or a new software version is released.
So what do you need?
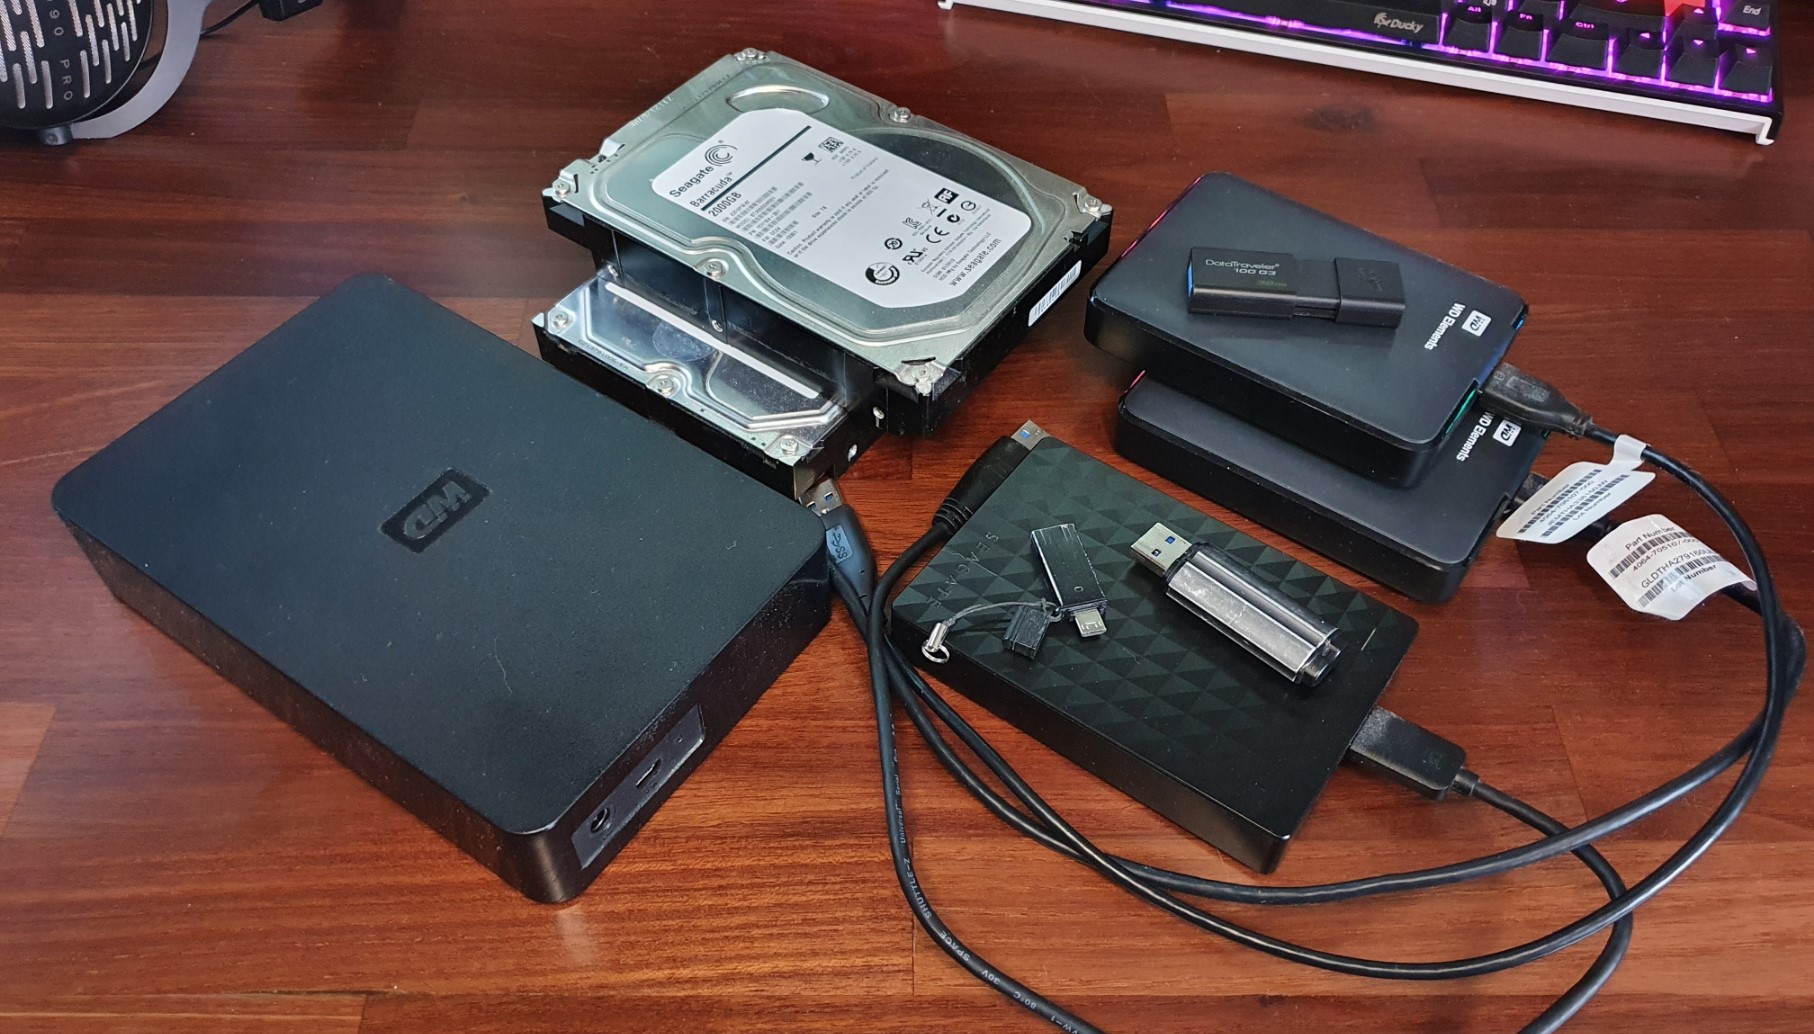
- An old computer with at least 8GB RAM, a x86_64 CPU, a hard disk for the OS and additional hard disks for data storage, as much as you want / have / need
- A USB stick with at least 1GB space
- A little bit of eagerness to experimentation and free time
In my case I put the old testbench hardware around Ivy Bridge-E and 3 old 2TB Seagate SATA HDDs into an even older ATX case and wired the whole thing as simple as possible, the hard drives directly attached via SATA to the mainboard. An additional fan is placed next to the HDDs to provide at least a little air circulation and that’s it. The result is as ugly as it is functional. A quick look into the BIOS, checked if all hardware is detected correctly and set some basic settings like XMP profile of the RAM and behaviour in case of power failure. Finally, we connect the network, monitor and keyboard for setup. That’s it, the hardware is ready.
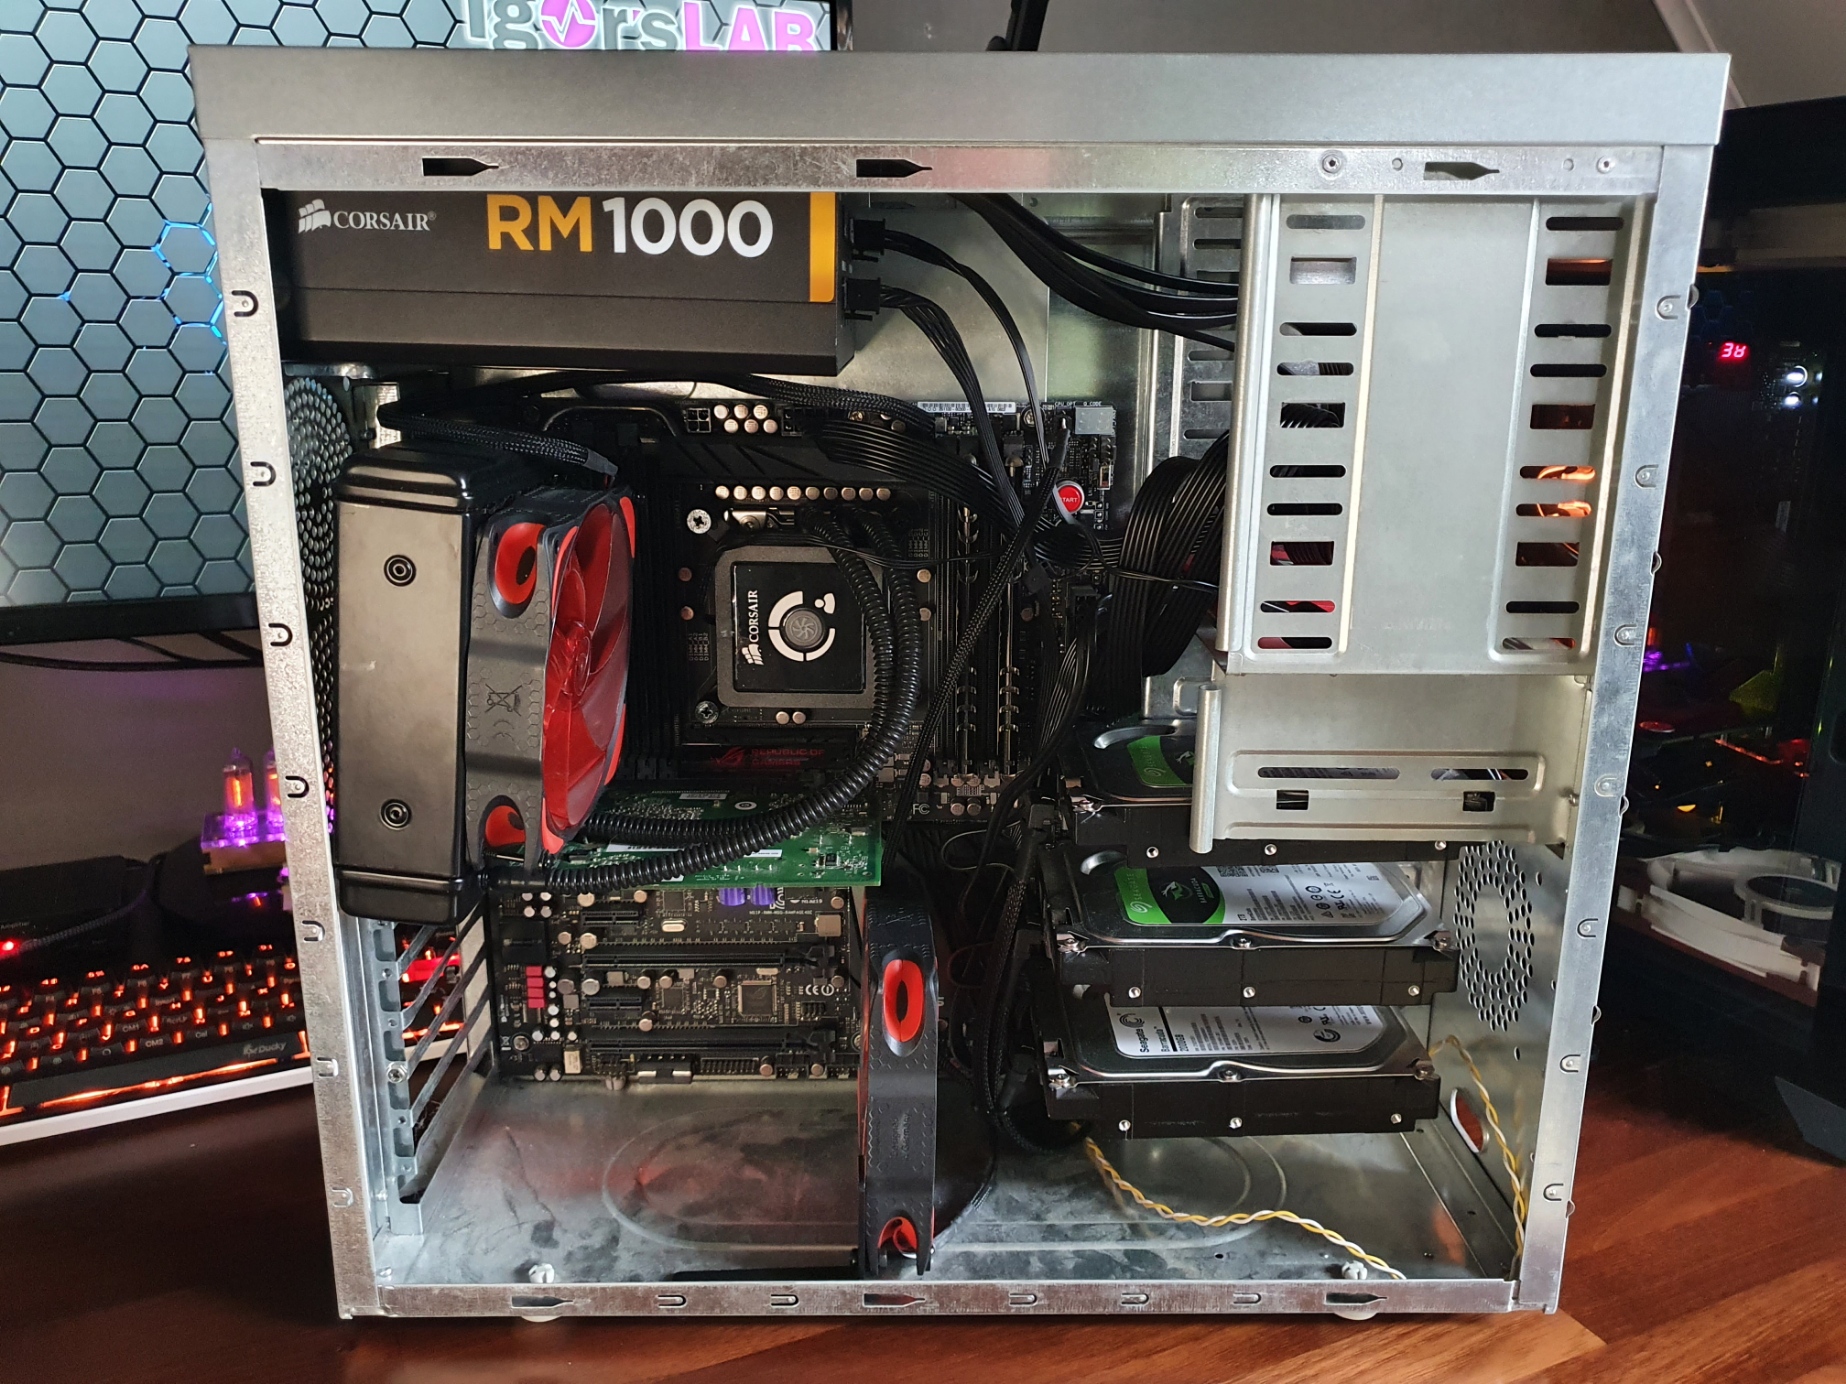
And before the cries get loud that this could almost be a photo from the category “fluff, paste and pins”, I would like to respond prophylactically: The point is to show that a functioning overall system can be achieved with little effort and that it doesn’t require meticulous cable management or colour matching of the components. But of course, those who want to go the extra mile to the glossy level should feel free to do so.
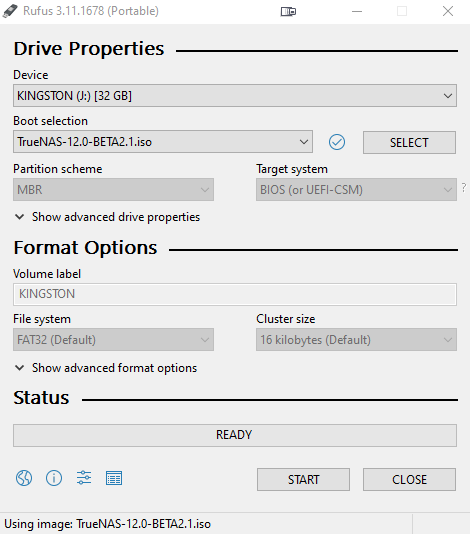
Now we have to download the installation ISO from the TrueNAS website and mirror it to the USB stick with an imaging tool of our choice. I like Rufus, because it’s simple and reliable.
Back in the 90s – Installation TrueNAS
Then insert the USB stick into the computer and boot from it via the boot menu of the MB. The TrueNAS Installer starts and shows for the first time its “GUI”, which is a bit reminiscent of past decades. Well, at least it’s free. But don’t worry, only the installer looks like this. The web interface, which we will use later to do most of the configuration work, looks much nicer and can also be operated with the mouse.
So, now we come to the installation and basic setup. Because my TrueNAS server is already running and I don’t want to tinker with anything there, I have created a VM with 8GB RAM and 4 disks on my TrueNAS Server to authentically recreate the installation. And yes, TrueNAS can also act as a hypervisor if you have a few GB of RAM free.

After booting from the USB stick, we see several options. For installation we select 1. and confirm, or simply wait until the autoboot timeout of 10s has passed.

Then the Install Wizard starts and we are prompted to specify the disk on which TrueNAS, i.e. the operating system, is to be installed. This only concerns the operating system, not the disks for later data storage. For performance reasons, an SSD or at least a USB stick is recommended. In this case I select the first of my virtual discs here and confirm with OK.
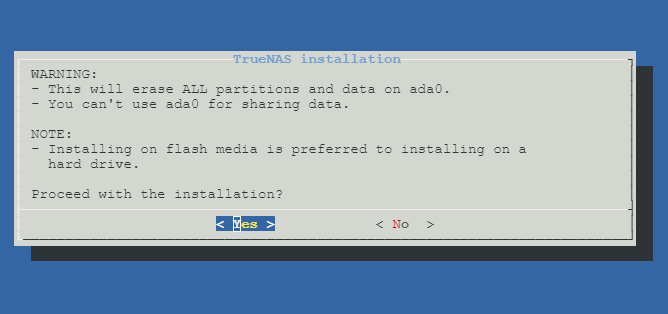
We get another warning that everything on the OS disk will be overwritten and confirm this with Yes.

Now we are asked to set the root password, which we will use later for the rest of the configuration. If you don’t know yet, “root” is the highest administrative account on Linux systems, analogous to “Administrator” on Windows. Enter the password and confirm with OK.
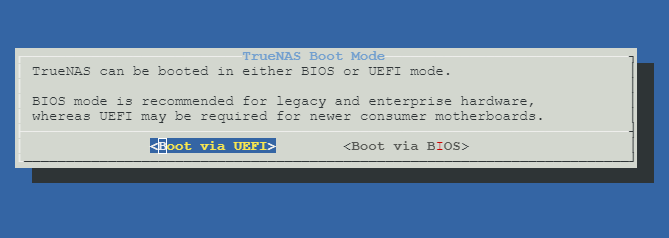
Finally we have to decide between BIOS and UEFI. If hardware and BIOS settings support it, UEFI is recommended, as it supports larger hard disks.

After confirming again, the installation starts, which takes about 5-10 minutes, depending on the speed of the media. Just wait a moment, when the installation is finished, the installer reports back.
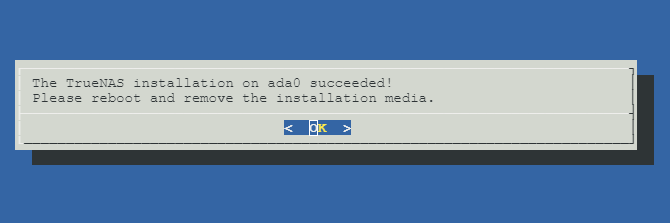
Once the installation is complete, you will be asked to reboot the system and remove the USB stick. So we do just that.
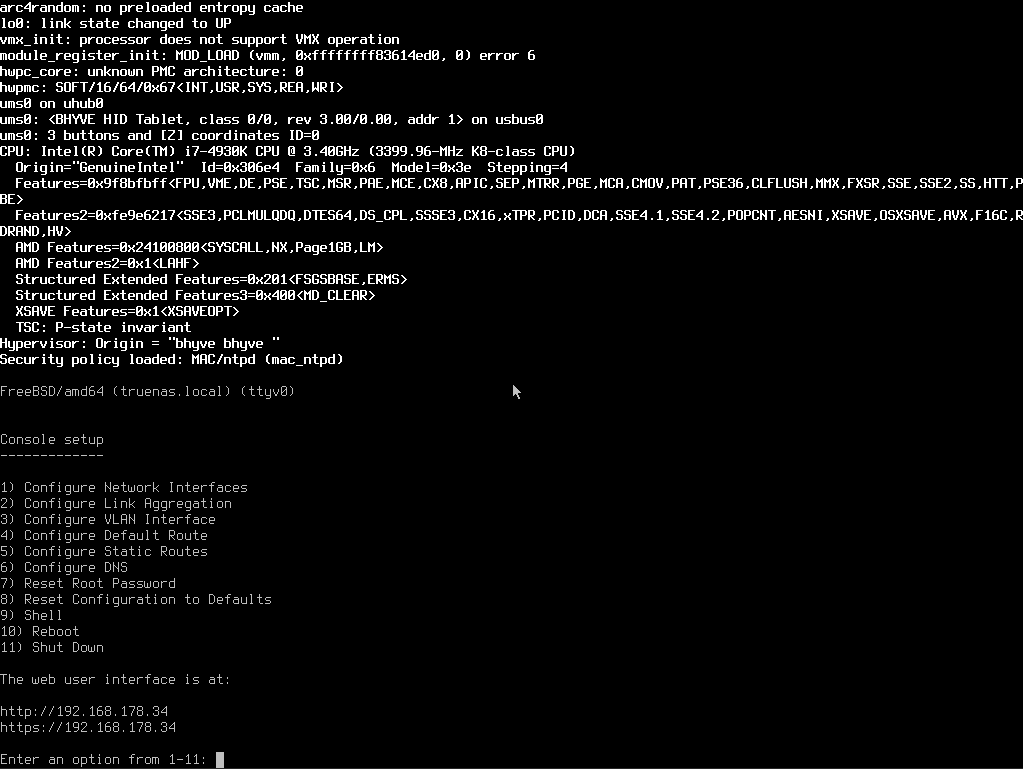
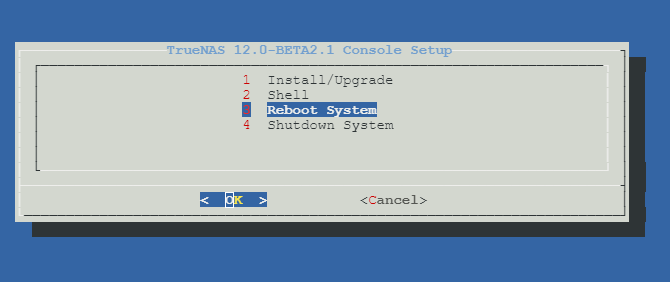
After the reboot, the freshly installed TrueNAS loads and starts its various services. On the monitor we now only see the following menu, with options to configure the network interface, reset the root password, to shut down or reboot the system. Since a DHCP server in the form of a FritzBox is active in my home network, the system has already received an IP address and, as we can see at the bottom, the web interface is available there. Furthermore, the A-record “truenas.local” was already created automatically via DDNS, because my FritzBox allows this. The web interface can now be accessed via IP or via DNS record. And that’s exactly what we’re doing now.
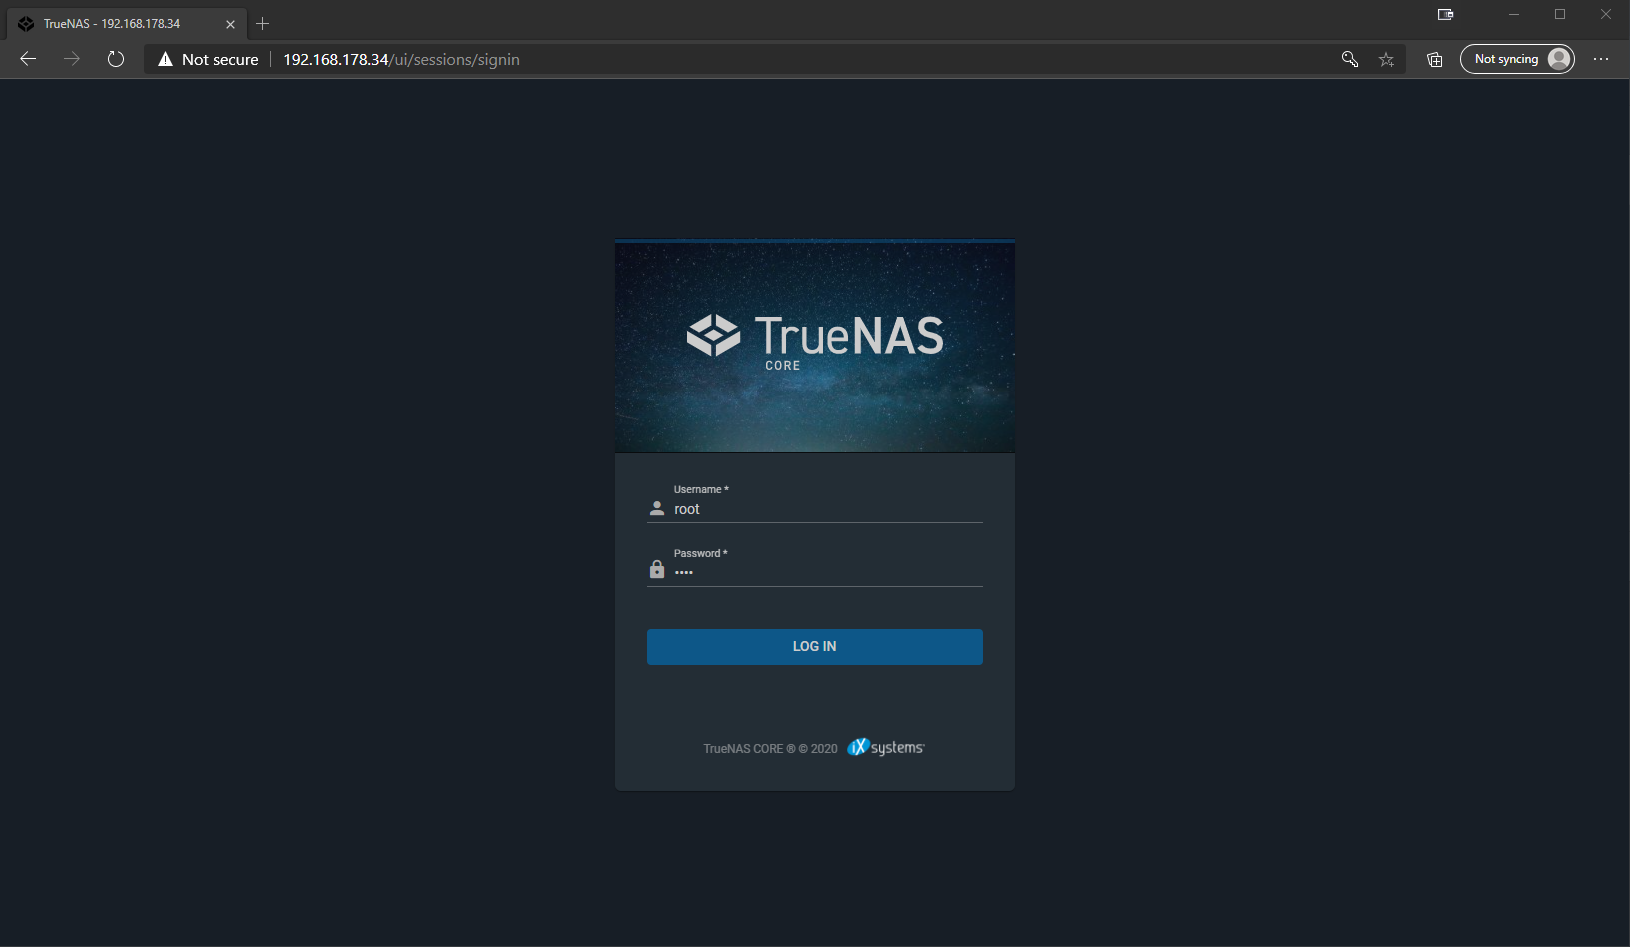
So start the browser, open the web interface and authenticate with the root user, whose password we assigned during the installation.
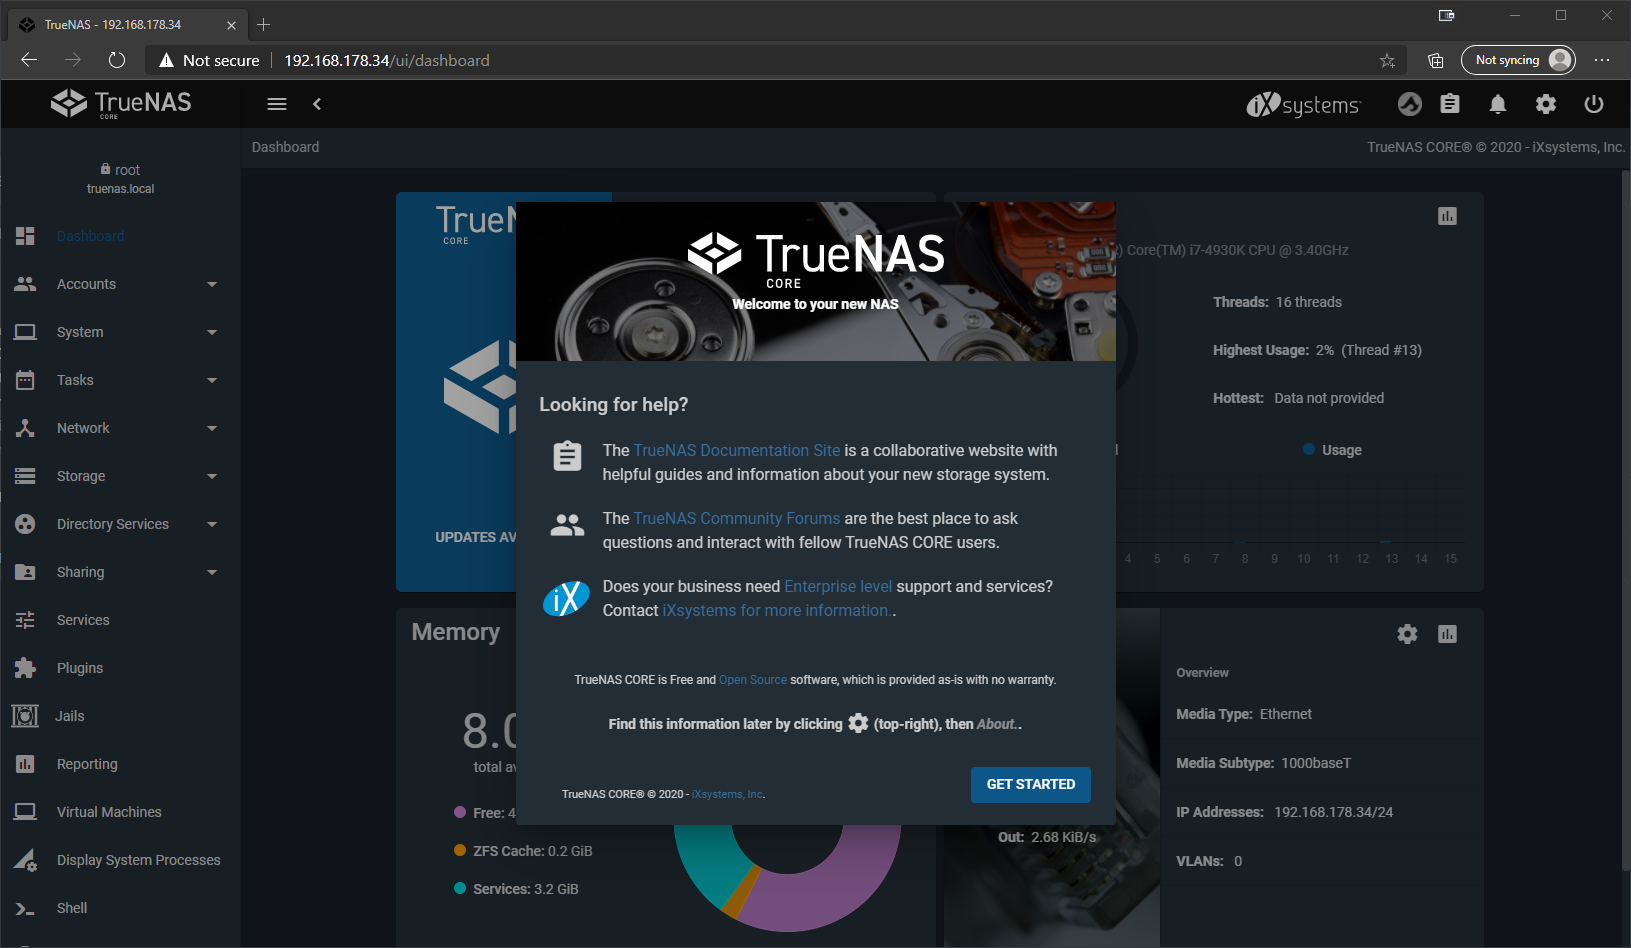
We end up on the dashboard, where various system metrics are displayed, and when we log in for the first time, we also get additional links to the TrueNAS Wiki, forum and other contact points of the manufacturer.


Kommentieren